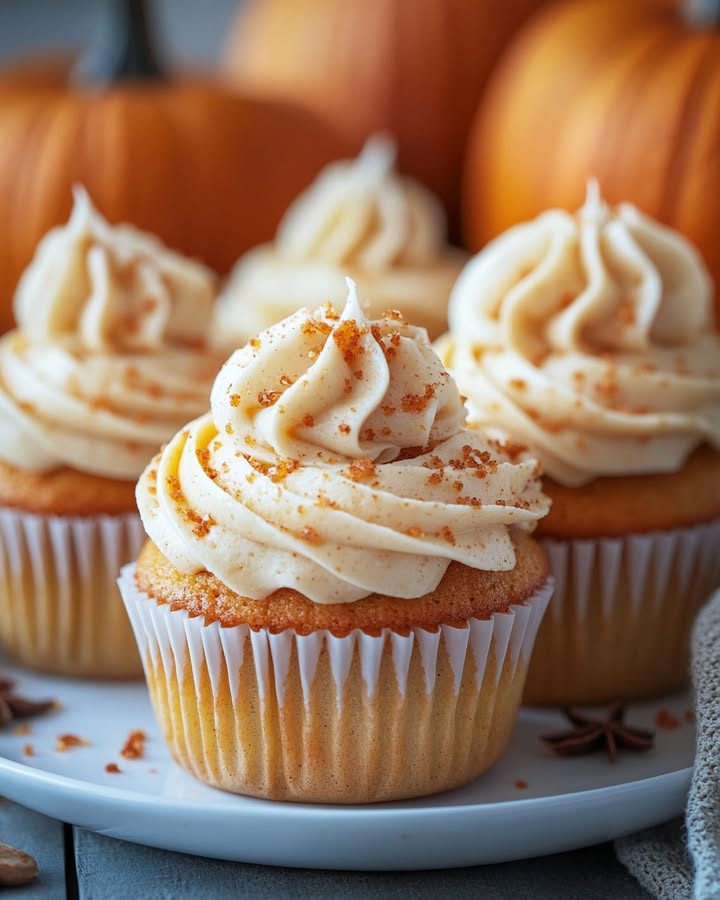
There’s a certain magic in baking that brings people together. For me, it’s when my kitchen fills with the smell of cinnamon, nutmeg, and sweet pumpkin. It signals fall is here and it’s time for my most requested treat: Decorated Pumpkin Cupcakes. They’re not just a dessert; they’re a happy, edible craft project. The first time I made them for my son’s school party, they vanished in minutes. Now, they’re a family tradition we all look forward to every October.
A Little Slice of Autumn in Every Bite
While cupcakes are a classic American treat, the combination of pumpkin and warm spices is a nod to much older traditions. Pumpkin pie spice, that beloved blend, connects us to the very first harvest feasts. My version takes the cozy, comforting flavor of a pumpkin pie and turns it into a handheld, frosted delight. The modern twist is the playful decoration, transforming a simple cupcake into a miniature pumpkin patch. It’s a fun way to celebrate the season, blending traditional flavors with a joyful, creative finish.
Why Your Family Will Adore These Pumpkin Cupcakes
This recipe is a winner for so many reasons. First, the batter comes together in a snap – no fancy equipment needed, just two bowls and a whisk. The secret ingredient? A bit of mayonnaise. Don’t flinch! It sounds unusual, but it guarantees an unbelievably moist and tender crumb every single time. The spiced pumpkin flavor is just right—not too bold, not too shy. And the cream cheese frosting? It’s the perfect creamy, tangy partner. Best of all, decorating them is a blast. It’s the kind of recipe where the kids can join in, laughing as they pipe on green vines.
The Best Moments for Pumpkin Cupcakes
These aren’t just any cupcakes; they’re the life of the party! They are absolutely perfect for:
- Halloween Parties: A safer, sweeter alternative to trick-or-treat candy bowls.
- Thanksgiving Feasts: A wonderful addition to the dessert table, especially for those who find pie too heavy.
- Fall Birthday Celebrations: A seasonal twist that feels extra special.
- School Bake Sales: They always sell out first—trust me on this one!
- A Cozy Weekend Baking Project: Simply to make your house smell amazing and enjoy a sweet treat.
Gathering Your Pumpkin Cupcakes Ingredients
Let’s get everything on the counter! Making sure ingredients are at room temperature (especially eggs and cream cheese) helps everything blend smoothly.
For the Cupcake Batter:
- 1 ½ cups granulated sugar
- 1 ½ cups all-purpose flour
- 1 teaspoon baking soda
- 1 teaspoon baking powder
- ½ teaspoon salt
- ½ teaspoon ground nutmeg
- ½ teaspoon ground cloves
- 1 teaspoon ground cinnamon
- 2 large eggs (room temperature)
- 8 oz (1 cup) pure pumpkin puree (not pumpkin pie filling)
- ½ cup mayonnaise
- ⅓ cup water
For the Cream Cheese Frosting:
- 8 oz cream cheese, softened
- 4 tablespoons (½ stick) butter, softened
- 3-4 cups powdered sugar
- 1 teaspoon pure vanilla extract
- Orange and green gel food coloring (gel works better than liquid!)
Handy Ingredient Swaps
Out of something? No panic! Here are some easy swaps.
- Mayonnaise: You can use an equal amount of sour cream or full-fat plain yogurt.
- Spices: If you don’t have individual cloves and nutmeg, use 2 teaspoons of pre-mixed “pumpkin pie spice” and reduce the cinnamon to ½ teaspoon.
- All-Purpose Flour: For a slightly denser, whole-grain option, swap up to half the flour for white whole wheat flour.
- Cream Cheese: Full-fat, brick-style cream cheese is best for stable frosting. The spreadable tub kind can make frosting too soft.
Crafting Your Pumpkin Cupcakes: Step-by-Step
Here’s where the fun begins. Put on some music, and let’s make some magic.
Step 1: Preheat and Prepare
First things first, get that oven warming up to 350°F (175°C). This gives it time to reach the perfect, steady temperature. While it heats, line your muffin tin with cute cupcake liners. I love using orange or brown liners for an extra fall feel. Getting this done upfront means no frantic searching later with batter-covered hands.
Step 2: Mix the Dry Ingredients
In a medium-sized bowl, whisk together your flour, sugar, baking soda, baking powder, salt, and all those wonderful spices. As you stir, you’ll see the flour turn a soft, sandy beige from the cinnamon and nutmeg. The smell is incredible already. Whisking well here ensures the baking agents are evenly distributed, which is key for a nice, even rise in the oven. No one wants a cupcake with a giant bubble on one side!
Step 3: Combine the Wet Ingredients
In a larger bowl, let’s bring the wet team together. Crack in the eggs and give them a quick whisk. Then, add the pumpkin puree, mayonnaise, and water. The mixture will look a lovely bright orange and be beautifully smooth. Pro tip: Using a spatula to scrape out every last bit of pumpkin from the can gets you the perfect amount and avoids waste.
Step 4: Bring It All Together
Now, pour your bowl of dry ingredients into the bowl of wet ingredients. Use a spatula or whisk to gently fold and stir until you see no more streaks of flour. The batter will be thick, creamy, and richly colored. Remember, a few small lumps are just fine! Over-mixing is the enemy of tender cupcakes. The scent of pumpkin and spice will be filling your kitchen now.
Step 5: Fill and Bake
Using a spoon or ice cream scoop, fill each cupcake liner about two-thirds of the way full. This leaves just enough room for them to puff up into perfect domes without spilling over. Slide the pan into your preheated oven. Bake for 17-19 minutes. You’ll know they’re done when the tops spring back at a gentle touch, and a toothpick inserted comes out clean.
Step 6: The Crucial Cool Down
This step is non-negotiable! Let the cupcakes cool in the pan for about 5 minutes, then move them to a wire rack. They must be completely, totally cool before you even think about frosting. If they’re warm, that lovely cream cheese frosting will melt right off into a sad, runny puddle. Patience is a baker’s secret weapon.
Step 7: Make the Dreamy Frosting
While the cupcakes cool, let’s make the frosting. In a large bowl, beat the softened cream cheese and butter together until it’s completely smooth and creamy. Scrape down the bowl, add the vanilla, and beat again. Now, gradually add the powdered sugar, about one cup at a time, beating well after each addition. Start with 3 cups, then add more until it’s thick enough to hold a shape but still creamy.
Step 8: Color and Decorate
Here’s the creative part! Scoop about ½ cup of the white frosting into a small bowl and tint it with green gel dye. Color the remaining larger portion a vibrant orange. Fit a piping bag with a large round tip (like a Wilton 1A or 2A) and fill it with orange frosting. On each cooled cupcake, pipe a simple mound, starting at the outside and swirling inward. For the stem, use a small round tip with the green frosting. You can even use a leaf tip to add a cute little leaf! Don’t stress about perfection—they all have their own charming personality.
Your Pumpkin Cupcakes Timeline
Here’s a quick look at how your time will be spent:
- Prep Time: 25 minutes (including frosting prep)
- Cook Time: 18 minutes
- Cooling Time: 1 hour (very important!)
- Decorating Time: 15 minutes
- Total Time: About 2 hours from start to finish
My #1 Secret for the Best Frosting
Always use gel food coloring, not liquid! Liquid dye can add too much moisture and make your frosting thin and runny. Gel coloring is super concentrated, so you only need a tiny dot to get a bold, beautiful color without messing up your frosting’s perfect texture.
A Fun Fact About Pumpkin
Did you know that pumpkins are technically a fruit? They’re a type of winter squash! The pumpkin puree we bake with is packed with Vitamin A and adds natural moisture to baked goods. That’s one reason why these cupcakes stay so wonderfully soft for days.
Kitchen Tools You’ll Need
You don’t need fancy gear, just the basics:
- Muffin/Cupcake tin
- Cupcake liners
- Mixing bowls (2 medium, 1 large)
- Whisk and spatula
- Electric hand mixer or stand mixer (for frosting)
- Piping bags (disposable are easy!)
- Frosting tips: Large round, small round, and a leaf tip if you have one.
- Wire cooling rack
Storing Your Masterpiece
Because of the cream cheese frosting, these cupcakes need a little special care. They can sit at room temperature for up to 2 hours during serving, but for any longer, they must be refrigerated.
Place them in a single layer in an airtight container. They will keep nicely in the fridge for up to 5 days. The cold fridge can dry out cupcakes a bit, so the container is key.
When you’re ready to serve, let them sit out on the counter for about 30 minutes before eating. This takes the chill off and allows the frosting to soften to its perfect creamy texture again.
My Best Tips for Success
- Measure flour correctly: Fluff your flour with a spoon, then gently spoon it into your measuring cup and level it off with a knife. Don’t scoop directly from the bag—it packs in too much flour and leads to dry cupcakes.
- Room temp is best: Let your eggs, cream cheese, and butter sit out for 30-60 minutes before starting. They blend much more smoothly.
- Test for doneness early: Ovens can vary. Start checking at 17 minutes to avoid over-baking.
- Practice piping: If you’re new to decorating, squeeze a few practice pumpkins onto a plate first. It builds confidence!
Making Your Pumpkin Cupcakes Shine
A few finishing touches make them extra special:
- Sprinkle a tiny pinch of cinnamon on top of the orange frosting for a “dusty pumpkin” look.
- Place them on a cake stand lined with artificial autumn leaves for a festive display.
- For a kids’ party, add candy eyes or small black icing details to make Jack-O’-Lantern faces.
Exploring Different Flavors: 6 Tasty Twists
Love the base recipe? Try these fun variations!
- Chocolate Chip Pumpkin: Fold ¾ cup of mini chocolate chips into the batter before baking for a sweet, melty surprise.
- Gingerbread Spiced: Swap the spices for 2 tsp ginger, 1 tsp cinnamon, and ¼ tsp cloves. Frost with a spiced cream cheese frosting.
- Streusel Topped: Skip the fancy frosting. Before baking, sprinkle a mix of flour, brown sugar, butter, and oats on the batter for a crunchy, coffee-cake style top.
- Maple Cream Cheese Frosting: Replace the vanilla extract in the frosting with 1-2 tablespoons of pure maple syrup for a deep, autumnal sweetness.
- Mini Cupcakes: Use a mini muffin tin and reduce baking time to 10-12 minutes. Perfect for a large party platter.
- Bourbon Spiked: Add 1 tablespoon of bourbon to the batter for a grown-up, sophisticated flavor note.
Common Mistakes to Avoid
Mistake 1: Using Cold Ingredients
Trying to blend rock-hard butter or cold cream cheese straight from the fridge is a battle you won’t win. It leads to lumpy frosting and dense batter that doesn’t bake evenly. Always plan ahead. Let your dairy ingredients sit on the counter until they are soft to the touch. This simple step makes the entire mixing process effortless and gives you a silky-smooth result.
Mistake 2: Overfilling the Liners
That thick, tempting batter makes it easy to think “a little more won’t hurt.” But it does! Overfilled liners cause the batter to spill over the sides during baking. You end up with messy, flat-topped cupcakes that are hard to decorate. The sweet spot is filling each liner only two-thirds full. This leaves the perfect amount of room for a beautiful, domed top that’s ideal for holding a swirl of frosting.
scenes with a lasting.
The wolf she
Crispy Buttermilk Tenders
Ingredients
Equipment
Method
- Preheat the oven to 350°F (175°C) and line your muffin tin with cupcake liners.
- In a medium bowl, whisk together flour, sugar, baking soda, baking powder, salt, and spices until well combined.
- In a larger bowl, whisk together eggs, pumpkin puree, mayonnaise, and water until smooth.
- Pour the dry ingredients into the wet ingredients and gently fold until just combined.
- Fill each cupcake liner about two-thirds full with the batter and bake for 17-19 minutes.
- Cool the cupcakes in the pan for 5 minutes, then transfer to a wire rack to cool completely.
- For the frosting, beat together cream cheese and butter until smooth and creamy, then gradually add powdered sugar and vanilla.
- Tint frosting with orange and green gel coloring, then pipe onto cooled cupcakes to decorate.