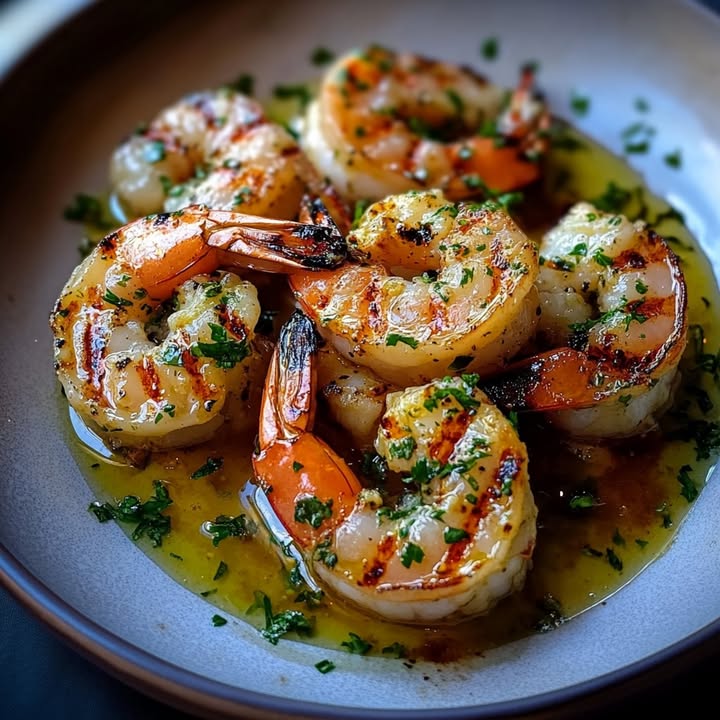
Why Garlic Butter Shrimp is a Must-Try Dish
There’s something magical about the smell of garlic sizzling in butter. It pulls everyone into the kitchen, even those who swore they weren’t hungry. I remember making this Garlic Butter Shrimp for the first time on a random Tuesday evening. My family was skeptical—how could something so simple taste amazing? But one bite later, and it became our go-to dish for busy nights, cozy dinners, or even last-minute guests. This recipe is proof that you don’t need hours in the kitchen to create something spectacular.
The Story Behind Garlic Butter Shrimp
This dish has roots in Mediterranean and French cuisines, where butter, garlic, and seafood are often paired to create rich, comforting flavors. Traditionally, it’s served as an appetizer with crusty bread to soak up the garlicky sauce. Over time, home cooks adapted it into a quick weeknight meal by adding ingredients like lemon juice and parsley. I love how versatile it is—you can serve it over pasta, rice, or even zucchini noodles for a low-carb option. Every time I make it, I feel connected to those timeless traditions while adding my own twist.
Why You’ll Love This Recipe
First off, this Garlic Butter Shrimp recipe is ridiculously easy. If you can melt butter and stir a pan, you’re golden. The flavors are bold yet balanced: creamy butter, zesty garlic, and a hint of citrus from fresh lemon juice. Plus, it’s ready in just 15 minutes! Whether you’re cooking for yourself or hosting friends, this dish will impress without breaking a sweat. And did I mention it’s naturally gluten-free and low-carb? That’s a win-win in my book.
Perfect Occasions for Garlic Butter Shrimp
This dish is perfect for any occasion. Need a quick weeknight dinner? Done. Hosting a dinner party? Serve it as an appetizer with baguette slices. It’s also great for romantic date nights or holiday meals when you want something fancy but don’t have hours to prep. Once, I made it for a friend recovering from surgery, and she said it was “healing in a bowl.” Honestly, it’s that good.
Ingredients List
- 450 g of shrimp, peeled and deveined
- 3 tablespoons unsalted butter
- 4 cloves garlic, finely minced
- 1/4 teaspoon red pepper flakes (optional)
- 1/2 teaspoon paprika
- 60 ml white wine or chicken broth
- 1 tablespoon lemon juice
- 2 tablespoons fresh parsley, chopped
- Salt and black pepper, to taste
- Lemon wedges, for serving
Substitution Options
If you’re out of white wine, swap it with chicken broth or vegetable stock—it works just as well. For a dairy-free version, use olive oil instead of butter. Fresh parsley can be replaced with cilantro or basil if that’s what you have on hand. And if you’re not a fan of spice, skip the red pepper flakes altogether. Flexibility is key here!
Step-by-Step Preparation
Step 1: Prep Your Shrimp
Start by patting your shrimp dry with paper towels. This step is crucial because wet shrimp won’t sear properly—they’ll steam instead. Sprinkle them with salt, black pepper, and paprika. The paprika adds a subtle smokiness that complements the buttery sauce beautifully. Pro tip: Let the shrimp sit for 5 minutes while you prep other ingredients. This helps the seasoning stick better.
Step 2: Sauté the Garlic
In a large skillet over medium heat, melt two tablespoons of butter. Once it starts foaming, add the minced garlic and red pepper flakes. Stir constantly for about 30 seconds until the garlic turns fragrant but doesn’t brown. Burnt garlic tastes bitter, so keep an eye on it. At this point, your kitchen will smell heavenly, and you might find yourself sneaking a piece of bread to dip into the butter.
Step 3: Cook the Shrimp
Add the seasoned shrimp to the skillet in a single layer. Cook them for 1-2 minutes per side until they turn pink and opaque. Don’t overcrowd the pan; otherwise, they’ll release too much liquid and won’t get that lovely golden edge. Pro tip: Resist the urge to flip them too early. Let them develop a nice sear for maximum flavor.
Step 4: Deglaze and Finish
Pour in the white wine or broth along with the lemon juice. Scrape up any browned bits from the bottom of the pan—they’re packed with flavor. Let the liquid simmer for a minute before stirring in the remaining tablespoon of butter and chopped parsley. The butter gives the sauce a glossy finish, while the parsley adds freshness. Chef’s tip: Add a tiny pinch of sugar to balance the acidity of the lemon.
Timing Breakdown
- Prep Time: 5 minutes
- Cooking Time: 10 minutes
- Total Time: 15 minutes
Chef’s Secret
To elevate your Garlic Butter Shrimp, use high-quality butter and fresh garlic. Pre-ground spices lack the punch of freshly cracked peppercorns or freshly grated nutmeg. Also, always finish with a squeeze of fresh lemon juice right before serving—it brightens the entire dish.
Extra Info
Did you know that shrimp is one of the most sustainable seafood options? Look for wild-caught varieties certified by organizations like the Marine Stewardship Council. Not only are they eco-friendly, but they also tend to have better texture and flavor than farmed shrimp.
Necessary Equipment
- Large nonstick skillet
- Wooden spoon or spatula
- Measuring spoons
- Sharp knife for mincing garlic
- Cutting board
Storage Tips
If you happen to have leftovers (unlikely!), store them in an airtight container in the fridge for up to two days. Reheat gently on the stovetop with a splash of broth to prevent drying out. Avoid microwaving, as it can make the shrimp rubbery. For longer storage, freeze the cooked shrimp in a freezer-safe bag for up to three months. Thaw overnight in the fridge before reheating.
When freezing, lay the shrimp flat in a single layer on a baking sheet first. Once frozen, transfer to a bag. This prevents clumping and makes portioning easier later. Always label your containers with the date so you know how long they’ve been stored.
Finally, never refreeze thawed shrimp. Doing so compromises both texture and safety. Plan ahead and only defrost what you need for each meal.
Tips and Advice
- Use jumbo or large shrimp for a more satisfying bite.
- Don’t skip drying the shrimp—it ensures proper browning.
- For extra richness, stir in a dollop of cream at the end.
Presentation Ideas
- Garnish with extra parsley and lemon zest for color.
- Serve in individual ramekins for a chic appetizer vibe.
- Pair with grilled vegetables or a crisp salad for contrast.
Healthier Alternatives
Here are six ways to tweak this recipe:
- Zoodles: Swap carbs for spiralized zucchini noodles.
- Olive Oil Base: Replace half the butter with olive oil.
- Herb Mix: Experiment with dill or thyme instead of parsley.
- Spice It Up: Add cayenne pepper for extra kick.
- Coconut Milk Sauce: Use coconut milk for a tropical twist.
- Grilled Version: Thread shrimp onto skewers and grill.
Common Mistakes to Avoid
Mistake 1: Overcooking the Shrimp
Overcooked shrimp become tough and chewy, ruining the dish. They only need 1-2 minutes per side. To avoid this, remove them from the heat as soon as they turn opaque. Pro tip: Set a timer to ensure precision.
Mistake 2: Skipping the Drying Step
Wet shrimp won’t brown properly and may splatter during cooking. Always pat them dry with paper towels before seasoning. Trust me, it makes a world of difference.
Mistake 3: Using Old Spices
Stale spices lack flavor. Check the expiration dates on your paprika and red pepper flakes. Freshness matters more than you think.
Frequently Asked Questions
Can I Use Frozen Shrimp?
Absolutely! Just thaw them completely in the fridge overnight or under cold running water. Pat them dry before seasoning.
What Can I Substitute for White Wine?
Chicken broth or vegetable stock works perfectly. Both add depth without overpowering the dish.
Is This Recipe Gluten-Free?
Yes, it’s naturally gluten-free. However, double-check labels on store-bought broths to ensure no hidden additives.
How Do I Know When Shrimp Are Cooked?
Shrimp are done when they turn pink and opaque. They curl slightly into a C shape. Overcooking leads to toughness.
Can I Make This Ahead?
While best served fresh, you can prep ingredients ahead. Store peeled shrimp, minced garlic, and chopped parsley separately until ready to cook.
What Side Dishes Pair Well?
Rice, quinoa, roasted veggies, or crusty bread are excellent choices. They soak up the delicious sauce.
Why Does My Sauce Taste Bitter?
Burnt garlic is likely the culprit. Sauté it gently and keep stirring to prevent browning.
Can I Double the Recipe?
Of course! Adjust quantities accordingly, but cook in batches to avoid overcrowding the pan.
What If I Don’t Have Lemon Juice?
Vinegar or lime juice can work in a pinch, though lemon offers the brightest flavor.
How Do I Store Leftovers?
Keep leftovers in an airtight container in the fridge for up to two days. Reheat gently on the stovetop.
Final Thoughts
This Garlic Butter Shrimp recipe is a testament to the beauty of simplicity. With minimal effort, you can create a dish that feels indulgent yet wholesome. Whether you’re feeding your family or impressing guests, it’s sure to become a favorite. So grab some shrimp, channel your inner chef, and let the aroma of garlic and butter fill your home tonight!
Garlic Butter Shrimp
Ingredients
Equipment
Method
- Pat the shrimp dry with paper towels and season with salt, black pepper, and paprika.
- In a large skillet over medium heat, melt two tablespoons of butter; then add minced garlic and red pepper flakes.
- Cook the garlic for about 30 seconds, being careful not to brown it.
- Add the seasoned shrimp to the skillet in a single layer and cook for 1-2 minutes per side until pink and opaque.
- Pour in white wine or broth along with lemon juice; deglaze the pan by scraping up browned bits.
- Stir in the remaining tablespoon of butter and chopped parsley before serving.