Bring a Dream to Life with Cotton Candy Unicorn Parfaits
Have you ever wanted to eat a rainbow? I certainly did the day my niece asked for a “magical” dessert for her birthday party. I stared into my pantry, willing inspiration to strike. That’s when I saw the sprinkles, the lucky charms, and a bottle of cotton candy syrup hiding in the back. A spark went off! What if I could layer fluffy, pastel clouds into a glass? The result was these Cotton Candy Unicorn Parfaits. They’re not just a dessert; they’re an experience. The smiles and gasps of delight from the kids (and the adults!) told me I’d created something truly special. It’s now my go-to recipe for adding a dash of pure, unbridled joy to any day.
A Sweet Slice of Modern Magic
While unicorns have roots in ancient myths, the “unicorn food” trend is a wonderfully modern creation. It exploded across social media, celebrating all things colorful, sparkly, and joyful. This recipe is a direct descendant of that happy movement. It takes the nostalgic, creamy delight of a classic parfait and transforms it into a fantastical treat. There’s no single cultural origin, unless you count the land of birthday parties and Pinterest dreams! The traditional version is simply layers of fruit, yogurt, or custard and granola. Our modern, magical version swaps those for a cookie crust, vibrantly tinted cream, and toppings that crackle with fun. It’s food as play, and I absolutely adore that.
Why You’ll Fall in Love with This Recipe
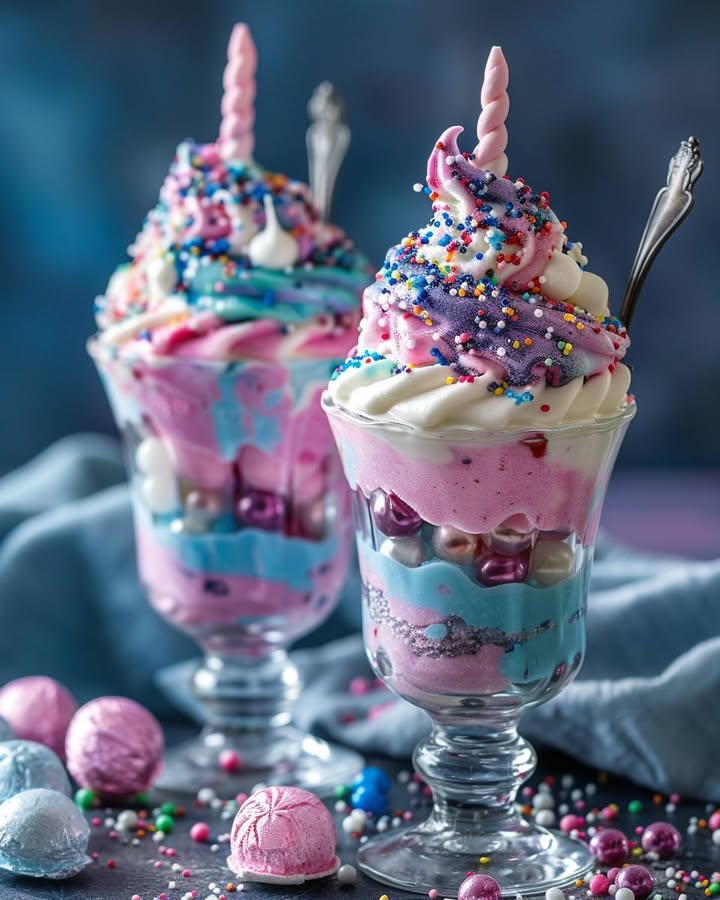
First, it’s incredibly easy. There’s no baking involved, just mixing and layering. Second, it’s a total showstopper. The swirl of pink, purple, and blue against the golden crust looks like it came from a fairy tale. The flavor is a dreamy blend of sweet cream and that unmistakable, nostalgic cotton candy taste. Best of all, it’s a recipe that invites you to play. Let the kids choose the color order or add extra sprinkles. It’s foolproof fun that guarantees a happy kitchen and even happier eaters.
The Perfect Occasion for a Unicorn Treat
This isn’t just a dessert; it’s a centerpiece for celebration! It’s perfect for:
- Birthday Parties: Especially for kids who love all things rainbow and magical.
- Sleepovers: A fantastic, interactive activity where everyone can assemble their own.
- Bridal or Baby Showers: A whimsical touch for a “sprinkle” or “princess” themed event.
- Just Because: Sometimes a Tuesday needs a little magic to turn it around.
What You’ll Need: The Magical Ingredients
Gathering these ingredients is half the fun! Here’s your shopping list:
- For the Crust: 20 Golden Oreo Sandwich Cookies
- For the Filling: 2 cups heavy whipping cream (very cold!), 1/4 cup powdered sugar, cotton candy syrup to taste, neon food coloring in pink, purple, and blue.
- For the Topping: Rainbow sprinkles, pink sparkle gel, Lucky Charms marshmallows.
No-Problem Substitutions
Don’t stress if you’re missing an item! Magic is adaptable.
- Golden Oreos: Use regular Oreos (for a chocolatey crust), graham crackers, or even crushed vanilla wafers.
- Cotton Candy Syrup: A few drops of cotton candy flavoring extract works. For a syrup-free version, use a bit more powdered sugar and a tiny drop of vanilla.
- Heavy Whipping Cream: For a shortcut, use a good quality, extra-creamy vanilla frosting. Whip it briefly to fluff it up before coloring.
- Lucky Charms Marshmallows: Any mini marshmallows, star sprinkles, or even fresh berries add a lovely pop on top.
Crafting Your Edible Rainbow: Step-by-Step
Step 1: Prepare the Crust
Let’s start with a solid, tasty foundation. Take your Golden Oreos and place them in a zip-top bag. Seal it tightly and grab a rolling pin. Gently crush the cookies until you have fine, sandy crumbs. You’ll love the buttery, vanilla scent that comes out. Then, carefully spoon an even layer of these golden crumbs into the bottom of each serving glass or cup. Press down lightly with the back of the spoon. This creates the perfect texture contrast for the fluffy cream above. Pro tip: For an even easier time, pulse the cookies a few times in a food processor.
Step 2: Make the Magical Filling
This is where the real magic happens! Pour your very cold heavy cream into a large, chilled mixing bowl. Using a hand mixer or stand mixer, whip the cream on medium-high speed. Watch as it transforms from liquid to soft, billowy peaks that just barely hold their shape. Now, sprinkle in the powdered sugar and keep whipping. You’re looking for stiff peaks that stand straight up when you lift the beaters. The texture should be lush and holdable. Next, divide this snowy-white cream equally into three separate bowls.
Step 3: Color the Clouds
Time to paint with flavor! To the first bowl of cream, add a few drops of cotton candy syrup and your pink neon food coloring. In the second bowl, add syrup and purple coloring. The third gets syrup and blue. Now, take a spatula and gently fold the color and syrup into the cream. Be gentle to keep all that lovely air you whipped in. You’ll see beautiful pastel hues emerge—pink like fairy floss, purple like twilight, and blue like a summer sky. Taste as you go; add more syrup if you want a stronger cotton candy flavor.
Step 4: Assemble the Parfaits
This is the artistic part! Grab your glasses with the crust. Using a spoon or a piping bag, add a layer of one colored cream. I like to start with pink. Smooth it out, then carefully add the next color, say purple, trying to keep the lines distinct. Top with the blue layer. The vibrant stripes look incredible against the glass. Don’t worry about perfect lines—a little swirling makes it look more magical! Chef’s tip: For super clean layers, chill the glass for 10 minutes after each cream layer.
Step 5: Add the Final Sparkle
No unicorn dessert is complete without glitter and charms! Now, rain down a generous pinch of rainbow sprinkles over the top. Next, take your pink sparkle gel and drizzle it in swirls and zig-zags. Finally, crown your creation with a handful of Lucky Charms marshmallows. Those little rainbows and hearts are the perfect final touch. Step back and admire your handiwork. You’ve just created edible joy!
Step 6: Chill and Serve
Patience, young magician! Place your finished parfaits carefully in the refrigerator. Let them chill for at least 1 hour. This waiting time is crucial. It allows the whipped cream to set firmly and the flavors to really meld together. The cotton candy syrup infuses the whole dessert. When it’s time, bring them out to your eager crowd. Serve them chilled, with long spoons for diving into all the layers. Get ready for the “oohs” and “aahs”!
Your Time Investment for Magic
Good things don’t take long here!
- Prep Time: 25 minutes
- Chill Time: 1 hour
- Total Time: 1 hour 25 minutes
- Yields: 4-6 parfaits, depending on glass size
A Chef’s Secret for Peak Perfection
Here’s my little secret: chill everything. I mean it. Chill your mixing bowl and beaters in the freezer for 15 minutes before you start. Use cream straight from the fridge. A cold environment helps the cream whip up faster, higher, and more stable. It prevents it from turning into butter. This one simple step is the difference between good whipped cream and legendarily fluffy, cloud-like cream that holds its shape for hours.
A Fun Fact About That Flavor
Ever wonder what gives cotton candy its iconic taste? It’s not actually a single fruit or berry! The flavor “cotton candy” is a clever blend, often combining ethyl maltol (which has a sweet, caramelized sugar smell) with hints of vanilla and a fruity note like strawberry or raspberry. It’s a flavor designed to evoke the experience of the fairgrounds—the smell of sugar spinning, the bright pink color, the melt-in-your-mouth texture. Our syrup captures that perfectly, turning simple whipped cream into a memory.
Tools of the Magical Trade
You don’t need fancy equipment.
- Mixing bowls (one large, three smaller)
- Hand mixer or stand mixer
- Rubber spatula
- Measuring cups and spoons
- Serving glasses or clear cups (parfait glasses are perfect!)
- Zip-top bag and rolling pin (or food processor) for crushing cookies
Storing Your Leftover Magic
These parfaits are best enjoyed the day they are made. The whipped cream is at its peak fluffiness, and the crust is still nicely crisp.
If you have leftovers, cover the tops tightly with plastic wrap and refrigerate. They will keep for up to 24 hours. Be aware that the crust will soften the longer it sits, becoming more like a cookie pudding layer (which is still delicious!). The sprinkles may also bleed a tiny bit of color.
I do not recommend freezing these parfaits. Whipped cream doesn’t freeze and thaw well; it becomes grainy and can separate. For the best texture and visual appeal, make them fresh for your event.
Tips for Unicorn Parfait Success
- Let kids be the “unicorn chefs.” Set up a station with the colored creams, toppings, and empty glasses. They’ll love building their own.
- For a neater layered look, use a piping bag with a large round tip for each colored cream.
- If your food coloring isn’t “neon,” the colors will be softer pastels. That’s still beautiful! For super vibrant hues, use gel food coloring.
- Serve with a long iced tea spoon so everyone can dig all the way to the bottom crust in one perfect bite.
Presentation Ideas to Enchant Your Guests
- Glittering Goblets: Use vintage coupe glasses or fancy dessert glasses for an elegant twist on the magical theme.
- Individual Jars: Make them in small mason jars with lids. They become adorable, portable treats for a picnic or party favor.
- The Unicorn Horn: Skewer large marshmallows dipped in pink and purple candy melts onto a pretzel rod. Stick one into each parfait as an edible unicorn horn garnish.
- Edible Flower Power: Top with pastel-colored rock candy “crystals” or a few fresh edible flowers like pansies for a garden fairy vibe.
Healthier Twists on the Unicorn Dream
Want the magic with a lighter touch? Try these fun variations:
- Greek Yogurt Unicorn Cups: Use thick, full-fat Greek yogurt sweetened with a touch of honey or maple syrup. Layer with fresh berries and granola instead of the cookie crust.
- Chia Seed Pudding Base: Make a vanilla chia pudding with almond milk. Let it set, then layer it with the pastel whipped cream. You get a protein and fiber boost!
- Cottage Cheese Clouds: Blend smooth cottage cheese with a little honey and a splash of milk until creamy. Divide and color for a high-protein filling.
- Angel Food Cake Crumbles: Swap the Oreo crust for crumbled, store-bought angel food cake. It’s lighter and soaks up the creamy flavors wonderfully.
- “Nice” Cream Layers: Use naturally colored fruit purees (strawberry for pink, blueberry for purple) swirled into lightly sweetened whipped cream or even frozen banana “nice cream.”
- Sugar-Free Celebration: Use a sugar-free whipped topping, sugar-free cotton candy syrup, and a crust made from blended nuts and dates.
Common Mistakes to Avoid
Mistake 1: Using Warm Cream or Bowls
This is the biggest culprit for runny whipped cream. If your heavy cream, bowl, or beaters are even slightly warm, the fat won’t whip up properly. You’ll be mixing forever and end up with a sad, soupy liquid. Always start with everything very cold. Take the extra five minutes to chill your equipment. It makes the whipping process quick and ensures you get those beautiful, stable peaks that hold your layers.
Mistake 2: Over- or Under-Whipping the Cream
There’s a sweet spot! Under-whipped cream is too soft and will collapse, causing your layers to slump together. Over-whipped cream turns grainy and then into butter. Stop when you have stiff peaks. This means when you lift the beater, the peak of cream stands straight up and doesn’t curl over. If you see any butter-like solids or the cream looks separated, you’ve gone too far. Start fresh with new cold cream.
Mistake 3: Stirring Instead of Folding in Color
When you add your syrup and food coloring, be gentle! Vigorous stirring or beating will knock out all the precious air you just incorporated. This deflates your cream, making it dense and less voluminous. Instead, use a folding motion with a spatula. Cut down through the center, scoop along the bottom, and fold over the top. Repeat just until the color is evenly distributed. Your cream will stay light and airy.
Mistake 4: Skipping the Chill Time Before Serving
I know it’s tempting to dig right in! But that hour in the fridge is not just for show. It allows the whipped cream to firm up, which gives the parfait structure. It also lets the cotton candy flavor permeate the cream and allows the cookie crust to soften just a touch. Serving it immediately means a looser texture and less blended flavor. The patience is worth it for the perfect bite.
Your Cotton Candy Unicorn Parfait Questions, Answered
Can I make these parfaits ahead of time?
You can prepare them up to 4-5 hours in advance. Keep them covered tightly in the refrigerator. For the absolute best texture and to prevent the sprinkles from bleeding, I recommend adding the final toppings (sprinkles, gel, marshmallows) just before serving. You can crush the crust and whip/color the creams earlier in the day, then do the final assembly an hour or two before your event.
I can’t find cotton candy syrup. What can I use?
No problem! A few drops of cotton candy flavoring extract is a great alternative. You can also use a different flavored syrup like vanilla or raspberry and achieve the magical look just with the food coloring. For a simple sweet cream, increase the powdered sugar slightly and add a teaspoon of clear vanilla extract. The vibrant colors will still make it feel whimsically “unicorn.”
Can I use regular food coloring instead of neon?
Absolutely! Regular liquid food coloring will give you lovely, softer pastel shades. They will be just as pretty, just less electric. If you want more intense color with regular dye, you’ll need to add quite a few more drops. I recommend using gel food coloring for the most vibrant hues without adding extra liquid to your cream.
What can I use instead of Lucky Charms marshmallows?
The options are endless! Any mini marshmallows work fine. You could also use star-shaped sprinkles, rainbow chocolate chips, pastel M&M’s, or even small pieces of fresh fruit like raspberries and blueberries. For a more elegant look, try white chocolate curls or shavings tinted with edible gold dust.
How do I get really distinct layers in my parfait?
The key is cold and thick cream. Ensure your cream is whipped to stiff peaks. When layering, use a spoon or a piping bag to gently place the next color on top. Don’t drop it or spread it aggressively. Some slight blending at the edges is natural and pretty. For the sharpest lines, chill the parfait for 10-15 minutes between adding each colored layer.
Is there a non-dairy version of this recipe?
Yes! For the whipped cream, you can use a well-chilled can of full-fat coconut cream. Scoop out the solid cream part (discard the water) and whip it with powdered sugar and flavoring. The color may be slightly off-white, but it will work. For the crust, use dairy-free cookies. All the toppings are generally dairy-free, but always check labels.
My whipped cream turned out runny. Can I fix it?
If it’s just slightly soft, you can try chilling the whole bowl in the freezer for 15 minutes, then whipping it again briefly. However, if it’s truly runny and won’t thicken, it’s likely due to warm equipment or cream. Unfortunately, you can’t fix it once the fat has broken down. Your best bet is to start over with new, very cold cream and chilled tools.
Can I use Cool Whip instead of whipping my own cream?
You can, for a shortcut! Thaw a tub of extra-creamy Cool Whip, divide it, and gently fold in your syrup and colors. The texture will be different—softer and less “fresh cream” tasting—but it’s a stable, easy option for hot days or if you’re short on time. I’d recommend the whipped cream for its superior flavor and texture, but Cool Whip will definitely still bring the magic.
What are the best types of glasses to use?
Clear glasses are the best because they show off the beautiful layers! Parfait glasses, wide-mouth champagne flutes, margarita glasses, or simple clear plastic cups all work wonderfully. Mason jars are charming for a rustic-magic look. Choose something with a wide enough opening to get a spoon in easily and to showcase those rainbow stripes.
How can I make this recipe for a large crowd?
This recipe scales up beautifully! Simply multiply the ingredients by the number of servings you need. You can prepare a huge bowl of plain whipped cream, divide it into larger batches for coloring, and set up an assembly line. For a party, consider making it a DIY parfait bar. Set out bowls of crust, the different colored creams, and all the toppings. Let everyone build their own unicorn dream—it’s a fantastic activity and takes the pressure off you!
Go Create Some Kitchen Magic!
And there you have it—your guide to creating a dessert that’s as fun to make as it is to eat. These Cotton Candy Unicorn Parfaits are more than just sugar and cream. They’re a chance to play, to be creative, and to spread a little bit of wonder. Whether it’s for a special party or just a regular day that needs brightening, this recipe never fails to deliver smiles. So grab your sprinkles, chill that cream, and get ready for some serious, delicious magic. Your inner unicorn (and all your friends) will thank you!
Salmon Quinoa Stack
Ingredients
Equipment
Method
- Crush the Golden Oreos in a zip-top bag or food processor until fine crumbs form and place an even layer into serving glasses.
- In a large chilled mixing bowl, whip the cold heavy cream on medium-high speed until soft peaks form.
- Add the powdered sugar and whip until stiff peaks form.
- Divide the whipped cream into three bowls, adding cotton candy syrup and food coloring to each bowl (pink, purple, and blue) and fold gently.
- Layer the colored creams into the glasses, starting with pink, followed by purple, and finishing with blue.
- Top with rainbow sprinkles, drizzle with pink sparkle gel, and add Lucky Charms marshmallows.
- Chill the parfaits in the refrigerator for at least 1 hour before serving.