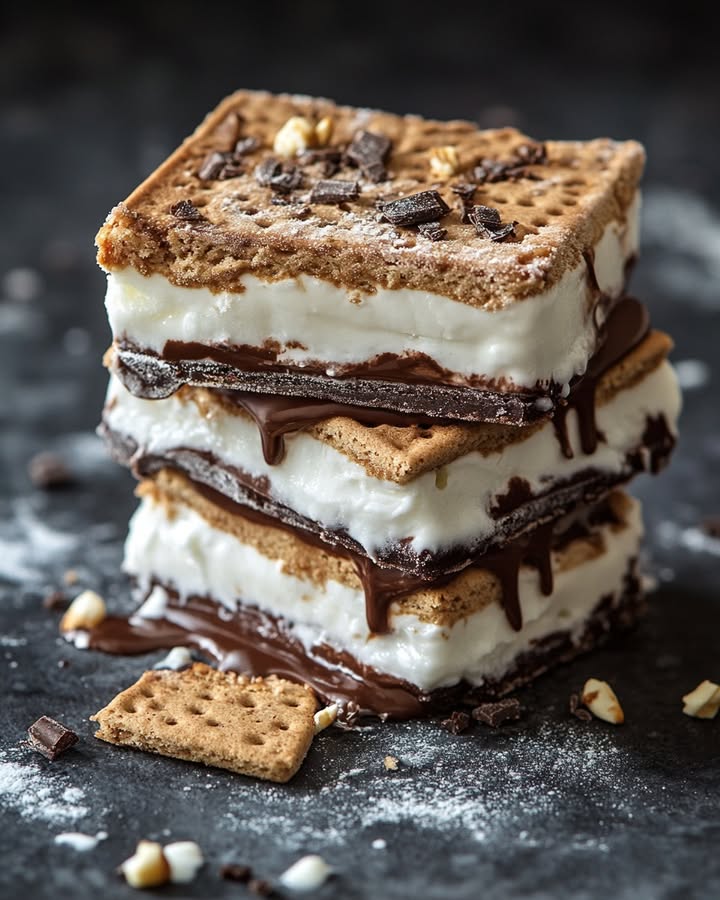
Frozen S’mores Delight: Your New Favorite No-Bake Summer Treat
Is there anything more nostalgic than the taste of a gooey s’more? That perfect combo of crunchy graham, melty chocolate, and toasty marshmallow brings back memories of campfires and summer nights. But let’s be honest, building a fire in the backyard on a busy Tuesday isn’t always practical. That’s exactly why I fell in love with this Frozen S’mores Delight. It captures every bit of that magical flavor in a make-ahead dessert you can pull straight from the freezer. I first made it for my niece’s birthday party—the kids were bouncing off the walls, and these frozen squares were the only thing that stopped them in their tracks! It’s the lifesaver recipe every busy friend or parent needs up their sleeve.
The Story Behind the S’more Sensation
The classic s’more is a true American campfire icon, with its origins tracing back to the early 1900s in Girl Scout guides. The name itself is a contraction of “some more”—because one is never enough! This Frozen S’mores Delight is our modern, no-mess tribute to that tradition. It takes the spirit of the campfire and tucks it neatly into a pan, swapping the open flame for your freezer. You get all the beloved layers without worrying about burnt marshmallows or sticky fingers (well, maybe just a little sticky!). It’s the perfect example of how a classic can be reinvented for convenience without losing its soul.
Why You’ll Absolutely Adore This Frozen Treat
You’re going to love this recipe for so many reasons. First, it’s incredibly easy—no fancy skills required! Second, it’s a fantastic make-ahead dessert. You can whip it up in the morning, forget about it in the freezer, and be the coolest hostess when dessert time rolls around. The texture is pure magic: a firm, snappy chocolate ganache layer over a buttery crust, with frozen marshmallows that have this wonderful chewy, icy bite. It’s rich but not overly heavy, making it the ideal sweet finish to a summer barbecue or a fun weeknight surprise.
Perfect Occasions for a Frozen S’mores Delight
This isn’t just a dessert; it’s the guest of honor! It’s perfect for pool parties, Fourth of July cookouts, or baby showers where you need something that won’t melt on the patio. I always bring it to potlucks because it travels so well in a cooler. It’s also a superstar for kids’ sleepovers—it feels like a huge, decadent treat, but you know exactly what’s in it. And on those sweltering summer evenings when turning on the oven feels like a crime, this is your delicious, breezy solution.
Gathering Your Ingredients for Frozen S’mores Success
Let’s gather the simple players for this sweet symphony:
- 1 1/2 cups graham cracker crumbs – You can buy them pre-crumbled or crush whole sheets in a bag.
- 1/4 cup butter, melted – This is the glue for our crust. Salted butter adds a nice flavor contrast.
- 1 cup mini marshmallows – The miniature size gives perfect distribution in every bite.
- 1 cup milk chocolate chips – The classic choice for that authentic s’mores taste.
- 1 cup heavy cream – This will transform into a luxurious, firm chocolate ganache.
- 2 tbsp honey (optional, for drizzling) – A lovely, natural sweetness to finish.
Easy Swaps: Your Substitution Guide
Don’t have something? No problem! Cooking should be fun, not stressful.
- Graham Cracker Crumbs: Digestive biscuits or vanilla wafers make a great stand-in.
- Butter: Dairy-free margarine works perfectly for the crust.
- Chocolate Chips: Feel free to use semi-sweet, dark, or even butterscotch chips for a twist.
- Heavy Cream: For a non-dairy version, full-fat coconut cream is a fantastic substitute for making the ganache.
- Mini Marshmallows: You can chop up large marshmallows, but the minis are so much easier!
Creating Your Frozen S’mores Delight, Step-by-Step
Step 1: Toasting the Graham Cracker Foundation
First, get your oven warming to a cozy 350°F (175°C). While it heats, combine the graham cracker crumbs and melted butter in a medium bowl. Mix it with a fork until every crumb is lightly coated and the mixture holds together when you pinch it. Now, press this buttery goodness firmly and evenly into the bottom of your 9-inch square pan. I like to use the bottom of a measuring cup to get it nice and flat. Pop it in the oven for just 8-10 minutes. You’ll smell a wonderful, toasty aroma, and the edges will turn a light golden brown. Let this crust cool completely on a wire rack—this is crucial for the next layer!
Pro tip: Lining your pan with parchment paper, leaving an overhang on two sides, makes removing and cutting the frozen squares a dream later on.
Step 2: Crafting the Silky Chocolate Ganache
This step feels fancy but is wonderfully simple. Pour the heavy cream into a small saucepan and heat it over medium heat. Keep a close eye on it! You want it just barely simmering, with tiny bubbles forming around the edges—do not let it boil vigorously. As soon as it’s hot, take it off the heat and immediately pour in the mountain of chocolate chips. Let it sit for a minute to allow the chocolate to soften, then start stirring. You’ll watch the magic happen as the chocolate melts into the cream, creating a glossy, smooth, and decadent chocolate ganache.
Chef’s tip: For an extra-smooth ganache, ensure your chocolate chips are evenly distributed in the hot cream before stirring. A gentle whisk at the end can eliminate any last tiny lumps.
Step 3: Assembling & The Big Freeze
Once your crust is completely cool, slowly and carefully pour that luscious chocolate ganache over the top. Tilt the pan gently to help it spread into an even, beautiful layer. Now, for the fun part: take a handful of those fluffy mini marshmallows and sprinkle them evenly over the entire chocolate surface. You want a generous, snowy blanket. Gently press them down just a tad so they stick. Now, the hardest part—patience! Carefully place the pan in the freezer, flat and level. Let it freeze for at least 2 hours, or until it is completely firm to the touch.
Step 4: Serving with a Sweet Finale
When you’re ready to serve, take the pan out of the freezer. If you used parchment paper, simply lift the whole block out. Using a large, sharp knife (warmed under hot water and wiped dry for cleaner cuts), slice the frozen delight into squares or bars. Arrange them on a serving platter. For that final, elegant touch, drizzle a little honey over the top of each square. The honey will partially freeze on contact, creating lovely sweet strands. Serve immediately and listen for the happy sighs!
Your Frozen S’mores Delight Timeline
- Prep Time: 20 minutes (mostly hands-off cooling time for the crust)
- Cooking Time: 10 minutes (for toasting the crust)
- Freezing Time: 2 hours (minimum)
- Total Time: 2 hours 30 minutes
- Servings: 12 generous squares
- Calories: Approximately 200 kcal per serving
The Chef’s Secret for Ultimate Flavor
Here’s my little secret: toast your graham cracker crumbs before mixing them with the butter. Spread the crumbs on a baking sheet and toast them in the 350°F oven for 5-7 minutes until fragrant, then let them cool slightly before mixing with the melted butter. This deepens the nutty, wheaty flavor of the crust and makes it taste even more like a real campfire-toasted graham cracker. It’s a simple extra step that makes a world of difference!
A Sweet Bit of Extra Info
Did you know the first recorded recipe for a “Some More” was in a 1927 Girl Scout publication called “Tramping and Trailing with the Girl Scouts”? The instructions were wonderfully simple: “Toast two marshmallows over the coals to a crisp gooey state and then put them inside a graham cracker and chocolate bar sandwich.” Our frozen version is just the 21st-century interpretation of that very same joyful idea!
Necessary Kitchen Equipment
You likely have everything you need already!
- 9×9 inch square baking pan
- Medium mixing bowl
- Small saucepan
- Whisk or fork for stirring
- Measuring cups and spoons
- Spatula
- Sharp knife for cutting
- Parchment paper (highly recommended!)
Storing Your Frozen S’mores Masterpiece
This dessert is meant for the freezer, so storage is a breeze! Once you’ve cut the squares, you can place them in a single layer in an airtight container separated by layers of parchment paper. They will keep their perfect texture and flavor for up to 2 weeks.
If you need to store the whole pan, simply cover it tightly with plastic wrap and then a layer of aluminum foil to prevent any freezer odors from sneaking in. The plastic wrap pressed directly on the surface also stops ice crystals (freezer burn) from forming on your chocolate layer.
There’s no need to thaw before serving. In fact, these are best enjoyed straight from the freezer for that satisfying firm, cool texture. Just take out only what you need and return the rest to their icy home.
My Best Tips and Advice for You
- For super clean cuts, run your knife under very hot water, wipe it dry quickly, and slice in one smooth, firm motion. Rewarm and wipe between cuts.
- If you’re a dark chocolate lover, swap the milk chocolate chips for semi-sweet or dark. It creates a more sophisticated, less sweet treat that adults adore.
- Want a more “toasted” look? You can quickly torch the marshmallows with a kitchen torch after sprinkling them on the warm ganache, before freezing. This adds incredible flavor!
- Make it festive by adding a sprinkle of crushed peppermint before freezing for a holiday version, or a dusting of coarse sea salt for a salty-sweet kick.
Presentation Tips to Impress Your Guests
- Serve on a chilled platter to keep the squares firm longer.
- Drizzle with not just honey, but also melted peanut butter or a salted caramel sauce.
- For a party, stick a small decorative toothpick or a mini pretzel stick into each square for easy grabbing.
- Plate each square on a small puddle of chocolate sauce and add a few fresh raspberries for a pop of color.
Healthier & Fun Variations to Try
Love the idea but want to mix it up? Here are six fantastic spins on the Frozen S’mores Delight:
- PB & S’mores Delight: Swirl 1/4 cup of smooth peanut butter into the warm ganache before pouring it over the crust. The peanut butter and chocolate combo is legendary.
- Vegan Frozen Delight: Use vegan graham crackers, dairy-free butter, vegan chocolate chips, coconut cream, and Dandies vegan marshmallows. It’s just as indulgent and totally plant-based.
- Cookie Dough Layer: Spread a layer of edible eggless chocolate chip cookie dough over the baked crust, then add the ganache and marshmallows. It’s a next-level treat.
- Mint Chocolate Chip: Add 1/2 teaspoon of peppermint extract to the ganache and use dark chocolate chips. It’s like a frozen mint s’more!
- Salted Caramel Swirl: Before adding marshmallows, dollop 3-4 tablespoons of thick salted caramel sauce over the ganache and use a knife to swirl it in gently.
- Berry Blast: Sprinkle a half cup of freeze-dried raspberries or strawberries (crushed slightly) over the ganache layer before the marshmallows. They add a wonderful tartness and crunch.
Common Mistakes to Avoid for Frozen S’mores Perfection
Mistake 1: Pouring Ganache on a Warm Crust
This is the most common slip-up! If your graham cracker crust is even slightly warm when you add the chocolate ganache, the butter in the crust will melt. This causes the crust to become soggy and lose its firm, crunchy texture. The chocolate might also seep into the crust, making it messy to cut. Always let the crust cool completely on a wire rack. Touch it with your finger—it should feel room temperature, not warm.
Mistake 2: Overheating the Cream for the Ganache
When making the ganache, it’s tempting to let the cream boil to speed things up. But if the cream gets too hot, it can cause the fat in the chocolate to separate, resulting in a grainy, oily ganache instead of a smooth, shiny one. Heat the cream just until you see small bubbles form around the edge of the pan and steam rising. The second it starts to simmer, take it off the heat. This “scalded” cream is perfect for melting chocolate gently.
Mistake 3: Skimping on Freezing Time
Two hours is the minimum freezing time. If you try to cut the dessert before it’s fully set, you’ll have a gooey, messy situation. The ganache layer needs time to firm up completely so you get clean, neat squares. For best results, let it freeze for the full 2 hours, or even 3 if your freezer isn’t super powerful. Test it by gently pressing the marshmallow layer; it should be very firm.
Mistake 4: Using Old or Stale Marshmallows
Mini marshmallows can get hard and stale if they’ve been in the pantry for a while. Stale marshmallows won’t give you that pleasant, chewy-icy texture when frozen. They can taste overly hard or stale. Always check your bag for freshness. Give one a squeeze—it should be soft and springy. If they seem hard, it’s worth buying a fresh bag for this recipe.
Your Frozen S’mores Delight Questions, Answered
Can I make this recipe gluten-free?
Absolutely, and it’s very simple! Just use your favorite gluten-free graham crackers or gluten-free digestive biscuits. Crush them into fine crumbs following the same measurement. All the other ingredients are naturally gluten-free (just double-check your chocolate chip and marshmallow labels to ensure no cross-contamination). The result will be just as delicious and a perfect treat for friends with dietary needs.
Why did my chocolate layer turn out grainy or separated?
A grainy ganache usually happens if the cream was too hot and “shocked” the chocolate, or if water got into the mix. Always ensure your saucepan and utensils are completely dry. Also, when you pour the hot cream over the chips, let it sit for a full minute before stirring. This allows the chocolate to warm gradually from the bottom up, melting evenly into a silky smooth sauce. If it does separate, a quick fix is to add a splash of room-temperature cream and whisk vigorously.
Can I use a different size pan?
You can, but it will change the thickness of your layers and the yield. A 9×9 inch pan gives you the perfect bite-sized ratio. If you use an 8×8 pan, your layers will be thicker, and you’ll get fewer, richer squares. You may need to add a few minutes to the crust baking time. If you use a 9×13 pan, your layers will be thinner, and you’ll get more squares. You might want to increase the recipe by half to maintain a good thickness.
How far in advance can I make this?
This is the best part! You can make it up to 2 weeks in advance. Once frozen solid, store the squares properly in an airtight container as described in the storage section. The flavors hold up wonderfully in the freezer. This makes it an ideal dessert for entertaining, as you can cross it off your to-do list days before your event.
My marshmallows got really hard in the freezer. What did I do wrong?
This is normal! Marshmallows freeze into a firm, chewy texture, which is part of the charm of this dessert—it mimics the stretchy, cool chew of a marshmallow. They shouldn’t be rock-hard like ice cubes. If they are, it might be that your freezer is set extremely cold. Let the squares sit at room temperature for just 2-3 minutes before serving to take the extreme edge off the hardness.
Can I use whipped topping or cool whip instead of homemade ganache?
I don’t recommend it for the classic version. Whipped topping won’t set hard enough to cut clean frozen squares. The ganache, made with real cream and chocolate, freezes to a perfect, sliceable consistency. However, for a softer, mousse-like frozen dessert, you could fold melted chocolate and marshmallows into sweetened whipped cream and freeze it. It would be a different, but still tasty, treat!
What’s the best way to get the squares out of the pan?
Parchment paper is your absolute best friend here! Before you press in the crust, line the pan with two strips of parchment paper so they overhang on opposite sides, creating “handles.” After freezing, you simply lift the entire block out in one piece onto a cutting board. No struggling with a spatula! If you didn’t use parchment, briefly dip the bottom of the pan in warm water to loosen the edges, then use a thin knife to help pop out a corner square first.
Is it safe to leave this dessert out during a party?
It’s fine for short periods, but it will start to soften and get messy if left out for more than 20-30 minutes, especially on a hot day. My strategy is to keep the container in the freezer and only put out a few squares on a chilled plate at a time. Replenish from the freezer as needed. This keeps every piece at the ideal frozen, firm texture for your guests to enjoy.
Can I add other mix-ins, like nuts or dried fruit?
You sure can! Chopped toasted pecans, walnuts, or even a sprinkle of toffee bits would be delicious additions. Sprinkle them over the ganache layer along with the marshmallows. I’d recommend keeping any add-ins small and dry. Avoid fresh fruit, as it will become icy and release water when frozen, which can make the texture weird.
Do I have to bake the graham cracker crust?
Technically, you don’t have to for a no-bake version. The crust just won’t have that lovely toasted flavor and might be a bit more crumbly. If you skip the baking, just make sure you press the butter-crumb mixture very firmly into the pan and let it chill in the fridge for 20-30 minutes before adding the ganache. This helps it set. But for the best flavor and texture, those 8 minutes in the oven are totally worth it!
The Final Scoop on This Frozen Treat
So there you have it—the secret to having the taste of a summer campfire ready in your freezer anytime the craving strikes. This Frozen S’mores Delight is more than just a recipe; it’s a little piece of happy nostalgia that’s incredibly easy to share. It never fails to bring smiles, whether I’m serving it to my kids after dinner or to a crowd of friends on the patio. I hope it becomes a treasured, make-again favorite in your home, just like it is in mine. Now, go make some memories (without the mosquito bites)!
Avocado Mozzarella Melt
Ingredients
Equipment
Method
- Preheat the oven to 350°F (175°C).
- Combine graham cracker crumbs and melted butter in a bowl; press into a 9-inch pan.
- Bake crust for 8-10 minutes until golden brown; cool.
- Heat heavy cream until barely simmering; remove from heat.
- Add chocolate chips to hot cream; stir until smooth to form ganache.
- Pour ganache over cooled crust; sprinkle mini marshmallows on top and press lightly.
- Freeze for at least 2 hours until firm.
- Cut into squares and drizzle with honey before serving.