Why Garlic Butter Shrimp Is a Must-Try Dish
Picture this: a cozy Friday evening, the house smells like buttery heaven, and your family is gathered around the table. That’s exactly what happened when I first made Garlic Butter Shrimp. It’s one of those dishes that feels fancy but takes less time to cook than ordering takeout. The combination of juicy shrimp, rich garlic butter, and a hint of citrus is pure magic. Whether you’re a seafood lover or just looking for a quick and delicious meal, this recipe will win your heart—and your taste buds.
A Little History Behind Garlic Butter Shrimp
Garlic Butter Shrimp might sound like a modern dish, but its roots go way back. Mediterranean and French cuisines have long celebrated the pairing of garlic and butter as a flavor powerhouse. Shrimp, on the other hand, has been a staple in coastal regions for centuries. What makes this dish special is how it brings together simple ingredients to create something extraordinary. I remember trying a version of this dish at a little seaside restaurant in France. When I came home, I knew I had to recreate it. After a few tweaks, this recipe became my go-to for impressing guests and feeding my family.
Why You’ll Love This Recipe
This Garlic Butter Shrimp recipe is all about simplicity and flavor. With just a handful of ingredients, you can whip up a dish that tastes like it came from a high-end restaurant. The best part? It’s ready in under 15 minutes! The garlic adds depth, the butter brings richness, and the lemon gives it a fresh, zesty kick. Plus, it’s naturally low-carb and gluten-free, making it perfect for anyone following a healthier lifestyle. Trust me, once you try it, you’ll want to make it again and again.
Perfect Occasions to Prepare This Recipe
Whether you’re hosting a dinner party or need a quick weeknight meal, Garlic Butter Shrimp fits the bill. It’s elegant enough for date night but easy enough for a casual family dinner. I’ve served it at holiday gatherings, summer barbecues, and even as a last-minute dish when unexpected guests dropped by. Pair it with crusty bread, pasta, or a fresh salad, and you’ve got a meal that’s sure to impress.
Ingredients
- 450 g of shrimp, peeled and deveined
- 3 tablespoons unsalted butter
- 4 cloves garlic, finely chopped
- 1/4 teaspoon red pepper flakes (optional)
- 1/2 teaspoon paprika
- 60 ml white wine or chicken broth
- 1 tablespoon lemon juice
- 2 tablespoons fresh parsley, chopped
- Salt and black pepper, to taste
- Lemon wedges, for serving
Substitution Options
If you don’t have white wine, chicken broth works just as well. For a dairy-free version, swap the butter with olive oil or a plant-based alternative. Don’t have fresh parsley? Dried parsley or cilantro can step in. If you’re not a fan of shrimp, try this recipe with scallops or even chicken breast. The possibilities are endless!
Step 1: Preparing the Shrimp
Start by patting the shrimp dry with paper towels. This step is crucial because excess moisture can prevent them from getting that beautiful golden sear. Season them generously with salt, black pepper, and paprika. The paprika adds a subtle smokiness that complements the buttery sauce perfectly. Pro tip: Let the shrimp sit for a few minutes while you prep the other ingredients. This allows the seasoning to penetrate the shrimp for maximum flavor.
Step 2: Sautéing the Garlic
In a large skillet over medium heat, melt two tablespoons of butter. Once it’s bubbling gently, add the chopped garlic and red pepper flakes. Stir constantly for about 30 seconds until the garlic turns fragrant but doesn’t brown. Browning garlic can make it bitter, so keep an eye on it. The aroma at this stage is absolutely heavenly—your kitchen will smell like a gourmet restaurant!
Step 3: Cooking the Shrimp
Add the seasoned shrimp to the skillet in a single layer. Cook them for 1-2 minutes per side until they turn pink and opaque. Resist the urge to overcrowd the pan; this ensures each shrimp gets evenly cooked. The shrimp should have a slight golden edge, which adds texture and flavor. Chef’s tip: Use tongs to flip the shrimp quickly to avoid overcooking.
Step 4: Creating the Sauce
Pour in the white wine or chicken broth along with the lemon juice. Scrape the bottom of the pan to release any flavorful bits stuck there. Let the liquid simmer for a minute to reduce slightly. Add the remaining tablespoon of butter and chopped parsley, stirring until the butter melts into a glossy sauce. The sauce should coat the shrimp beautifully, giving them a luxurious finish.
Timing
Prep time: 5 minutes
Cooking time: 10 minutes
Total time: 15 minutes
Chef’s Secret
For an extra burst of flavor, zest a bit of lemon peel into the sauce before serving. The citrus oils add a bright note that elevates the entire dish. It’s a small touch, but it makes a big difference!
Extra Info
Did you know that shrimp is one of the most consumed seafood items in the U.S.? Not only is it delicious, but it’s also packed with protein and nutrients like omega-3 fatty acids. Just be sure to buy sustainably sourced shrimp to support responsible fishing practices.
Necessary Equipment
You’ll need a large skillet, wooden spoon or spatula, measuring spoons, a sharp knife for chopping garlic, and a zester or grater if you’re adding lemon zest. A good nonstick skillet works wonders for preventing sticking and ensuring easy cleanup.
Storage
To store leftovers, transfer the Garlic Butter Shrimp to an airtight container and refrigerate within two hours of cooking. It stays fresh for up to three days. Reheat gently in a skillet over low heat to preserve the texture of the shrimp. Avoid microwaving, as it can make the shrimp rubbery.
If you plan to freeze the dish, skip adding the final tablespoon of butter until after reheating. Freezing butter-based sauces can alter their consistency. Thaw overnight in the fridge before reheating.
For meal prep, portion the shrimp into individual servings. Pair with steamed veggies or rice for a complete, ready-to-go lunch.
Tips and Advice
Always use fresh garlic instead of pre-minced for the best flavor. Keep the heat at medium to avoid burning the butter or garlic. If you’re new to cooking shrimp, look for ones labeled “easy peel” to save time. Lastly, taste as you go—adjusting seasonings midway ensures a perfectly balanced dish.
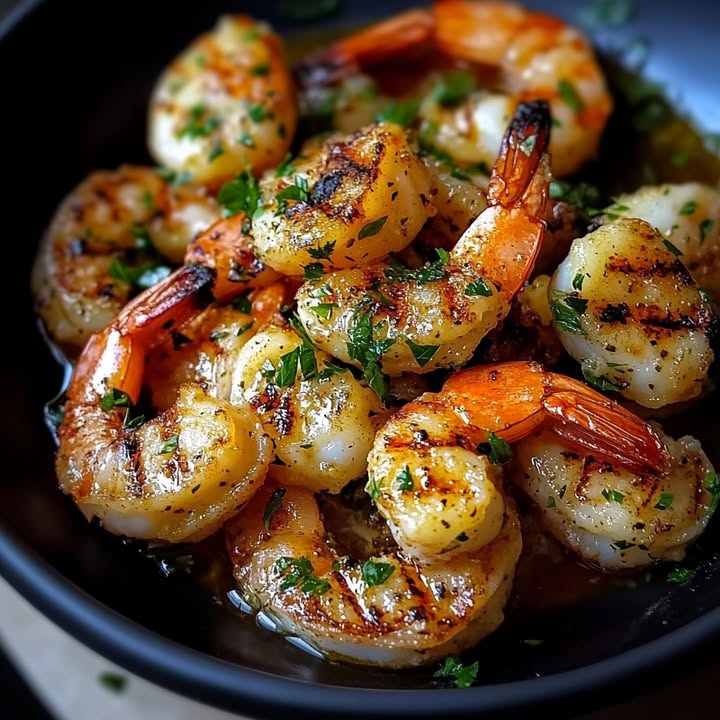
Presentation Tips
Serve the Garlic Butter Shrimp in a shallow bowl with a sprinkle of parsley for color. Arrange lemon wedges around the plate for a pop of brightness. For a rustic touch, place the shrimp on a wooden board with crusty bread on the side. Garnish with a drizzle of olive oil or extra red pepper flakes for visual appeal.
Healthier Alternative Recipes
1. Zucchini Noodle Version: Swap traditional pasta for spiralized zucchini noodles. Toss them in the garlicky sauce for a lighter option.
2. Coconut Milk Twist: Replace half the butter with coconut milk for a creamy, dairy-free sauce.
3. Grilled Shrimp Skewers: Thread the shrimp onto skewers and grill them for a smoky flavor.
4. Herb-Crusted Shrimp: Coat the shrimp in breadcrumbs mixed with herbs before sautéing.
5. Spicy Cajun Style: Add Cajun seasoning and a dash of hot sauce for a fiery kick.
6. Asian-Inspired Sauce: Use soy sauce, ginger, and sesame oil instead of butter for a fusion twist.
Common Mistakes to Avoid
Mistake 1: Overcooking the Shrimp
Shrimp cook incredibly fast, and leaving them on the heat too long makes them tough and chewy. To avoid this, watch them closely and remove them from the pan as soon as they turn pink and opaque. Pro tip: Set a timer for 2 minutes per side to stay on track.
Mistake 2: Skipping the Pat-Dry Step
Wet shrimp won’t sear properly and may steam instead of browning. Always pat them dry with paper towels before seasoning. This simple step ensures a nice crust and enhances the overall texture.
Mistake 3: Using Cold Butter
Cold butter takes longer to melt and can separate in the sauce. Use softened or melted butter for a smoother consistency. If you forget to soften it, microwave it briefly—but only until soft, not melted.
FAQ
Can I use frozen shrimp?
Absolutely! Just thaw them completely in the fridge overnight or under cold running water. Be sure to pat them dry before seasoning to ensure proper cooking.
What wine pairs best with this dish?
A crisp white wine like Sauvignon Blanc or Chardonnay complements the flavors beautifully. If you prefer red, opt for a light Pinot Noir.
Is this dish kid-friendly?
Yes! Kids love the mild sweetness of shrimp. You can omit the red pepper flakes if they’re sensitive to spice.
Can I double the recipe?
Of course! Just make sure your skillet is large enough to accommodate the increased quantity without overcrowding.
How do I know when the shrimp are done?
Shrimp are done when they turn pink, opaque, and slightly firm to the touch. They typically curl into a C-shape during cooking.
What sides go well with Garlic Butter Shrimp?
Pair it with steamed vegetables, mashed potatoes, or a fresh green salad. Crusty bread is also a must for soaking up the sauce!
Can I make this ahead of time?
While it’s best served fresh, you can prepare the ingredients in advance. Store the seasoned shrimp and chopped garlic separately in the fridge until ready to cook.
What if I don’t have white wine?
No problem! Substitute with chicken broth or vegetable stock. The flavor will still be delicious.
How do I prevent the garlic from burning?
Keep the heat at medium and stir frequently. If the garlic starts to brown too quickly, lower the heat slightly.
Can I add vegetables to this dish?
Definitely! Bell peppers, spinach, or cherry tomatoes work wonderfully. Add them to the skillet after cooking the garlic for a colorful twist.
Final Thoughts
Garlic Butter Shrimp is a dish that proves great food doesn’t have to be complicated. With minimal effort, you can create a meal that’s bursting with flavor and sure to impress. Whether you’re cooking for yourself or entertaining guests, this recipe is a winner. So grab some shrimp, channel your inner chef, and enjoy the deliciousness!
Garlic Butter Shrimp
Ingredients
Equipment
Method
- Pat the shrimp dry with paper towels and season with salt, black pepper, and paprika.
- In a large skillet over medium heat, melt two tablespoons of butter.
- Add the chopped garlic and red pepper flakes, stirring constantly for about 30 seconds.
- Add the seasoned shrimp to the skillet in a single layer and cook for 1-2 minutes per side until pink and opaque.
- Pour in white wine or chicken broth and lemon juice, scraping the bottom of the pan.
- Let the liquid simmer for a minute, then add the remaining tablespoon of butter and parsley, stirring until melted.