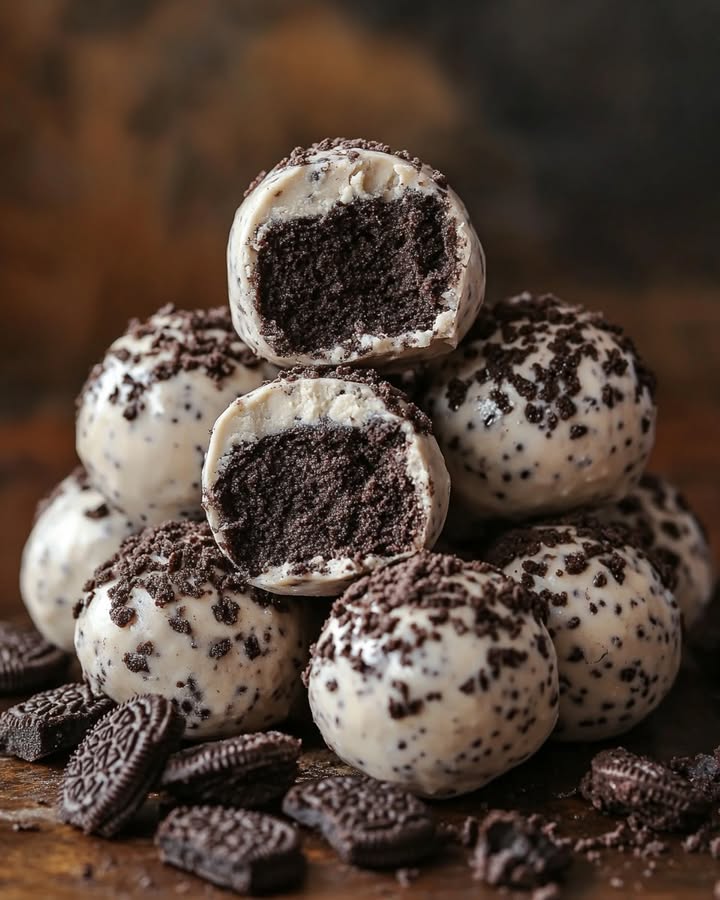
The Easiest, Most Irresistible Party Treat: Oreo Balls
Let me tell you about the dessert that saved my last-minute school bake sale. I had one hour, a pantry full of Oreos, and a prayer. What came out of my kitchen that day were these magical little bites of joy—Oreo Balls. They were gone before I even finished setting them on the table! I’m not kidding; they are that good. They’re the secret weapon every busy person needs: no baking, just mixing, rolling, and melting your way to pure bliss.
From Cookie Jar to Culinary Star
Oreo Balls, also known as Oreo Truffles, don’t have a fancy centuries-old history. Their origin is wonderfully modern and homey, born in American kitchens from the simple love of a classic cookie. They’re a testament to the “more is more” philosophy of dessert. The traditional recipe is a beautiful triad: Oreo, cream cheese, and chocolate. But today, home chefs get creative, using white chocolate, mint Oreos, or even a dash of peanut butter. They’re a global party favorite now, proving that the best ideas are often the simplest ones.
Why You’ll Go Nuts for These No-Bake Balls
You will love this recipe because it’s foolproof. Seriously, if you can stir and roll, you’ve got this. They are rich, decadent, and perfectly sweet without being overwhelming. The creamy, slightly tangy filling hidden inside a crisp chocolate shell is a texture dream. Plus, they look like you spent hours on them, but our little secret is that they come together in under an hour. They are the ultimate crowd-pleaser for kids and adults alike.
When to Whip Up a Batch of Oreo Balls
These treats are wonderfully versatile. I make them for holiday cookie swaps, where they always stand out. They’re perfect for birthday parties, potlucks, or as a fun family activity. Throw them in a cute box, and you have a heartfelt homemade gift. Honestly, any day that needs a little sweetness is the perfect occasion for Oreo Balls.
Gathering Your Ingredients
Here’s everything you need. The beauty is in the short list!
- 1 package (15.35 oz) Oreo cookies
- 1 package (8 oz) cream cheese, softened
- 12 oz semisweet chocolate chips
- Optional: Sprinkles or crushed Oreos for decoration
No Stress Substitutions
Don’t have exactly these items? No problem! Use what you have.
- Oreos: Any flavor works! Mint, peanut butter, or golden Oreos create fun twists.
- Cream Cheese: Use full-fat for the best texture, but low-fat will work in a pinch. Let it get to true room temperature for easy mixing.
- Chocolate Chips: Swap for white chocolate, dark chocolate, or even candy melts. Candy melts set harder and come in many colors.
- Decorations: Chopped nuts, toasted coconut, or a drizzle of contrasting chocolate are all fantastic.
Let’s Make Some Magic: Your Step-by-Step Guide
Step 1: Crush Those Oreos
First, let’s transform our cookies. Toss the whole Oreos—cream filling and all—into your food processor. Pulse it until you have fine, dark crumbs that look like rich soil. You can also use a zip-top bag and a rolling pin if you need to get some energy out! Just crush them until no big chunks remain. This fine texture is key for a smooth truffle center. The smell of chocolate will already start to fill your kitchen.
Pro tip: If using a bag, double-bag it to prevent any sneaky tears from sending crumbs flying everywhere.
Step 2: Mix the Dreamy Filling
Now, take that bowl of beautiful black crumbs and add your softened cream cheese. Use a hand mixer or a sturdy spoon to combine them. Watch as the mixture goes from crumbly to a thick, cohesive, almost fudgy dough. It’s ready when you can pinch it and it holds its shape without sticking too much to your fingers. The color will be a gorgeous, uniform dark gray.
Step 3: Forming Your Balls
Line a baking sheet with parchment paper. Using a small cookie scoop or a teaspoon, portion out the dough. Roll each portion between your palms to form a smooth, compact ball. Aim for about 1-inch in diameter—bite-sized perfection. Place each one on the sheet. If your hands get sticky, a quick rinse under cold water helps.
Pro tip: For super even balls, weigh them! About 1 ounce (28g) each is perfect.
Step 4: The Essential Chill
This step is non-negotiable. Pop that baking sheet into the refrigerator for at least 30 minutes. This firms up the balls, making them much easier to dip in chocolate later. A firm ball won’t fall apart in the warm chocolate. Think of it as giving them a little nap before their chocolate bath.
Step 5: The Chocolate Coat
Time for the glamorous part! Melt your chocolate chips gently. A double boiler is best to avoid seizing, but the microwave works too: heat in 30-second bursts, stirring well between each. You want it smooth and fluid. Using a fork or a dipping tool, lower a chilled ball into the chocolate. Swirl it to coat, let the excess drip off, and gently place it back on the parchment. Work quickly but calmly.
Step 6: Decorate While Wet
If you’re adding sprinkles or extra crumbs, now’s the time! Decorate the top of each ball immediately after dipping, before the chocolate sets. This is where kids love to help. Go wild with colors or keep it classy with a simple sprinkle of sea salt.
Step 7: The Final Set
Once all your balls are dressed in their chocolate coats and decorated, return the tray to the fridge. Let them chill for another 20-30 minutes, or until the chocolate is completely hard and shiny. This waiting period is the hardest part!
Step 8: Enjoy Your Creation!
The moment of truth! Arrange your Oreo Balls on a platter and watch them disappear. Serve them straight from the fridge for a satisfying snap, or let them sit out for a few minutes for a slightly softer, creamier bite. Congratulations, you’ve just made something spectacular.
Chef’s tip: For an extra-professional finish, after the chocolate sets, you can drizzle a little melted white chocolate over the top in zig-zags. It looks stunning with almost no effort.
Timing is Everything
Here’s a quick breakdown of your time investment:
- Prep Time: 20 minutes
- Chill Time: 50-60 minutes (in two stages)
- Total Time: About 1 hour 20 minutes
- Yield: Approximately 36-40 balls
A Little Secret from My Kitchen
My secret weapon is a tiny pinch of flaky sea salt sprinkled on top of the wet chocolate. It cuts the sweetness just enough and makes the chocolate flavor pop in a way that will have people asking, “What did you put in these?” It’s the detail that takes them from great to unforgettable.
Fun Fact: The Humble Oreo
The Oreo cookie itself celebrated its 111th birthday in 2023! Since its debut in 1912, it’s become the world’s best-selling cookie. The “Oreo” name’s origin is a mystery, but some think it comes from the French word for gold, “Or,” as the original packaging was gold. Now, we’re turning this iconic cookie into a whole new treat.
Tools You’ll Need
You likely have everything already:
- Food processor or zip-top bag & rolling pin
- Large mixing bowl
- Hand mixer or sturdy spoon
- Baking sheet
- Parchment paper
- Microwave-safe bowl or double boiler
- Fork or dipping tool
Storing Your Oreo Balls
Keep your Oreo Balls in an airtight container in the refrigerator. They will stay fresh and delicious for up to 2 weeks. The cold fridge keeps the cream cheese filling firm and safe to eat.
For longer storage, you can freeze them beautifully. Place them in a single layer on a tray to freeze solid, then transfer to a freezer bag or container. They’ll keep for up to 3 months. Thaw in the fridge before serving.
If you’re taking them to a party, transport them in a cooler or an insulated bag with an ice pack. You don’t want them to get soft and melty on the journey to your event.
Tips for Oreo Ball Perfection
- Ensure your cream cheese is truly softened. This prevents lumpy filling.
- Don’t skip the first chill. A firm ball is a dippable ball.
- If your chocolate gets too thick, add a tiny bit of coconut oil or vegetable shortening to thin it.
- For a super smooth top, use a toothpick to dip the ball, then use a second toothpick to gently push it off onto the parchment.
Pretty Presentation Ideas
- Place them in mini paper cupcake liners for a classic, elegant look.
- Stack them in a clear glass jar or on a cake stand for a dessert table centerpiece.
- For holidays, use themed sprinkles: red and green for Christmas, pastels for Easter, etc.
- Create a drizzle pattern with two different colored chocolates for a modern touch.
Healthier & Fun Variations to Try
Want to mix it up? Here are six delicious ideas:
- Protein Power Balls: Use reduced-fat cream cheese and mix in a scoop of chocolate protein powder with the crumbs for a post-workout treat.
- Vegan Delight: Use vegan Oreos and blend with vegan cream cheese. Coat with dairy-free chocolate.
- Peanut Butter Paradise: Add ¼ cup of smooth peanut butter to the filling mix. Dip in chocolate and sprinkle with chopped peanuts.
- Mint Chocolate Cooler: Use mint Oreos. Add a drop of peppermint extract to the filling. Coat in dark chocolate.
- Birthcake Balls: Use birthday cake Oreos. Roll the finished balls in funfetti cake mix powder for a burst of color and flavor.
- Orange Zest Twist: Add the zest of one orange to the classic filling. The citrus cuts the richness beautifully.
Common Mistakes to Avoid
Mistake 1: Using Cold Cream Cheese
This is the biggest culprit for lumpy, hard-to-mix filling. Straight-from-the-fridge cream cheese won’t blend smoothly with the Oreo crumbs. You’ll end up with white streaks and a mixture that’s tough to combine. Always plan ahead. Take the cream cheese out and let it sit on the counter for at least 30-60 minutes until it’s soft to the touch.
Mistake 2: Skipping or Shortening the Chill Time
It’s tempting to dip those balls right after rolling them. But if they’re not firm and cold, they can fall apart in the warm chocolate. You might get crumbs in your coating, or the ball could even melt into a mess. Patience is key. A full 30 minutes in the fridge makes the dipping process clean and easy.
Mistake 3: Overheating the Chocolate
Zapping chocolate in the microwave for too long will scorch it. Burned chocolate becomes grainy, clumpy, and unusable. It’s called “seizing.” Always melt chocolate slowly and gently. Use short bursts of heat and stir well in between. If using a microwave, 30-second intervals are perfect. When in doubt, a double boiler is your safest bet.
Mistake 4: Making the Balls Too Big
These are rich, decadent treats. If you make them the size of a golf ball, they become overwhelming to eat in one bite and messy to handle. Aim for a diameter of about 1 inch. They are the perfect one-bite pop of flavor. A small cookie scoop (about 1 tablespoon) is the ideal tool for keeping them uniform and just the right size.
Your Oreo Ball Questions, Answered
Can I use a different type of cookie?
Absolutely! This method works with many sandwich cookies. Try it with Nutter Butters, Golden Oreos, or even ginger snaps. Just keep the ratio about the same: one package of cookies to one 8-ounce block of cream cheese. The flavor will change, but the fun remains. It’s a great way to use up leftover cookies from the holidays.
My mixture is too sticky to roll. What do I do?
This usually means you need to chill the mixture itself before rolling. Pop the whole bowl of combined crumbs and cream cheese into the fridge for 15-20 minutes. The fat in the cream cheese will firm up, making it much easier to handle. You can also lightly dampen your hands with water while rolling to prevent sticking, but chilling is the better fix.
Can I make these Oreo balls ahead of time?
Yes, they are perfect for making ahead. You can prepare them fully and store them in the fridge for up to two weeks. You can also freeze them for months. In fact, some people think they taste even better after a day, as the flavors have more time to meld together. Just make sure they are in an airtight container so they don’t absorb any fridge odors.
Why is my chocolate coating cracking?
Cracking often happens if the filled balls are too cold when dipped, or if the chocolate coating is too thick. Let the balls sit out of the fridge for just 2-3 minutes before dipping to take the deep chill off. Also, make sure your melted chocolate is fluid enough. If it’s too thick, thin it with a teaspoon of coconut oil to make it more elastic when it sets.
What’s the best way to melt chocolate for dipping?
For control, a double boiler is best. Place a heatproof bowl over a pot of simmering (not boiling) water, ensuring the bowl doesn’t touch the water. Stir until melted. For speed, the microwave works: use a microwave-safe bowl, heat in 30-second bursts at 50% power, and stir thoroughly between each burst. Never let water get into the chocolate, as it will cause it to seize.
Can I make these without a food processor?
You sure can. Place the Oreos in a large, sturdy zip-top bag (use two bags if needed). Use a rolling pin to crush them into fine crumbs. Press and roll until you have a consistent texture. It’s a great arm workout and works perfectly well. Just make sure you crush them finely for the smoothest filling.
Are Oreo balls gluten-free?
The classic recipe is not, as Oreo cookies contain wheat. However, you can easily make a gluten-free version by using gluten-free sandwich cookies. Many brands make them. Combine them with your cream cheese and gluten-free chocolate for coating, and you have a safe and delicious treat for those with sensitivities.
How do I get a perfectly smooth chocolate coating?
The trick is in the drip-off. After dipping the ball, gently tap the fork or tool against the side of the bowl to let the excess chocolate drip back in. Swipe the bottom of the ball lightly on the bowl’s edge. Then, place it on the parchment and use a toothpick to gently swirl the top where the fork hole is. This minimizes the mark and gives a smooth finish.
Can I use almond bark or candy melts instead of chocolate chips?
Yes, and many people prefer it! Almond bark and candy melts are designed for coating. They set harder, have a pleasant snap, and come in many colors. They also don’t require tempering like real chocolate. Simply melt according to the package directions. They can sometimes be sweeter than semisweet chocolate, so choose based on your taste.
My balls are falling off the fork when I dip them. Help!
This is frustrating! Try using two forks. Balance the ball on one fork, lower it into the chocolate, then use the second fork to gently roll it and lift it out, letting the excess drip between the tines. You can also buy specialty dipping tools online that have thin, looped wires which are fantastic for truffles. Chilling the balls thoroughly is still step one for preventing this.
The Perfect Sweet Ending
So there you have it—the complete guide to making the most delicious, foolproof Oreo Balls. They’ve brought so much joy to my family gatherings and friend potlucks. I love that something so simple can feel so special. Whether you stick to the classic or try a fun variation, I know you’ll create something wonderful. Now go raid that cookie cabinet and get rolling. Your new favorite treat is just a few steps away!
Easy Meatball Bake
Ingredients
Equipment
Method
- Crush the whole Oreos using a food processor or a zip-top bag with a rolling pin until finely crumbled.
- Mix the crushed Oreos with the softened cream cheese until it forms a thick dough.
- Line a baking sheet with parchment paper and roll the mixture into 1-inch balls.
- Chill the rolled balls in the refrigerator for at least 30 minutes.
- Melt the chocolate chips using a double boiler or microwave until smooth.
- Dip each chilled ball into the melted chocolate, letting excess drip off and place back on the parchment paper.
- Decorate with sprinkles or extra crumbs while the chocolate is still wet.
- Chill the chocolate-covered balls for another 20-30 minutes until set.
- Serve and enjoy your Oreo Balls!