Ever had one of those kitchen lightbulb moments? Mine was the day I realized my sad, overripe bananas weren’t doomed for the trash. They were destined for something glorious. I was craving ice cream, but let’s be real, who wants to churn a custard base on a Tuesday? That’s when I discovered the magic of frozen bananas. This Banana Ice Cream with Hot Nutella Syrup recipe was born from pure, delicious desperation. It’s become my secret weapon for impressing guests and pacifying my kids’ sweet tooth in under 10 minutes.
The Scoop on This Heavenly Combo
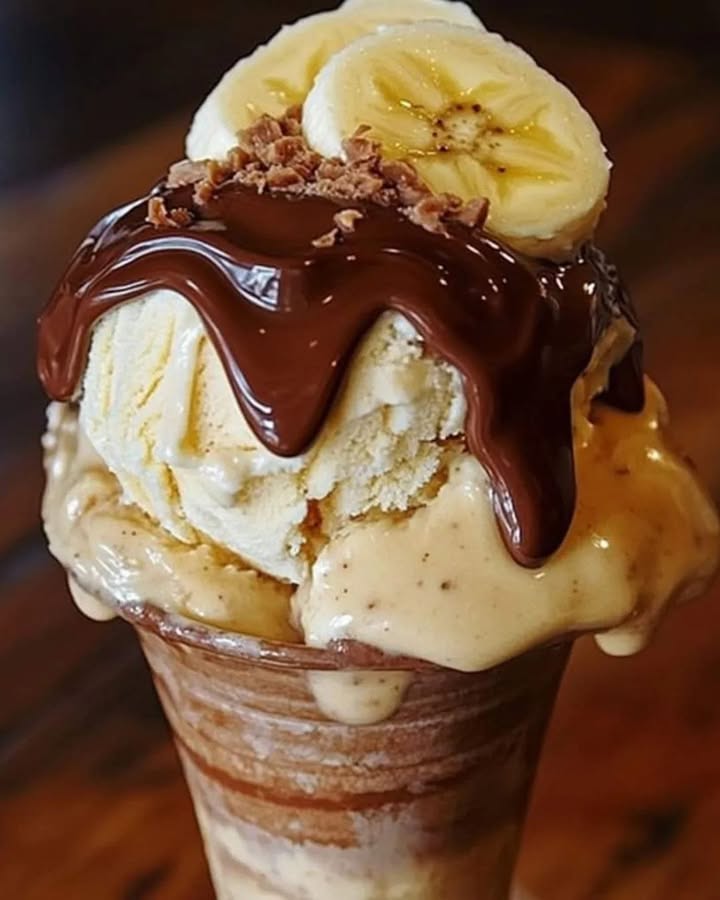
This dish is a beautiful mash-up of two universal loves: ice cream and chocolate. The concept of “nice cream” – blending frozen fruit for a soft-serve texture – has been around for ages in health circles. But let’s be honest, sometimes you just need that indulgence. The real star is the contrast. The warm, rich, almost fudge-like Nutella sauce cascades over the cold, velvety banana ice cream. It’s like a sundae, but it feels fancier and you get to brag about making the ice cream from scratch. My family now calls it “Mom’s Lazy Gourmet Dessert,” and it’s a title I wear with pride.
Why You’ll Adore This Banana Ice Cream Recipe
First, it’s ridiculously easy. No special machine, no cooking sugar syrups. If you can operate a blender, you’re a master ice cream maker. Second, it feels a tiny bit virtuous because it’s packed with real fruit, but the hot Nutella syrup makes it a proper treat. The flavor is unreal. You taste the sweet, concentrated banana, and the vanilla cream makes it luscious. Then comes the warm, hazelnut-chocolate hug. The textures create a party in your mouth. It’s cold, creamy, hot, and silky all at once. It’s pure dessert happiness in a bowl.
When to Whip Up This Treat
This is the ultimate versatile dessert. It’s perfect for those “I need something sweet NOW” moments. But it also shines for gatherings. I love serving it at summer barbecues – it’s a refreshing, cool finish. It’s a genius last-minute dinner party dessert that looks like you spent hours. Movie nights? Absolutely. It’s also a fantastic way to use up bananas that are turning spotty. Instead of banana bread, try this frozen delight!
Simple Ingredients for a Spectacular Dessert
- 4 ripe bananas (the spottier, the sweeter!)
- 1/2 cup of heavy cream or whipping cream
- 1 teaspoon of pure vanilla essence
- 1/2 cup Nutella or any hazelnut chocolate spread
- 1/4 cup of milk (any kind you have)
No-Fuss Substitution Options
Don’t sweat it if you’re missing something. This recipe is very forgiving!
- For the bananas: You can use other frozen fruit like mango or berries for a different flavor. The texture will vary slightly.
- For the cream: Full-fat coconut milk makes a fantastic dairy-free alternative and adds a lovely tropical hint.
- For the Nutella: Any chocolate-hazelnut spread works. Or, use plain chocolate chips melted with a splash of milk and a dab of butter.
- For a lighter version: Skip the cream and use just the frozen bananas and vanilla. It’ll be more like a sorbet but still delicious with the syrup.
Let’s Make Some Banana Ice Cream Magic!
Step 1: The Banana Freeze
First, peel your ripe bananas. This is crucial! Freezing them in their skins is a nightmare to deal with later. Slice them into thick coins—this helps them freeze faster and blend easier. Lay the slices on a parchment-lined baking sheet in a single layer. Pop them into the freezer for at least 4 hours, but overnight is ideal. You want them rock solid. This step locks in their sweetness and creates that perfect, creamy ice cream base.
Step 2: The Big Blend
Take your frozen banana chunks out of the freezer. Let them sit on the counter for just 2-3 minutes to take the very hardest edge off. Toss them into a powerful blender or food processor. Blend on high. At first, it’ll look crumbly, then go through a powdery phase. Keep going! Scrape down the sides. It will magically transform into a thick, smooth, soft-serve consistency. If your blender struggles, add a tablespoon or two of milk to get things moving. Pro tip: A food processor often works better for this than a weak blender.
Step 3: Creamy Dreamy Finish
Now, pour in that lovely cold cream and the vanilla essence. Hit the blender again for another 30 seconds to a minute. Watch as it turns even creamier, paler, and more voluminous. The vanilla scent will waft up. Taste it! You’ll be amazed at how much it tastes like real banana ice cream. Once it’s silky and combined, you can eat it immediately as soft-serve. For a firmer texture, spread it into a container and freeze for an hour.
Step 4: Crafting the Hot Nutella Syrup
While your ice cream is setting, make the magic sauce. In a small saucepan, combine the Nutella and milk. Use low heat. Warm it gently, stirring constantly with a whisk or spatula. You’ll see it start to loosen and become gloriously shiny and pourable. It should take just 2-3 minutes. Don’t let it boil! You want a warm, thick, sauce-like syrup. Chef’s tip: Add a tiny pinch of sea salt to the sauce. It makes the chocolate flavor pop in the most incredible way.
Step 5: The Grand Finale
Scoop your beautifully creamy banana ice cream into bowls or fancy glasses. Now, take that warm saucepan and drizzle the hot Nutella syrup right over the top. Listen for the faint sizzle as it hits the cold ice cream. Watch it pool and cascade. The contrast is everything. Serve it immediately and watch everyone’s eyes light up. It’s pure, simple joy in a dish.
Your Banana Ice Cream Timeline
Here’s a quick breakdown so you can plan your dessert attack:
- Prep Time: 10 minutes (plus freezing bananas)
- Freezing Time: 4 hours minimum
- Assembly/Cooking Time: 10 minutes
- Total Time (with freezing): 4 hours 20 minutes
A Chef’s Secret for the Best Texture
For the absolute creamiest banana ice cream, freeze your banana slices solid on the tray first, then store them in a zip-top bag. This “flash freezing” prevents them from clumping into one big frozen banana brick. Individual pieces blend so much smoother and faster, giving you that perfect, scoopable soft-serve texture right out of the blender.
A Fun Food Fact
That amazing, creamy texture you get from blending frozen bananas? It comes from pectin, a natural fiber in the fruit. When bananas are frozen and pulverized, the pectin and cell structures break down into a smooth, airy, and stable foam. It’s science making your dessert delicious! This trick works with starchy fruits, which is why mango also makes great “nice cream.”
Kitchen Tools You’ll Need
- A good quality blender or food processor (this is key!)
- A baking sheet
- Parchment paper
- A small saucepan
- Whisk or silicone spatula
- Ice cream scoop (optional, but fun)
Storing Your Banana Ice Cream Creation
If you have leftover banana ice cream (a rare event in my house!), you can store it. Press plastic wrap directly onto the surface of the ice cream in its container. This prevents ice crystals from forming. Seal it with a lid. It will keep in the freezer for up to 2 weeks. The texture will be harder after a long freeze.
Let it sit on the counter for 5-10 minutes before scooping to soften. The Nutella syrup is best made fresh. However, you can store any extra cooled syrup in a jar in the fridge for up to a week. Gently reheat it in the microwave or on the stove with a splash of milk to bring it back to sauciness.
A word of caution: freezing the assembled dessert with the sauce already on it isn’t recommended. The syrup will freeze solid and lose its lovely pourable quality. Always add the warm syrup just before serving for that perfect hot-and-cold experience.
My Best Tips and Advice
- Banana Ripeness is Key: Use bananas that are very ripe, with lots of brown spots. They are sweeter and have a more intense banana flavor, which stands up to the Nutella.
- Get Creative with Toppings: Along with the syrup, try chopped toasted hazelnuts, a sprinkle of sea salt, fresh berries, or even crushed pretzels for a sweet-salty-crunchy twist.
- For a Decadent Upgrade: Use a tablespoon of good bourbon or rum instead of vanilla in the ice cream base for a grown-up flavor kick.
Presentation Ideas to Impress
- Serve in clear martini glasses or small mason jars to show off the beautiful layers.
- Drizzle the syrup in a zig-zag pattern and place a whole banana slice on the rim of the bowl.
- Create a “sundae bar” for parties. Set out bowls of the banana ice cream and let guests add warm Nutella syrup and their own toppings like sprinkles, nuts, and whipped cream.
- For a fancy touch, dust a little cocoa powder or cinnamon over the top before serving.
Healthier Alternative Twists
Love the idea but want to mix it up? Try these tasty variations:
- Chocolate Peanut Butter Cup: Blend 1 tablespoon of natural peanut butter into the ice cream base. Use melted dark chocolate thinned with a bit of milk for the syrup.
- Tropical Dream: Replace one banana with a cup of frozen pineapple chunks. Use a coconut milk-based caramel sauce instead of Nutella.
- Berry Swirl: After blending, gently swirl in 1/4 cup of sugar-free raspberry or strawberry jam before freezing.
- Mocha Madness: Blend 1 teaspoon of instant espresso powder with the bananas. Make a dark chocolate sauce for the topping.
- Cookie Dough Bliss: Stir mini chocolate chips and small pieces of edible cookie dough into the blended ice cream before the final freeze.
- Super Green Boost: Add a large handful of fresh spinach to the blender with the bananas. You won’t taste it, but you get a nutrient boost! Top with the Nutella as usual.
Common Mistakes to Avoid
Mistake 1: Using Fresh, Unfrozen Bananas
This is the biggest error. Blending room-temperature bananas will give you a smoothie, not ice cream. The freezing step is non-negotiable. It changes the texture completely, making it thick and scoopable. Without it, you’ll have a runny, soupy mess that won’t hold the shape of a scoop. Always freeze your banana slices solid first.
Mistake 2: Not Letting the Bananas Ripen Enough
Grabbing a green-tipped banana will result in bland ice cream. Underripe bananas lack the natural sweetness and strong flavor needed to stand out. Your dessert will taste weak and might have a slight starchy flavor. Wait for those bananas to get nice and spotty. The peel should be mostly yellow with many brown speckles. The riper, the better!
Mistake 3: Overheating the Nutella Sauce
If you blast the heat under your saucepan, you risk burning the chocolate. Burnt Nutella tastes bitter and can seize up into a grainy mess. Always use low to medium-low heat and stir constantly. You are just warming it to combine with the milk, not cooking it. The goal is a warm, velvety syrup, not a bubbling hot chocolate lava.
Mistake 4: Skimping on Blending Time
Patience is key in the blender. When you first process the frozen bananas, they’ll look like gravel. Many people stop here, thinking it’s not working. Keep blending! It will go through a stubborn, crumbly phase before suddenly whipping into creamy perfection. A weak blender might need a short rest to avoid overheating, but persist. Scrape down the sides often.
Mistake 5: Assembling Too Early
Pouring the hot Nutella syrup over the ice cream and then letting it sit before serving ruins the magic. The sauce will melt the ice cream into a puddle, and you’ll lose the fantastic hot-cold contrast. Have your guests ready, then do the final drizzle right at the table for the full “wow” effect. The visual and textural contrast is part of the experience.
Frequently Asked Questions
Can I make the banana ice cream base ahead of time?
Absolutely! That’s one of the best parts. You can freeze the blended ice cream in an airtight container for up to 2 weeks. Just let it soften at room temperature for 5-10 minutes before scooping. The texture might be a bit firmer, but it will still be delicious. Making the sauce is so quick, it’s best done fresh when you’re ready to serve for that warm, pourable consistency.
My ice cream turned out icy, not creamy. What went wrong?
Iciness usually means one of two things. First, your bananas might not have been ripe enough. Riper bananas have more sugar, which helps prevent large ice crystals. Second, your blender might not be powerful enough to create a perfectly smooth puree, leaving tiny ice chunks. Try letting the banana chunks thaw for 3-4 minutes before blending, and add that tiny splash of milk to help the blades move.
Is there a dairy-free version of this recipe?
Yes, and it’s fantastic! For the ice cream, use full-fat canned coconut milk (chilled) instead of the heavy cream. For the syrup, you can still use Nutella (check the label, as it contains milk powder) or opt for a dairy-free chocolate-hazelnut spread. Use a dairy-free milk like almond or oat milk to thin the spread into a syrup. The result is just as rich and satisfying.
What can I use if I don’t have a high-speed blender?
A food processor is actually my preferred tool for this job! It handles the hard, frozen chunks better than many blenders. If you only have a standard blender, make sure to slice your bananas thinly before freezing. Let them soften slightly on the counter, and add the milk one tablespoon at a time to help the blades catch. You may need to stop and stir/scrape frequently.
Can I use a different fruit instead of bananas?
You can, but bananas are unique in creating a creamy, ice-cream-like texture. Frozen mango works quite well and gives a lovely tropical sorbet. Berries or peaches will be more like a granita or sorbet – tasty but icier and less creamy. For the creamiest non-banana version, try frozen avocado chunks! It sounds wild, but it makes an incredibly rich, neutral base perfect for chocolate sauce.
How do I prevent the ice cream from turning brown?
Bananas oxidize and can turn a little grayish-brown after being blended and frozen. It’s harmless but not as pretty. To prevent it, you can add a tiny squeeze of lemon juice to the blender (just a teaspoon). The acid slows the browning. The vanilla also helps mask any slight color change. Don’t worry too much though – once you pour that dark, gorgeous Nutella syrup over it, no one will see a thing!
My Nutella sauce is too thick/thin. How can I fix it?
Sauce consistency is easy to adjust! If it’s too thick and gloopy to pour, simply whisk in more milk, a teaspoon at a time, over low heat until it’s just right. If it’s too thin, let it simmer on low for another minute or two to reduce and thicken slightly. Remember, it will also thicken a bit as it cools on the cold ice cream.
What’s the best way to freeze the bananas?
The absolute best method is the “single layer freeze.” Peel and slice the bananas, then lay the pieces in one layer on a parchment-lined baking sheet. Make sure they aren’t touching. Freeze for 4+ hours, then transfer to a zip-top bag. This prevents them from freezing into one solid lump, which is hard to blend. It’s a small step that makes the blending process much smoother.
Can I add mix-ins to the banana ice cream?
Please do! After you’ve achieved the creamy base, you can pulse in or gently stir in all sorts of goodies. Think mini chocolate chips, chopped nuts, crushed cookies, or small brownie bits. Just be careful if using a blender – pulse briefly just to incorporate, or you’ll over-blend them. For chunky mix-ins, folding by hand after blending is often best.
Is this actually healthier than regular ice cream?
It can be, depending on your choices! The banana base alone, without cream, is low-fat and provides fiber and potassium. Even with the cream, you’re avoiding processed stabilizers and loads of added sugar (the bananas provide natural sweetness). The control is in your hands. Using a lighter cream or coconut milk and being mindful of the amount of Nutella syrup can make it a healthier alternative to store-bought ice cream.
The Last Scoop
This Banana Ice Cream with Hot Nutella Syrup is more than a recipe. It’s a little bit of kitchen wizardry that never fails to delight. It’s proof that the most stunning desserts can come from the simplest ingredients and a few clever tricks. So next time you see those spotty bananas, don’t sigh. Smile. You know they’re about to become part of something truly magical. Give it a try, and prepare for the compliments to roll in. Happy blending!
Korean Chicken Buns
Ingredients
Equipment
Method
- Peel the bananas and slice them into thick coins.
- Lay the banana slices on a parchment-lined baking sheet in a single layer and freeze for at least 4 hours, preferably overnight.
- Remove the frozen banana chunks from the freezer and let them sit for 2-3 minutes.
- Blend the banana chunks in a powerful blender or food processor on high until they reach a thick, smooth, soft-serve consistency.
- Pour in the cold cream and vanilla essence, and blend again for 30 seconds to a minute until creamy.
- Prepare the Nutella syrup by combining Nutella and milk in a small saucepan over low heat, stirring constantly until smooth.
- Scoop the banana ice cream into bowls and drizzle the warm Nutella syrup over the top.