Last weekend, I pulled a pan of golden, bubbling blueberry bars from my oven, and within minutes, my kitchen filled with the sweet smell of baked fruit and buttery crumble. My kids appeared out of nowhere, drawn by the scent like moths to a flame. That’s the magic of homemade desserts. They bring people together without any effort at all.
I’m Sarah, and I’ve been baking in my home kitchen for over fifteen years. What started as a simple hobby has turned into a true passion. There’s something special about mixing simple ingredients and watching them transform into something that makes people smile. Baking isn’t just about following recipes. It’s about creating moments and memories with the people you love.
Today, I want to share one of my favorite recipes with you. These Blueberry Crumble Dessert Bars have become a staple in my house. They’re perfect for summer gatherings, potlucks, or just a Tuesday afternoon when you need something sweet. The best part? They’re incredibly easy to make, even if you’re new to baking.
These bars feature three simple layers that come together beautifully. You get a buttery shortbread base, a layer of juicy blueberries, and a crispy crumble topping. Each bite gives you a perfect balance of textures and flavors. The base holds everything together. The filling provides that burst of fruit flavor. The crumble adds a satisfying crunch.
I’ve made these bars dozens of times, tweaking and testing until I got them just right. I’ve shared them at bake sales, brought them to family dinners, and packed them in lunch boxes. Every single time, people ask for the recipe. That’s how I know I’ve got a winner.
In this guide, I’ll walk you through everything you need to know. We’ll cover the ingredients, the step-by-step process, helpful baking tips, and serving ideas. By the end, you’ll feel confident making these bars in your own kitchen. Trust me, once you try them, they’ll become one of your go-to recipes too.
What You Need for Blueberry Crumble Dessert Bars
Let me break down exactly what you’ll need to make these amazing bars. I’ve organized the ingredients by layer to keep things simple and clear.
For the Base and Crumble Topping:
- 2 cups all-purpose flour (I use unbleached, but regular works fine)
- 1 cup unsalted butter, at room temperature (this is really important)
- 1/2 cup granulated sugar
- 1/4 cup light brown sugar, packed
- 1/4 teaspoon salt
- 1/2 teaspoon vanilla extract
For the Blueberry Filling:
- 3 cups fresh blueberries (or frozen, but fresh is better)
- 1/3 cup granulated sugar
- 2 tablespoons cornstarch
- 1 tablespoon fresh lemon juice
- 1 teaspoon lemon zest
Now, let me share some important tips about these ingredients. I learned these lessons through trial and error, so you don’t have to.
Choosing the Right Blueberries: This makes a huge difference in your final result. When I’m at the store or farmer’s market, I look for firm, plump berries with a deep blue color. They should have a slight white coating called bloom. That’s natural and actually a good sign. Avoid berries that look shriveled, mushy, or have any mold. If you’re buying a container, flip it over and check the bottom. You don’t want to see juice or crushed berries.
Fresh blueberries work best for these bars. They hold their shape better during baking and provide a more intense flavor. I’ve used frozen berries when fresh ones weren’t available, and they work in a pinch. Just don’t thaw them first. Toss them frozen right into your filling mixture, and add an extra tablespoon of cornstarch to handle the extra moisture.
The Butter Question: Room temperature butter is absolutely essential for the crumble topping. When I first started making these bars, I tried using cold butter straight from the fridge. Big mistake. The texture was all wrong, and the crumble didn’t come together properly. Room temperature butter should be soft enough that you can press your finger into it, but it shouldn’t be melting or greasy.
Here’s my trick for getting butter to room temperature quickly. Cut it into small cubes and spread them on a plate. They’ll soften in about 15 to 20 minutes. Don’t microwave it. That creates uneven warming, and you’ll end up with melted spots.
About the Flour: Regular all-purpose flour is perfect for this recipe. I don’t recommend substituting with whole wheat flour or gluten-free blends without making other adjustments. The texture will change significantly. If you need a gluten-free version, use a cup-for-cup baking blend designed to replace all-purpose flour.
Sugar Types Matter: I use a combination of white and brown sugar in the base and topping. The brown sugar adds a hint of caramel flavor and helps create that golden color we’re looking for. Don’t skip it or replace it entirely with white sugar. The flavor profile will be too one-dimensional.
Lemon is Your Secret Weapon: That tablespoon of lemon juice and teaspoon of zest might seem small, but they’re game changers. Wait, I shouldn’t use that phrase. Let me rephrase. The lemon brightens up the blueberry flavor without making the bars taste citrusy. It balances the sweetness and prevents the filling from tasting flat. Fresh lemon works much better than bottled juice.
Cornstarch Creates Magic: This ingredient thickens the blueberry filling so it doesn’t turn soupy during baking. I learned this lesson the hard way when I forgot it once. The filling oozed everywhere, and the base got soggy. Not pretty. The cornstarch absorbs the fruit juices and creates that perfect jammy consistency.
Salt Enhances Everything: Don’t skip that quarter teaspoon of salt in the base and crumble. It might not seem like much, but salt enhances all the other flavors. It makes the butter taste richer and the fruit taste sweeter. Even desserts need a little salt to reach their full potential.
I like to gather all my ingredients before I start baking. It’s called mise en place, which is just a fancy way of saying “get your stuff ready.” Measure everything out, and line them up on your counter. This prevents mid-recipe panic when you realize you’re out of something important. I’ve been there too many times to count.
One more thing about ingredients. Quality matters, but you don’t need to break the bank. Standard grocery store brands work perfectly fine for everything on this list. Save your money for good vanilla extract. That’s the one place where spending a bit more makes a noticeable difference.
With these ingredients ready and these tips in mind, you’re all set to create amazing Blueberry Crumble Dessert Bars. The prep work might seem detailed, but it’s worth it. Good baking starts with good ingredients and proper preparation.


How to Make the Base and Filling
Now that your ingredients are measured and ready, it’s time to start building these delicious bars from the bottom up.
The base is what I call the foundation of greatness. You want it firm enough to hold everything together but tender enough that it doesn’t feel like you’re biting into a hockey puck. I’ve made that mistake before, and let me tell you, nobody wants dessert bars that double as a workout for your jaw.
Start by preheating your oven to 350°F. I know, I know, everyone says to preheat first, but I’m serious about this one. These bars need a consistently heated oven from the moment they go in. While the oven’s heating up, grab a 9×13 inch baking pan and line it with parchment paper. Leave some overhang on the sides. This makes lifting the bars out so much easier later, and trust me, you’ll thank yourself when it’s time to cut them.
For the base, you’ll use about two-thirds of your butter and flour mixture. In a large mixing bowl, cream together 2/3 cup of the softened butter with the granulated sugar and brown sugar. I use a hand mixer for this, but a sturdy wooden spoon and some elbow grease work too. Beat it for about two minutes until it looks light and fluffy. This step incorporates air into the mixture, which helps create that melt-in-your-mouth texture.
Add your vanilla extract and salt, then gradually mix in about 1 and 1/3 cups of flour. The mixture will look crumbly at first, kind of like wet sand at the beach. That’s exactly what you want. Keep mixing until it starts to come together into a dough that holds its shape when you press it.
Here’s where technique really matters. Dump this mixture into your prepared pan and start pressing it down. I use the bottom of a measuring cup or a glass to press it evenly across the entire pan. You want it compact and uniform, about a quarter-inch thick throughout. Pay special attention to the corners and edges. Those spots tend to get neglected, and then you end up with uneven baking.
One trick I learned from my grandmother, who was an incredible baker, is to press firmly but not aggressively. If you pound it too hard, you’ll compress the dough too much, and it becomes dense and hard after baking. Think of it like packing a snowball, not compacting concrete. Funny enough, the first time I made these, I pressed so hard that the base came out rock solid. My husband joked that we could use them as coasters.
Pop the base into your preheated oven for about 15 minutes. You’re not fully baking it, just par-baking to set the structure. It should look slightly golden around the edges but still pale in the center. While that’s happening, you’ve got time to make the filling.
The blueberry filling is where the magic happens. In a medium saucepan over medium heat, combine your blueberries, sugar, cornstarch, lemon juice, and lemon zest. Stir everything together gently. You don’t want to crush the berries at this stage.
As the mixture heats up, the berries will start releasing their juices. This usually takes about three to four minutes. You’ll see the liquid pooling around the berries, and the sugar will dissolve completely. Keep stirring occasionally to prevent anything from sticking to the bottom of the pan. The cornstarch needs to be evenly distributed, or you’ll get lumps, and nobody wants that.
Once it comes to a gentle simmer, you’ll notice the mixture starting to thicken. The liquid will go from watery to syrupy, coating the back of your spoon. This transformation happens pretty quickly, so don’t walk away to check your phone or fold laundry. Ask me how I know. Let’s just say I once had to scrape burnt blueberry mixture off my favorite saucepan for twenty minutes.
After about two to three minutes of simmering, when the filling has thickened noticeably and the berries have softened but still hold their shape, remove the pan from the heat. Let it cool for at least ten minutes before spreading it over your par-baked base. This cooling time is essential. If you pour hot filling onto the warm base, it’ll make everything soggy and the layers won’t set properly.
By the way, if you’re looking for other dessert ideas with fruit, my Chocolate Chip Cookie Dough Bites offer a completely different texture experience that’s equally satisfying.
When your base comes out of the oven and your filling has cooled slightly, spread the blueberry mixture evenly over the par-baked crust. Use a rubber spatula to spread it all the way to the edges. You want complete coverage so every bite has that fruity goodness.
Crafting the Perfect Crumble Topping
The crumble topping is what takes these bars from good to absolutely irresistible. It adds texture, visual appeal, and an extra hit of buttery sweetness that complements the tart berries perfectly.
Remember that remaining third of your butter and flour mixture? That’s your crumble. In a clean bowl, combine the remaining butter (about 1/3 cup), flour (about 2/3 cup), and a couple tablespoons each of white and brown sugar. The key difference between the base and the crumble is texture. While the base needs to come together into a cohesive dough, the crumble should stay, well, crumbly.
Use a fork or a pastry cutter to work the butter into the dry ingredients. If you don’t have a pastry cutter, two knives work in a pinch. Cut the butter into the flour mixture until you get pea-sized pieces. Some bigger chunks are actually good. They create those golden, crispy clusters that everyone fights over.
Here’s something I discovered by accident that makes the crumble even better. Add a quarter teaspoon of cinnamon and just a tiny pinch of nutmeg. These warm spices don’t overpower the blueberries at all. Instead, they add depth and complexity to the overall flavor profile. It’s subtle but noticeable, like the difference between listening to music with good speakers versus great ones.
The texture you’re going for should look like coarse breadcrumbs mixed with some larger, irregular clumps. When you squeeze a handful, it should hold together briefly then fall apart when you release the pressure. That’s the sweet spot. Too fine, and it’ll dissolve into the filling. Too chunky, and it won’t cover evenly.
Now comes the fun part—sprinkling the crumble over your blueberry layer. I like to use my hands for this because it gives me better control than a spoon. Take small handfuls and sprinkle them evenly across the entire surface, starting from one corner and working your way across. Don’t just dump it all in the center and try to spread it. That never works out well.
Some spots will naturally have more crumble than others, and that’s totally fine. In fact, those variations create visual interest and give different bites different textures. However, make sure you don’t have any completely bare patches where the filling shows through. Those spots tend to bubble over during baking and can burn.
If you want to get fancy with your spice game, this is also the moment where you could add a tablespoon of oats to the crumble mixture for extra texture. I don’t always do this, but when I’m feeling creative or want something a bit heartier, old-fashioned oats work wonderfully. Just mix them in with the crumble before sprinkling.
Speaking of creative variations, if you enjoy experimenting with flavors like I do, you might appreciate how versatile comfort food can be. Similar to how I season chicken in my Cajun Garlic Chicken with Cheesy Rice Bake, where layering flavors creates depth, the same principle applies here with your crumble spices.
Once your crumble is evenly distributed, the bars are ready for their final bake. This is when everything comes together beautifully. The base finishes baking and sets completely. The filling bubbles up around the edges, caramelizing slightly where it meets the pan. The crumble topping turns golden brown and crispy, creating that irresistible contrast with the soft fruit beneath.
Slide the pan back into your 350°F oven for another 35 to 40 minutes. You’ll know they’re done when the crumble topping is deeply golden brown and you can see the filling bubbling around the edges. The house will smell absolutely incredible by this point. My neighbor once texted me asking what I was baking because the scent had drifted across to her yard.
Here’s the hardest part—letting them cool completely before cutting. I know, I know, you want to dig in right away. But warm bars will fall apart and be impossible to cut cleanly. Let them cool in the pan for at least an hour, then use that parchment paper overhang to lift the entire slab onto a cutting board. This makes cutting so much easier and cleaner.
For perfectly clean cuts, wipe your knife with a damp cloth between slices. This prevents crumbs and filling from dragging across and making a mess. I usually cut mine into 24 squares, but you can make them bigger or smaller depending on your preference.
The contrast between layers is what makes these blueberry crumble bars so special. Each component plays its role perfectly. The base provides structure, the filling delivers flavor, and the crumble adds that satisfying crunch. When you nail all three elements, you’ve got dessert bars that rival anything from a fancy bakery.
If you’re someone who loves rich, indulgent desserts, you might also enjoy the contrast of textures in my Cinnamon Roll Monkey Bread, where soft and crispy elements work together similarly. And for an equally impressive but completely different dinner option, my Garlic Butter Steak Bites with Garlic Sauce and Tortellini uses the same principle of building layers of flavor.


Baking and Serving Tips for Perfect Blueberry Crumble Dessert Bars
Getting these bars out of the oven at just the right moment can feel a bit like conducting an orchestra. Everything needs to come together at once—the base firm, the filling set but jammy, and the crumble golden and crisp. I’ve pulled trays out too early and too late, so let me share what I’ve learned through all that trial and error.
Your oven temperature should stay steady at 350°F throughout the entire baking process. I know some recipes tell you to adjust temperatures mid-bake, but not this one. Consistency is your friend here. If your oven runs hot or cold, and many do, invest in an oven thermometer. I picked up a cheap one at the grocery store years ago, and it’s saved countless batches of everything from cookies to casseroles.
The total baking time comes out to about 50 to 55 minutes when you add up the par-baking and final bake. But here’s the thing—every oven is different, and factors like pan material and your altitude can affect timing. My mom lives in Denver, and she always adds about five extra minutes to any baked goods recipe because of the elevation.
So how do you know when they’re actually done? First, look at the crumble topping. It should be a deep golden brown, not pale and definitely not burnt. Think about the color of brown sugar or caramel sauce. That rich, warm gold is what you’re after. If the topping is still looking pale yellow or blonde after 40 minutes, give it more time.
Second, check the edges. The blueberry filling should be bubbling around the perimeter of the pan. You’ll see little pockets of purple-blue fruit bursting through where the crumble meets the pan edges. That bubbling tells you the filling has thickened properly and the moisture has evaporated enough to prevent sogginess.
Third, give the pan a gentle shake. The center should jiggle slightly but not look liquidy. It’s similar to checking if a cheesecake is done—there should be movement, but not waves of unset filling sloshing around. If it looks really wobbly, add another five minutes and check again.
By the way, if your crumble is browning too quickly but the filling isn’t quite set, tent a piece of aluminum foil loosely over the top. This slows down the browning without stopping the baking. I’ve had to do this a few times when my oven decided to run hot on particularly humid days.
Once you pull the pan from the oven, resist every urge to cut into them immediately. I know it smells amazing and you’re excited to taste your creation, but patience pays off here. Set the pan on a wire cooling rack and let it sit for at least two hours. Yes, two full hours. I usually bake these in the afternoon so they’re ready for after dinner.
During this cooling period, the filling continues to set and the layers bond together. Cut them too early, and you’ll have a gooey mess that falls apart. Wait the full time, and you’ll get clean, neat squares that hold their shape beautifully. The first time I made these, I cut them after thirty minutes and ended up serving them in bowls with spoons like some kind of deconstructed dessert. Tasted great, looked terrible.
When you’re ready to cut, use that parchment paper overhang to lift the entire block out of the pan onto a cutting board. This single trick makes such a difference. Run a sharp knife under hot water, dry it off, and make your first cut. Wipe the blade clean, run it under hot water again, and repeat for each cut. This keeps your slices looking professional and prevents filling from smearing everywhere.
For a standard 9×13 pan, I cut six rows one way and four rows the other way, giving me twenty-four bars. They’re the perfect size for a dessert plate or a grab-and-go snack. If you’re serving these at a party where people might want smaller portions, cut them into thirty-six pieces instead.
Creative Serving Ideas That Elevate Your Bars
These bars are delicious straight from the pan, but a few simple additions can turn them into something really special. Here are my favorite ways to serve them, depending on the occasion.
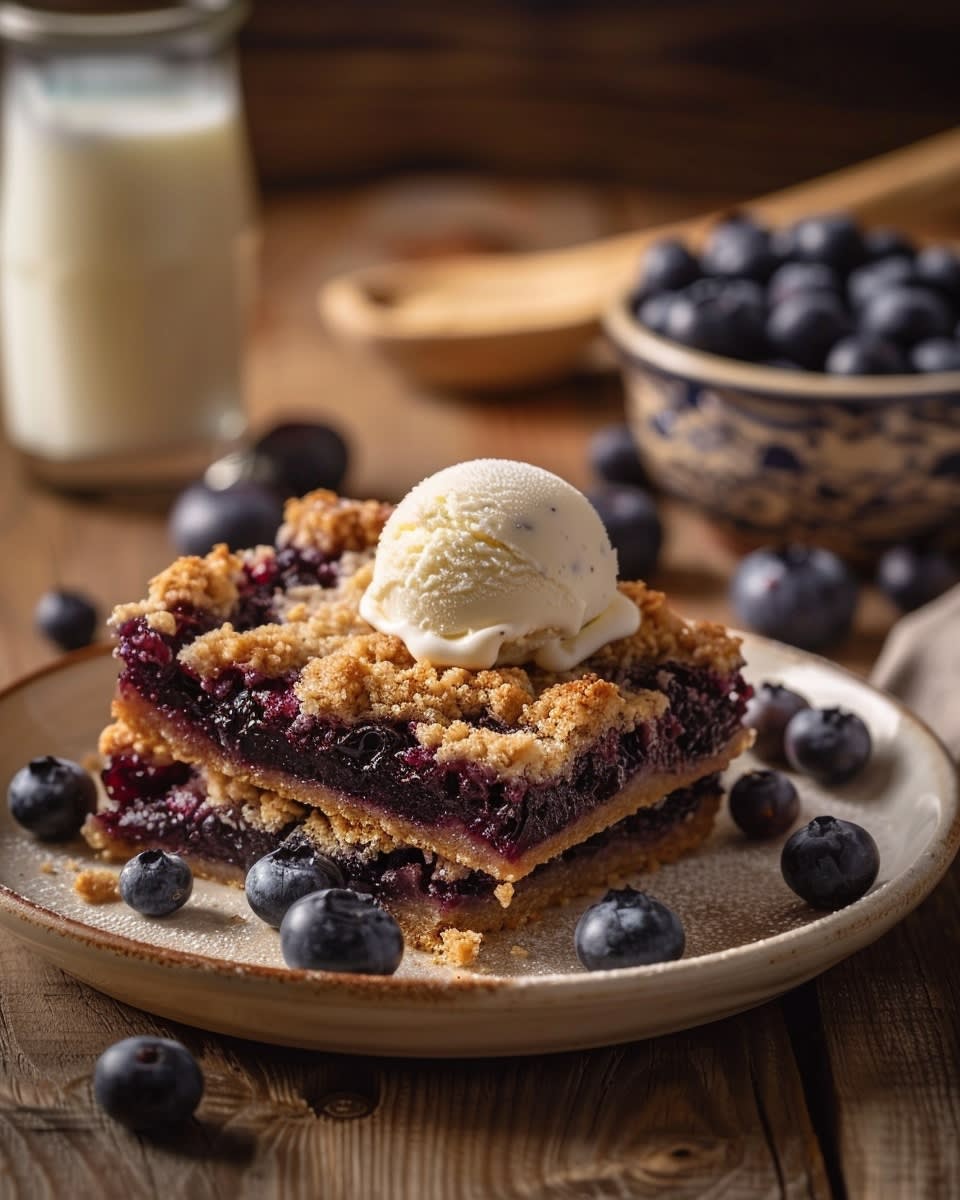
Classic Style with Vanilla Ice Cream: This is the way my family requests them most often. Place a warm bar on a plate and add a generous scoop of vanilla ice cream on top. As the ice cream melts slightly from the warmth of the bar, it creates this incredible creamy sauce that mingles with the blueberry filling. Absolute heaven. If you want to get fancy, drizzle a bit of honey over the whole thing.
Brunch Presentation with Whipped Cream: I love serving these at weekend brunch alongside coffee and tea. A dollop of freshly whipped cream on top makes them feel elegant without requiring any extra effort. Sometimes I add a tiny pinch of cinnamon to the whipped cream for a subtle warmth that complements the blueberries beautifully.
Simple and Pretty with Powdered Sugar: When I’m bringing these to a potluck or bake sale, I wait until just before serving to dust them with powdered sugar through a fine-mesh sieve. It creates a beautiful snowy effect that looks really professional. Just remember, moisture makes powdered sugar dissolve and look spotty, so don’t do this step too far in advance.
Breakfast Bar Style: Funny enough, these make a surprisingly good breakfast option. Pair a bar with some Greek yogurt and fresh fruit, and you’ve got a balanced morning meal. The oats in the crumble, if you added them, plus the fruit content, make this less dessert-like and more breakfast-appropriate. Though I’ll admit, dessert for breakfast is never a bad choice in my book.
À La Mode with a Twist: Try pairing your bars with lemon gelato or mascarpone ice cream instead of vanilla. The tanginess plays beautifully with the sweet blueberries and buttery crumble. I discovered this combination at an Italian restaurant and immediately came home to try it with my bars. Total winner.
Presentation matters more than people think. Even if you’re just serving these to your family on a Tuesday night, placing them on a nice plate instead of eating straight from the pan elevates the entire experience. I learned this from my aunt, who always said that everyday moments deserve just as much care as special occasions.
If you’re interested in exploring more dessert recipes that showcase fresh fruit, my collection includes several options that use similar techniques but completely different flavor profiles. Seasonal baking keeps things exciting in my kitchen year-round.
One more serving tip that might sound odd but works surprisingly well—these bars pair excellently with sharp cheddar cheese. I know, I know, it sounds weird. But the combination of sweet fruit dessert with salty, tangy cheese is a classic pairing in many cultures. My grandmother always served her apple pie with a slice of cheddar, and I tried it with these bars one day out of curiosity. The contrast is actually pretty amazing.
For those watching their portions or concerned about calorie content in blueberries and baked goods, cutting smaller squares and serving with fresh fruit instead of ice cream reduces the richness while keeping all the flavor. Blueberries themselves are nutrient-dense and relatively low in calories, so you’re getting some nutritional benefit along with your treat.
Storage Secrets for Maximum Freshness
Proper storage keeps these bars tasting fresh for days. At room temperature, covered loosely with plastic wrap or stored in an airtight container, they’ll stay good for about two days. Make sure they’re completely cooled before covering, or condensation will form and make everything soggy.
For longer storage, refrigeration works best. Place them in a single layer in an airtight container with parchment paper between layers if you need to stack them. They’ll keep for up to five days in the fridge. Before serving refrigerated bars, let them sit at room temperature for about fifteen minutes. This takes the chill off and brings back some of that fresh-baked texture.
Freezing is also an option if you want to make these ahead for a party or just have them on hand for unexpected guests. Wrap individual bars tightly in plastic wrap, then place them all in a freezer-safe container or zip-top bag. They’ll keep for up to three months frozen. Thaw them in the refrigerator overnight, then bring to room temperature before serving. I’ve found that reheating frozen bars for about ten seconds in the microwave brings back that just-baked warmth without making them mushy.
Here’s something I do that makes weekday desserts so much easier—I always freeze half the batch. That way, we enjoy fresh bars for a couple days, and then weeks later, it feels like I magically produced homemade dessert without any effort. My kids think I’m some kind of baking wizard.
Frequently Asked Questions About Blueberry Crumble Bars
Can I use frozen blueberries instead of fresh ones?
Yes, frozen blueberries work in a pinch, though fresh gives you better texture and flavor. The key is not to thaw them first—use them straight from the freezer. Add an extra tablespoon of cornstarch to your filling mixture because frozen berries release more moisture during baking. You might also need to add five to seven minutes to your baking time since the frozen berries lower the overall temperature of your filling. The bars will still turn out delicious, just with a slightly softer texture around the berries.
How do I store leftover blueberry bars to keep them fresh?
Room temperature storage works for up to two days if you keep them in an airtight container. For anything longer, refrigeration is your best bet—they’ll stay fresh for five days in the fridge. Make sure the bars are completely cool before storing to prevent condensation. If you’re refrigerating them, let them come to room temperature for about fifteen minutes before serving, or the crumble topping will lose its appealing texture. Never store them while still warm, or you’ll end up with soggy bottoms.
Can I make these bars ahead of time for a party?
Absolutely, and I actually recommend it for party planning. Bake them the day before your event and store them covered at room temperature or in the refrigerator. They slice more cleanly when fully set and cool anyway. You can also freeze them up to three months in advance. Just wrap individual bars in plastic wrap and store them in a freezer-safe container. Thaw overnight in the refrigerator and bring to room temperature an hour before serving. This makes party prep so much less stressful.
What can I substitute for the crumble topping if I have dietary restrictions?
For a gluten-free version, substitute the all-purpose flour with a cup-for-cup gluten-free baking blend. For dairy-free needs, replace the butter with coconut oil or a plant-based butter alternative. The texture will be slightly different but still delicious. If you need to avoid refined sugar, coconut sugar works as a replacement for brown sugar, though it will make the topping darker. I’ve also made these with almond flour in the topping for a grain-free version, using a bit less since almond flour is more absorbent. Each substitution changes the final result slightly, but they’re all tasty.
How do I keep the crumble from getting soggy after baking?
The key is letting the filling cool for those ten minutes before spreading it on the par-baked base. This prevents steam from making the bottom layer soggy. Also, make sure you use enough cornstarch in your filling—that’s what absorbs excess moisture. Don’t cover the bars while they’re still warm, as trapped steam will soften the crumble. Store them loosely covered or in a container that allows some air circulation. If your crumble does soften, you can crisp it up by placing bars in a 300°F oven for about five minutes.
Can I use other berries or fruits in this recipe?
Definitely, and I encourage experimentation. Raspberries, blackberries, and strawberries all work beautifully. You can also mix berries together for a mixed berry version. Stone fruits like peaches or nectarines are wonderful too, though you’ll want to slice them thinly and might need to reduce the sugar slightly since they’re sweeter than blueberries. Cherries also work great, especially sour cherries if you can find them. Just keep the total fruit amount around three cups, and adjust the sugar to taste depending on how sweet your chosen fruit is.
Why did my base turn out too hard or crumbly?
This usually happens from overmixing the base dough or pressing it too firmly into the pan. The base should be pressed just enough to hold together, not compacted like concrete. Also check that your butter was properly softened—cold butter makes the dough harder to work with and can result in a tough texture. Finally, make sure you’re measuring your flour correctly by spooning it into the measuring cup and leveling it off, rather than scooping directly from the bag which packs in too much flour.
Can I double this recipe for a crowd?
Yes, but I recommend making two separate batches rather than doubling everything in one bowl. Mixing a double batch makes it harder to get even distribution of ingredients, and you might end up with inconsistent results. You can bake both pans at the same time if your oven has space, just make sure there’s enough room for air to circulate around each pan. Rotate the pans halfway through baking for even browning. Two 9×13 pans will give you forty-eight bars, which is perfect for larger gatherings.
What’s the best way to transport these bars to a potluck or party?
Leave them in the baking pan if possible and cover with aluminum foil—this is the easiest method. If you need your pan back, cut the bars and arrange them in a single layer in a shallow container with a lid. Place parchment paper between layers if you need to stack them. Transport them in a cooler if it’s hot outside or if they’ll be sitting in a warm car. I always bring a small sifter and powdered sugar separately to dust them right before serving for that fresh-baked look. They travel surprisingly well compared to more delicate desserts.
My filling bubbled over during baking and made a mess. How do I prevent this?
This happens when there’s too much filling or if it wasn’t thickened enough before baking. Make sure you simmer the filling until it’s noticeably thickened and syrupy, not watery. Don’t skip the cornstarch, and make sure it’s evenly mixed throughout. Also, don’t overfill—the filling layer should be spread evenly but not piled high. If your filling is particularly juicy, add an extra half tablespoon of cornstarch. Placing your baking pan on a rimmed baking sheet catches any spills and makes cleanup easier if it does happen.
These blueberry crumble bars have become one of those recipes I turn to again and again, and I hope they become a favorite in your kitchen too. The combination of buttery crumble, sweet-tart berries, and that perfect shortbread base creates something that feels both homey and special at the same time. Give yourself permission to experiment, make mistakes, and find your own perfect version—that’s what baking is all about.
Ingredients
Equipment
Method
- Mixez le lait, la crème épaisse, le mélange à gâteau red velvet, le cacao en poudre et l'extrait de vanille dans un mixeur pendant 30 à 45 secondes jusqu'à obtenir un mélange lisse.
- Versez le mélange dans un pichet ou un bol et réfrigérez pendant au moins 30 minutes.
- Mélangez le mélange réfrigéré et versez-le avec précaution dans des verres à shooter, les remplissant aux trois quarts.
- Garnissez chaque shooter de crème fouettée et saupoudrez de sucre rouge ou de mini pépites de chocolat.
- Servez immédiatement et profitez-en!