Game day at my house used to mean a frantic dash to the store for bags of chips and store-bought dips. Then one Sunday, I threw together some mini chicken quesadilla bites on a whim. They disappeared in minutes. My brother-in-law actually asked if I’d hired a caterer. That’s when I knew I had stumbled onto something special. These little flavor bombs have since become my secret weapon for every party, movie night, and after-school snack attack.
I’m Sarah, and I’ve spent the last five years perfecting easy recipes that actually taste homemade. Today I’m sharing my go-to recipe for mini chicken quesadilla bites that will make you look like a kitchen genius. You’ll learn exactly how to make them, plus all my sneaky tricks for getting them crispy and delicious every time.
Why make these instead of regular quesadillas? First, they’re portion-controlled. No one fights over who got the bigger slice. Second, they’re perfect for little hands and big parties alike. Third, you can prep them ahead and just pop them in the oven when guests arrive. They work as a quick weeknight dinner, a fancy appetizer, or even a protein-packed snack for hungry kids. Plus, everyone gets that perfect golden edge on every single bite.
Ingredients for Perfect Mini Chicken Quesadilla Bites
Let me walk you through what you’ll need. I’ve tested this recipe dozens of times, and these ingredients create the best flavor and texture combination.
For the filling:
- 2 cups cooked chicken breast, shredded or diced small
- 1½ cups shredded Mexican cheese blend (or use cheddar and Monterey Jack)
- ¼ cup cream cheese, softened to room temperature
- ¼ cup diced bell peppers (I use red for sweetness and color)
- ¼ cup diced red onion
- 2 tablespoons fresh cilantro, chopped
- 1 teaspoon cumin
- 1 teaspoon chili powder
- ½ teaspoon garlic powder
- ½ teaspoon salt
- ¼ teaspoon black pepper
- 1 tablespoon lime juice
For assembly:
- 8 small flour tortillas (6-inch size works best)
- 2 tablespoons butter, melted
- Cooking spray
A quick note about ingredients: quality matters here. I learned this the hard way after making a batch with sad, watery chicken and bland cheese. The result was disappointing at best. Now I always use fresh ingredients, and the difference is night and day.
Step-by-Step Preparation Guide
Making the filling is where the magic happens. This is your chance to build layers of flavor that’ll have everyone asking for your recipe.
Preparing the chicken:
If you’re starting with raw chicken, here’s what I do. Take two medium chicken breasts and season them with a pinch of salt and pepper. You have three cooking options. The easiest is poaching: simmer them in chicken broth for about 15 minutes until they reach 165°F inside. This keeps them super moist. Option two is baking: put them on a sheet pan at 375°F for 25 minutes. Option three is my personal favorite when I’m in a rush: use a rotisserie chicken from the store. No one will judge you, and it actually adds extra flavor.
Once your chicken is cooked and slightly cooled, shred it with two forks or chop it into small pieces. The pieces should be about the size of a pea. Too big and your quesadilla bites won’t hold together well. Too small and you lose that satisfying chicken texture.
Making the filling mixture:
Now comes the fun part. Grab a large mixing bowl. Add your shredded chicken first. Then drop in the softened cream cheese. This ingredient is my secret weapon. It acts like glue, holding everything together while adding a creamy richness that regular quesadillas lack.
Mix the cream cheese and chicken together until well combined. You might need to use your hands here. Don’t be shy about getting in there. Once that’s mixed, add your shredded Mexican cheese blend. The cheese should coat all the chicken pieces.
Next, fold in your diced bell peppers and red onion. I dice mine pretty small, about ¼-inch pieces. This ensures you get a bit of everything in each bite without any ingredient overpowering the others. Fresh vegetables add a slight crunch that contrasts beautifully with the melted cheese and tender chicken.
Sprinkle in your spices: cumin, chili powder, garlic powder, salt, and black pepper. Add the chopped cilantro and squeeze in the lime juice. The lime is important. It brightens everything up and cuts through the richness of the cheese.
Mix everything thoroughly. Taste the mixture at this point. It should be well-seasoned and flavorful even before cooking. If it tastes a bit bland, add more salt or a pinch more cumin. Remember, flavors will mellow slightly when cooked, so the filling should taste bold right now.
Why fresh ingredients matter:
I used to think it didn’t matter much whether I used fresh or old ingredients for recipes like this. Boy, was I wrong. Fresh cilantro versus that dried stuff in a jar? Completely different taste. Fresh bell peppers versus frozen? Night and day in terms of texture and flavor.
The chicken quality especially matters. Organic, free-range chicken has more flavor than the basic stuff. If that’s outside your budget, even just choosing chicken that hasn’t been sitting in your fridge for a week makes a huge difference. Fresh chicken has a sweet, mild flavor that dried-out chicken just can’t match.
The cheese is another place where quality shines through. Pre-shredded cheese is convenient, but it’s coated with cellulose to prevent clumping. This coating can make your cheese less melty and creamy. When I have time, I buy a block of cheese and shred it myself. The extra three minutes of work pays off in a smoother, more flavorful filling.
Even the tortillas matter. Fresh tortillas from the bakery section or a local tortilla shop are softer and more pliable than those shelf-stable ones. They crisp up better in the oven and taste less cardboard-like. If you can only find regular store-bought tortillas, that’s fine. Just check the expiration date and choose the freshest package available.
Your filling is now ready. It should look colorful, smell amazing, and hold together when you scoop it. The cream cheese should have bound everything into a cohesive mixture that’s easy to work with. At this point, you can cover the bowl and refrigerate it for up to 24 hours if you’re prepping ahead. Just bring it back to room temperature before assembling your quesadilla bites, as cold filling is harder to spread.


Assembling the Mini Chicken Quesadilla Bites
With your filling ready and waiting, it’s time for the assembly line. This part is actually kind of therapeutic once you get into a rhythm. I usually put on some music and zone out while I make these. My kids love helping with this step too, though I’ll admit their quesadilla bites don’t always look as neat as mine.
Here’s the thing about assembly: there are a few different approaches you can take. The method I use most often is what I call the pizza-slice method. Lay out one tortilla on a clean cutting board. Spread about three heaping tablespoons of your filling mixture over the entire surface of the tortilla, leaving just a tiny border around the edge. Maybe a quarter-inch rim. That bare edge helps the tortilla seal better when it cooks.
Place another tortilla on top and press down gently but firmly. You want the two tortillas to stick together with the filling acting as the glue. Now comes the cutting part. Using a sharp knife or a pizza cutter, slice the quesadilla into eight triangular pieces, just like you’d cut a pizza. Each wedge becomes one mini quesadilla bite.
Another technique I sometimes use is the circle-cutter method. Instead of making full quesadillas and cutting them into triangles, I use a large biscuit cutter or cookie cutter to cut circles from each tortilla before filling them. Then I place a spoonful of filling on one circle, top with another circle, and press the edges together. This method creates perfectly round bites that look really polished at parties. The downside? You waste some tortilla around the edges. I usually save those scraps and fry them up with cinnamon sugar for a quick snack.
Funny enough, my friend Jessica came up with a third method that’s brilliant for meal prep. She makes full-size quesadillas with the filling, stacks them between sheets of parchment paper, and freezes them. Later, when she needs a quick snack, she pulls one out, lets it thaw for ten minutes, cuts it into mini bites, and cooks them up. The texture is exactly the same as fresh. If you’re big on batch cooking, this approach is a lifesaver.
Now let’s talk about getting an even fill. Nothing’s worse than biting into a quesadilla that’s all cheese on one side and all chicken on the other. The secret is spreading your filling right to the edges. Don’t leave a big pile in the middle and assume it’ll spread out during cooking. It won’t. Use the back of a spoon or a small offset spatula to spread the mixture evenly. I actually bought a small offset spatula specifically for this task after making dozens of lopsided quesadilla bites. Best twelve dollars I ever spent.
Sealing the edges is another key step people often skip. After you place the top tortilla and press down, run your finger around the entire perimeter, applying gentle pressure. This helps the tortillas stick together so they don’t pop open during cooking. If your tortillas seem dry and aren’t sticking well, very lightly dampen the edges with water before pressing. Just a tiny bit of moisture on your fingertip works wonders.
By the way, you can absolutely get creative with your cheese and toppings. The Mexican cheese blend I mentioned earlier is my standard, but I’ve experimented with tons of variations. Sharp cheddar gives you a more pronounced cheese flavor. Pepper jack adds a nice kick of heat. Oaxaca cheese creates these amazing cheese pulls when you bite into them, kind of like what you get with air fryer mozzarella sticks. I’ve even used goat cheese mixed with regular cheese for a tangy twist that adults really love.
For toppings and mix-ins, the possibilities are endless. Diced jalapeños add heat. Black beans boost the protein and add heartiness. Corn kernels bring sweetness and texture. Diced tomatoes work great, though you’ll want to drain them really well so they don’t make your quesadillas soggy. Chopped green chiles from a can are one of my favorite additions. They add flavor without too much heat. If you like spicy food, you might enjoy adding some of the same bold flavors I use in my cheesy jalapeño popper bites.
Some people like adding a thin layer of refried beans under the cheese. Others swirl in some salsa, though again, watch the liquid content. Cooked bacon bits are always a hit. Sautéed mushrooms work for people who want to add vegetables. Just remember that whatever you add needs to be fully cooked already, since these quesadilla bites cook quickly and won’t have time to cook raw ingredients.
One last assembly tip: work in batches and keep everything organized. I usually assemble all my quesadilla bites before I start cooking any of them. This way I’m not rushing to put together the next one while something’s burning on the stove. I lay them out on a large baking sheet lined with parchment paper, and they’re ready to cook whenever I am.
Cooking Techniques for Crispy Quesadilla Bites
Alright, so your mini chicken quesadilla bites are assembled and looking good. Now we need to cook them. I’ve tried pretty much every method possible, and each one has its pros and cons. Let me walk you through what works and what doesn’t.
Pan-frying was actually the first method I tried, mostly because I didn’t plan ahead and needed something fast. Heat a large non-stick skillet or griddle over medium heat. Add about half a tablespoon of butter or a light coating of cooking spray. Once it’s hot, place your quesadilla bites in the pan, making sure they don’t touch each other. Cook for about two to three minutes on the first side. You’re looking for a deep golden-brown color with some darker spots.
Flip them carefully with a spatula and cook another two to three minutes on the other side. The cheese should be melted and starting to ooze out slightly at the edges. That’s your sign they’re done. The biggest advantage of pan-frying is the texture. You get this incredible crispy exterior that shatters when you bite into it. The butter adds richness that’s hard to beat.
The downside? You can only cook about six to eight bites at a time, depending on your pan size. If you’re making these for a party, you’ll be standing at the stove for a while. Also, they require your full attention. Turn away to answer the door and you’ll have burnt quesadillas. Not that I’m speaking from experience or anything.
Baking is my go-to method for parties or when I’m making a large batch. Preheat your oven to 400°F. Line a large baking sheet with parchment paper or use a silicone baking mat. The silicone mat works better in my experience because the quesadillas don’t stick at all. Arrange your quesadilla bites on the baking sheet in a single layer, leaving a bit of space between each one.
Brush the tops lightly with melted butter. This step is crucial for getting them golden and crispy. Without it, they’ll cook through but stay kind of pale and soft. Pop the baking sheet into the oven and bake for about ten minutes. Then pull them out, flip each bite over, brush the other side with more melted butter, and bake for another eight to ten minutes.
The advantage here is capacity. I can fit about twenty-four bites on one large sheet pan, and I often use two sheet pans at once. You can basically make enough for a whole party in twenty minutes. The texture isn’t quite as crispy as pan-fried, but it’s still really good. Plus, you can walk away and do other things while they cook. Similar to how I bake my baked parmesan zucchini chips, the oven method gives you more freedom to multitask.
Now let’s talk about air frying, which has become my personal favorite method lately. If you have an air fryer, this is the way to go. Preheat your air fryer to 375°F. Lightly spray the basket with cooking spray to prevent sticking. Arrange the quesadilla bites in a single layer in the basket. Don’t overcrowd them. Air fryers work by circulating hot air, and they need space to do their thing.
Lightly spray the tops of the quesadilla bites with cooking spray or brush them with a tiny bit of melted butter. Cook for five minutes, then carefully flip each bite and spray or brush the other side. Cook for another four to five minutes until they’re golden brown and crispy.
The air fryer gives you the best of both worlds. You get that crispy, almost fried texture without standing over a hot stove. The cooking time is shorter than baking. The texture is better than oven-baking but nearly as good as pan-frying. The only real downside is batch size. Most air fryers can only fit about eight to twelve bites at a time, so you’ll still need to work in batches for a crowd.
Here’s a quick temperature and timing cheat sheet. For pan-frying: medium heat, two to three minutes per side. For baking: 400°F, ten minutes, flip, then eight to ten more minutes. For air frying: 375°F, five minutes, flip, then four to five more minutes. These times assume your quesadilla bites are about two to three inches across. If yours are larger or smaller, adjust accordingly.
Which method should you choose? If you’re making these for just yourself or your family, pan-frying gives you the best texture with minimal hassle. If you’re feeding a crowd, baking is your friend. If you want something fast with great texture and you’re okay working in batches, the air fryer wins. I honestly rotate between all three methods depending on my mood and how many people I’m feeding.
One more tip regardless of which method you choose: don’t stack your cooked quesadilla bites while they’re still hot. The steam will make them soggy. Instead, transfer them to a wire cooling rack set over a baking sheet. This allows air to circulate around them and keeps them crispy. If you need to keep them warm while you finish cooking the rest, set your oven to its lowest temperature, around 200°F, and keep them on that wire rack in the warm oven. They’ll stay hot and crispy for at least thirty minutes this way.
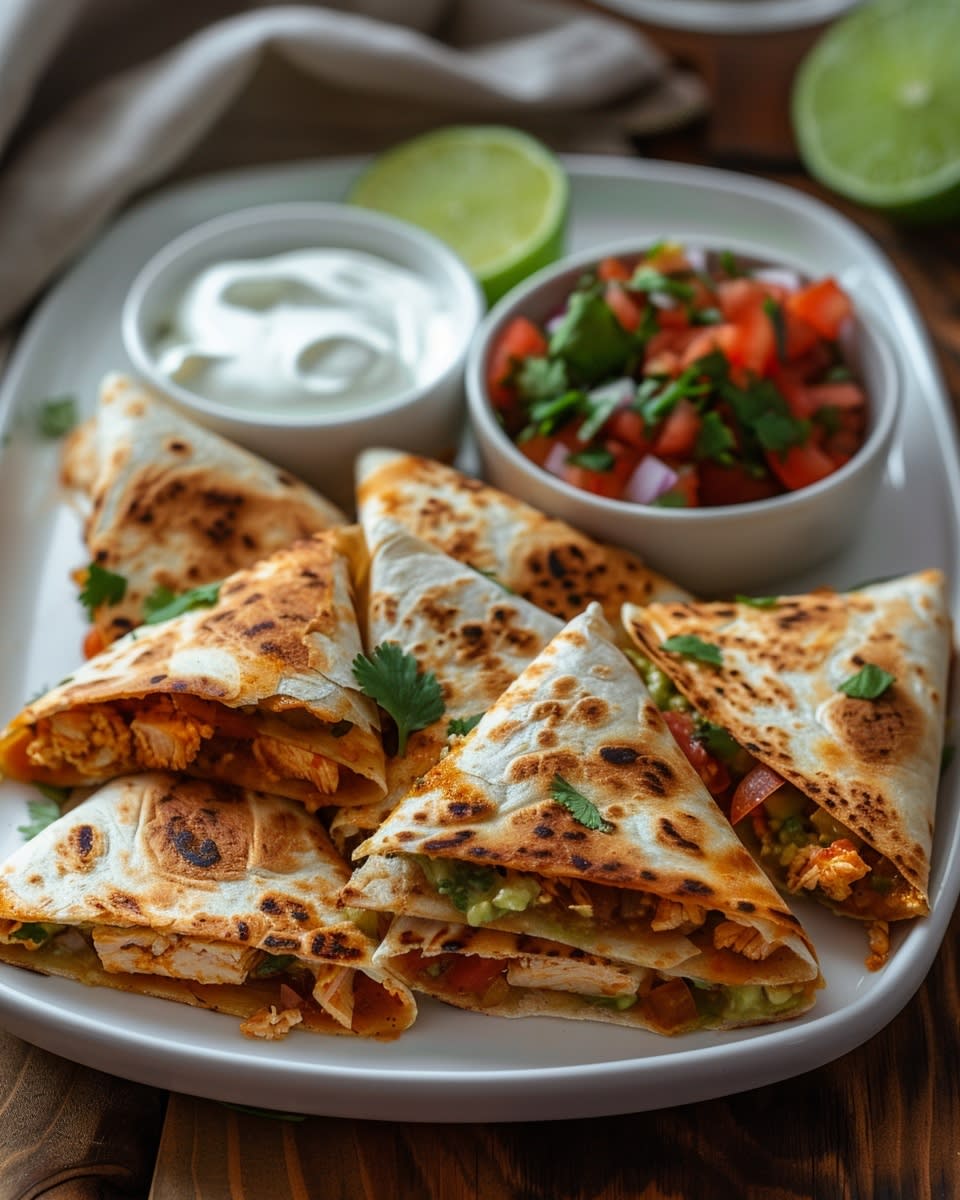
Serve these beauties with your favorite dips. Sour cream is classic. Guacamole is always a winner. Salsa adds freshness. I love pairing them with a chunky avocado salsa that has tomatoes and cilantro in it. The cool, fresh salsa contrasts perfectly with the warm, crispy quesadillas.


Serving Suggestions for Mini Chicken Quesadilla Bites
Let’s talk about the fun part: how you actually get these little guys onto the table in a way that makes people’s eyes light up. Presentation matters more than you might think. I learned this after watching my nephew walk past a plate of quesadilla bites I’d just dumped on a paper plate. Ten minutes later, I rearranged them on a nice platter with some colorful dips, and suddenly he was all over them. Same food, different reaction.
My favorite way to serve these is on a large wooden cutting board or slate platter. I arrange the quesadilla bites in a circular pattern, kind of like flower petals, with small bowls of different dips in the center. It looks impressive but takes literally two minutes to set up. The contrast of the golden quesadillas against a dark board makes them look almost restaurant-quality.
Speaking of dips, variety is your friend here. I always put out at least three options. Sour cream is the safe choice that everyone loves. I usually mix mine with a squeeze of lime juice and a pinch of cumin to make it a bit more interesting than plain sour cream. Guacamole is always a hit. If you’re making it from scratch, keep it chunky rather than smooth. The texture variation is nice.
Salsa is where you can really have fun. A fresh pico de gallo with tomatoes, onions, cilantro, and lime juice adds brightness and acidity that cuts through the richness of the cheese. A smoky chipotle salsa brings heat and depth. Mango salsa is my secret weapon when I want to impress people. The sweetness of the mango against the savory quesadilla creates this amazing contrast that people always comment on.
Beyond the usual suspects, I’ve found some unexpected dips that work beautifully. Ranch dressing might sound basic, but it’s legitimately delicious with these. A cilantro-lime crema made with sour cream, fresh cilantro, lime juice, and a bit of garlic is incredible. Greek yogurt mixed with taco seasoning gives you a healthier option that still tastes indulgent. Even a simple hot sauce for people who like things spicy works great.
Garnishes make a bigger difference than you’d think. A sprinkle of fresh cilantro over the top adds color and freshness. Thinly sliced jalapeños give you visual pop and let people know there’s some heat involved. A light dusting of cotija cheese or queso fresco adds an authentic touch. Lime wedges arranged around the platter serve double duty as decoration and as something people can squeeze over their bites for extra zing.
Here’s something I started doing that people love: I make a little assembly station. Instead of pre-made bites with dips on the side, I set out the cooked quesadilla bites alongside bowls of toppings like diced tomatoes, sliced avocado, shredded lettuce, pickled jalapeños, and different salsas. People can build their own perfect bite. It’s interactive, fun, and means everyone gets exactly what they want.
For parties, these mini chicken quesadilla bites are absolute gold. They’re the perfect finger food because they’re not messy, they’re easy to grab, and they’re substantial enough that people actually feel satisfied. I’ve served them at birthday parties, holiday gatherings, Super Bowl parties, and backyard barbecues. They always disappear fast.
Game nights are probably where these shine the brightest. There’s something about having good snack food that makes watching sports more enjoyable. These are way better than chips and store-bought dip, but they’re still casual enough that they don’t feel out of place. Plus, you can make them ahead and just keep them warm in the oven while everyone’s watching the game.
After-school snacks are another perfect occasion for these. My kids come home starving, and these give them protein, vegetables, and enough calories to hold them over until dinner. I usually have a batch in the freezer that I can just pop in the air fryer when they walk in the door. Add a handful of baby carrots and some fruit on the side, and it’s actually a pretty balanced snack.
Lunch boxes are surprisingly great for these, by the way. They’re compact, they don’t require reheating to be good, and kids love them. I pack them with some cherry tomatoes, cucumber slices, and a small container of sour cream for dipping. They hold up well for several hours at room temperature, though I do include a small ice pack in the lunch box to be safe.
Movie nights at home have been transformed since I started making these. Instead of ordering expensive takeout or eating popcorn for dinner, we have quesadilla bites with a bunch of dips and toppings. It feels special and indulgent but doesn’t break the bank. Everyone can eat with their hands while focusing on the screen, which is kind of the whole point of movie night food.
Brunch is an unexpected time to serve these, but trust me on this one. I made them for a weekend brunch gathering once when I was out of ideas, and people went crazy for them. Pair them with some scrambled eggs, fresh fruit, and maybe some breakfast potatoes, and you’ve got a complete spread. They’re more interesting than the usual breakfast casserole everyone makes.
Here’s the thing about presentation that took me way too long to figure out: temperature matters. Serve these warm, not hot and not cold. If they’re too hot, people burn their mouths and can’t taste anything. If they’re cold, the cheese gets hard and they lose their appeal. The sweet spot is warm where the cheese is still soft and melty but the exterior has cooled enough to handle.
Color is another element that elevates your presentation. The quesadilla bites themselves are pretty monochromatic, mostly golden brown. That’s why adding colorful elements around them makes such a difference. Red salsa, green guacamole, white sour cream, and bright garnishes create a visually appealing spread that draws people in.
If you’re going for a more formal presentation, consider individual servings. I’ve plated these at small dinner parties by putting three or four bites on a small appetizer plate with a small spoonful of guacamole, a dollop of sour cream, and a lime wedge. Garnish with a sprig of cilantro, and suddenly your casual quesadilla bites look like something from a tapas restaurant.
Skewers are another fun presentation idea, especially for parties where people are standing and mingling. Thread two or three quesadilla bites onto a small wooden skewer, alternating with cherry tomatoes or chunks of avocado. Stand them upright in a small vase or jar filled with dried beans for stability. It looks creative and makes the bites even easier to grab.
For kids’ parties specifically, I sometimes cut the quesadilla bites into fun shapes using cookie cutters before cooking. Stars, hearts, or dinosaurs depending on the party theme. Yes, you waste some tortilla this way, but the kids absolutely love it. Sometimes presentation that speaks to your audience is worth the extra effort.
One more serving idea that’s worked really well for me: the quesadilla bite bar. Similar to a taco bar, you set up a station with the cooked bites and then bowls of every topping you can think of. Let people build their own perfect bite. Include options like black beans, corn, different types of salsa, various cheeses, jalapeños, sour cream, guacamole, shredded lettuce, diced tomatoes, and hot sauce. It’s interactive and ensures everyone’s happy. If you’re looking for more creative ways to present finger foods and snacks at your next gathering, you might want to browse through other appetizer recipes and snack ideas that work well for parties and casual get-togethers.
Don’t be afraid to get creative with your serving styles. I’ve seen people serve these in small paper boats like you’d get at a food truck. I’ve seen them stacked vertically on small stands. I’ve seen them arranged to spell out words for birthday parties. The food is delicious enough to stand on its own, but a little creativity in presentation can turn a good dish into a memorable one.
The beauty of these mini chicken quesadilla bites is their versatility. They work for casual Tuesday night dinners and fancy cocktail parties. They’re appropriate for kids’ gatherings and adult events. They can be dressed up or kept simple. That flexibility is exactly what makes them such a valuable recipe to have in your back pocket.
So go ahead and experiment with how you serve these. Try different dips, different garnishes, different plating styles. The recipe itself is solid and reliable, which gives you freedom to play around with presentation and accompaniments. Make them your own. Add your personal touch. That’s when cooking stops being just following instructions and becomes something creative and fun.
These mini chicken quesadilla bites have honestly changed how I approach entertaining and even everyday meals. They’re easy enough to make on a whim but impressive enough to serve to guests. Give this recipe a try, and I bet they’ll become a regular in your rotation too.
Frequently Asked Questions
How do I store leftover mini chicken quesadilla bites?
Let them cool completely, then place them in an airtight container with sheets of parchment paper between layers to prevent sticking. They’ll keep in the refrigerator for up to three days. To reheat, I recommend using your oven at 350°F for about eight minutes or popping them in the air fryer for three to four minutes. The microwave works in a pinch but makes them a bit soggy. Honestly though, these rarely last long enough in my house to worry about storage.
Can I freeze mini chicken quesadilla bites?
Absolutely, and they freeze beautifully. You can freeze them either before or after cooking. For uncooked bites, assemble them completely, arrange on a baking sheet, freeze until solid, then transfer to a freezer bag. They’ll keep for up to three months. Cook them straight from frozen, adding a few extra minutes to your usual cooking time. For cooked bites, let them cool completely, freeze on a baking sheet, then store in freezer bags. Reheat from frozen at 350°F for about twelve minutes.
Can I use leftover cooked chicken for this recipe?
Yes, this is actually my preferred method most of the time. Leftover rotisserie chicken, grilled chicken from last night’s dinner, or even that plain baked chicken breast sitting in your fridge all work perfectly. Just shred or chop it small and mix it into your filling. The chicken is already seasoned from its original preparation, which often adds extra flavor. I’ve even used leftover chicken from takeout, and no one could tell the difference. It’s a great way to reduce food waste while making something delicious.
What are some vegetarian alternatives to chicken for this recipe?
You have tons of options here. Black beans or pinto beans work great and add protein and fiber. Sautéed mushrooms give you a meaty texture without actual meat. Roasted sweet potato chunks are surprisingly delicious and add natural sweetness. Seasoned cauliflower crumbles can mimic the texture of ground meat. I’ve also made these with just extra vegetables like bell peppers, onions, corn, and spinach. Another option is using plant-based chicken substitutes, which are getting better all the time. Whatever you choose, just make sure it’s well-seasoned since you’re losing the flavor that chicken brings.
How can I make the mini chicken quesadilla bites spicier?
There are several ways to add heat. Mix in diced jalapeños or serrano peppers to your filling. Add a teaspoon of cayenne pepper or crushed red pepper flakes to the seasoning mix. Use pepper jack cheese instead of regular Mexican blend. Stir in some hot sauce or chipotle peppers in adobo sauce to the filling mixture. Honestly, my favorite method is adding diced jalapeños because you get both heat and texture. Start with a small amount and taste your filling before assembling, then adjust from there based on your heat tolerance.
Are there any gluten-free options for the tortillas?
Yes, gluten-free tortillas work perfectly fine in this recipe. Most grocery stores now carry several brands of gluten-free flour tortillas made from corn, rice, or almond flour. Corn tortillas are naturally gluten-free and actually pretty traditional for quesadillas. They’re a bit more delicate to work with and tend to crack if they’re cold, so warm them slightly first. The texture is different from flour tortillas but still delicious. I’ve also seen people use large gluten-free wraps with good success.
Can I make these with corn tortillas instead of flour?
You definitely can, though there are a few adjustments to keep in mind. Corn tortillas are smaller and more fragile than flour ones. Warm them first by wrapping in a damp paper towel and microwaving for twenty seconds, or heating briefly in a dry skillet. This makes them pliable and less likely to crack. Use less filling than you would with flour tortillas since corn tortillas can’t hold as much. The flavor is more authentic and slightly sweet, which many people prefer. They crisp up beautifully when cooked and are naturally gluten-free.
How far in advance can I prepare these before cooking?
You can assemble the filling mixture up to twenty-four hours ahead and keep it refrigerated. The assembled but uncooked quesadilla bites can be made up to four hours in advance. Arrange them on a baking sheet, cover tightly with plastic wrap, and refrigerate until you’re ready to cook. Beyond four hours, the tortillas start absorbing moisture from the filling and can get soggy. If you need more advance prep time, I’d suggest freezing them instead. That way you can make them days or even weeks ahead without any quality loss.
What’s the best way to reheat these without making them soggy?
The air fryer is hands-down the best reheating method. Three to four minutes at 350°F brings them back to crispy perfection. The oven works well too, especially for larger batches. Arrange them on a wire rack set over a baking sheet and heat at 350°F for about eight to ten minutes. The wire rack allows air circulation underneath, preventing sogginess. Avoid the microwave if possible, as it steams the quesadillas and makes them soft and rubbery. If you must use the microwave, place a paper towel underneath to absorb moisture and heat in short fifteen-second bursts.
Can I make a large batch and meal prep these for the week?
Absolutely, and I do this regularly. Cook a double or triple batch, let them cool completely, then portion them into meal prep containers. Store in the fridge for up to four days or freeze for longer storage. They’re perfect for quick lunches or snacks throughout the week. I usually pack them with some baby carrots, cherry tomatoes, and a small container of dip. Just grab a container on your way out the door and you’ve got a satisfying meal ready to go. They’re filling enough to keep you satisfied but not so heavy that you feel sluggish afterward.
Ingredients
Equipment
Method
- Si vous utilisez du poulet cru, assaisonnez deux poitrines de poulet de taille moyenne avec du sel et du poivre et faites-les cuire en les pochants, en les cuisant au four ou en utilisant du poulet rôti.
- Une fois cuit, effilochez le poulet en petits morceaux.
- Dans un grand bol, mélangez le poulet effiloché et le fromage à la crème ramolli jusqu'à ce qu'ils soient bien mélangés.
- Ajoutez le fromage râpé au mélange de poulet.
- Incorporez les poivrons en dés et l'oignon rouge au mélange.
- Ajoutez le cumin, la poudre de chili, la poudre d'ail, le sel et le poivre noir.
- Ajoutez la coriandre hachée et le jus de lime; mélangez bien et ajustez l'assaisonnement si nécessaire.
- Pour l'assemblage, placez une tortilla sur une planche à découper et étalez trois cuillères à soupe de garniture dessus, en laissant une petite bordure autour du bord.
- Ajoutez une autre tortilla par-dessus et appuyez doucement pour les faire adhérer.
- Coupez la quesadilla en huit morceaux triangulaires à l'aide d'un couteau ou d'une roulette à pizza.
- Optionnellement, utilisez un emporte-pièce pour de petites bouchées de quesadilla circulaires.
- Scellez les bords des tortillas en appuyant et en humidifiant avec de l'eau si nécessaire.
- Cuisinez selon votre méthode préférée (poêler, cuire au four ou friteuse à air) jusqu'à ce qu'elles soient dorées et croustillantes.