Last weekend, I watched a plate of sliders disappear in about five minutes flat at my neighbor’s backyard cookout. Everyone gathered around the table, and those little burgers vanished faster than I could grab a second one. That’s when I knew I had to master the art of making BBQ bacon cheeseburger sliders at home.
These bite-sized beauties pack all the flavor of a full-sized burger into a perfect little package. They’re easy to eat while standing around chatting with friends. No awkward napkin juggling or sauce dripping down your chin. Just pure, delicious burger goodness in two or three bites.
I’ve been making sliders for years now, and they never fail to impress. Whether you’re hosting a Super Bowl party, planning a graduation celebration, or just having friends over for a casual weekend hangout, BBQ bacon cheeseburger sliders hit the spot every single time. They feed a crowd without breaking the bank, and you can prep most of the work ahead of time.
Today I’m sharing my go-to recipe along with the tricks I’ve learned through plenty of trial and error. Trust me, after making these a few dozen times, I’ve figured out what works and what doesn’t. You’ll walk away knowing exactly how to create sliders that’ll have your guests asking for the recipe.
What Are BBQ Bacon Cheeseburger Sliders?
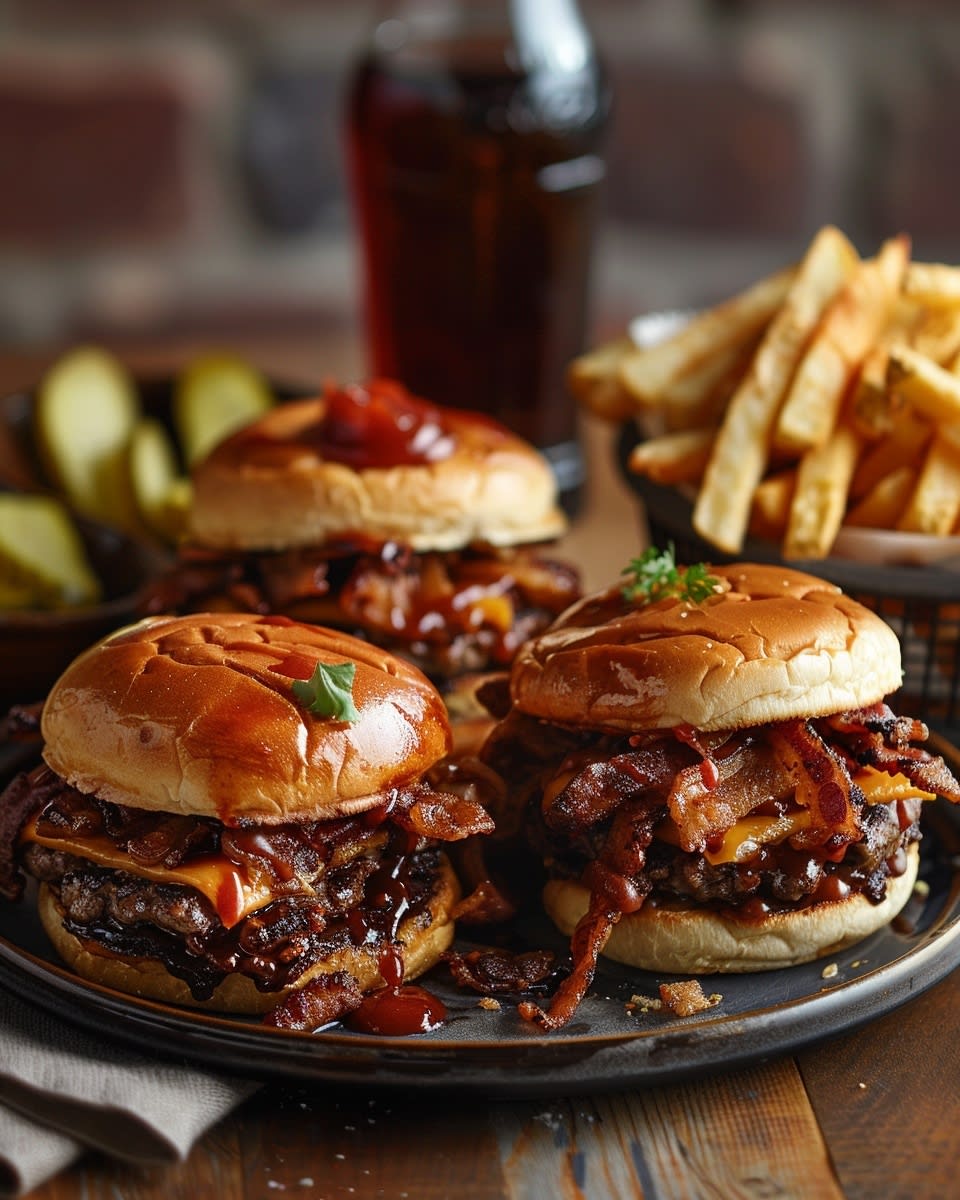
Let me break this down for anyone new to the slider game. BBQ bacon cheeseburger sliders are basically miniature hamburgers loaded with crispy bacon, melted cheese, and tangy BBQ sauce. They’re built on small buns, usually about two to three inches across.
The magic happens when you combine classic burger ingredients with that sweet and smoky BBQ flavor. You get seasoned beef patties topped with cheddar or American cheese, crispy bacon strips, and a generous drizzle of your favorite BBQ sauce. Some people add pickles, onions, or other toppings too.
Now you might wonder how sliders differ from regular cheeseburgers. Size is the obvious difference, but it goes beyond that. Regular burgers are individual meals that require both hands and your full attention. Sliders are social food. You can hold one in one hand while your other hand holds a drink or a plate of chips.
The smaller size also means you can eat two or three without feeling overly stuffed. Your guests can try different varieties if you make a few batches with different toppings. Plus, the ratio of bun to meat to toppings just tastes better in slider form. Every bite gets a perfect balance of all the flavors.
The real genius of bacon cheeseburger sliders shows up when you’re feeding a group. You can make a dozen sliders in the same time it takes to cook four regular burgers. Everyone gets their food hot and fresh at the same time. No one sits around waiting while others eat.
I particularly love using Hawaiian rolls for bacon cheeseburger sliders. Those soft, slightly sweet rolls add something special to the whole experience. The sweetness plays off the savory beef and salty bacon in the best way possible. Regular hamburger buns work fine, but Hawaiian rolls take things up a notch.
King’s Hawaiian makes the most popular sweet rolls, and you’ll find them in any grocery store. They come connected in a pack of twelve, which makes assembly super easy. You can slice the whole sheet of rolls in half horizontally, build all your sliders at once, and bake them together. This method saves tons of time compared to making individual burgers.
The convenience factor makes sliders perfect for parties. You can season and form the meat patties the night before. Cook the bacon ahead of time and store it in the fridge. Slice your rolls and have your cheese ready to go. When party time arrives, you just cook the patties, assemble everything, and pop the whole pan in the oven for a few minutes to melt the cheese.
I’ve also seen people make bacon cheeseburger sliders on pretzel buns, which adds a nice salty twist. The chewy pretzel texture contrasts beautifully with the tender beef. If you go this route, look for pretzel slider buns at bakeries or specialty grocery stores. They’re not as common as Hawaiian rolls, but they’re worth tracking down if you want to try something different.
Another approach is the bacon cheeseburger slider bake method. Instead of forming individual patties, you press seasoned ground beef into a baking pan, cook it as one large patty, then cut it to fit your rolls. This technique works great when you’re making sliders for a big crowd. Less hands-on cooking time and less chance of overcooking some patties while others are still raw.
The bake method also keeps everything juicy. When you cook meat in a pan with sides, the juices stay with the meat instead of dripping through your grill grates. You end up with more flavorful, moist sliders that don’t dry out.
Kids absolutely love sliders too. The small size feels less overwhelming than a huge burger. Picky eaters can skip toppings they don’t like without feeling like they’re missing out on much food. I’ve watched kids who normally avoid burgers happily munch on two or three sliders.
The versatility of a bacon cheeseburger sliders recipe means you can adjust it to match your crowd. Making them for adults who love heat? Add jalapeños and pepper jack cheese. Feeding a mix of kids and adults? Keep some plain and load up others with all the fixings. Everyone stays happy.
You can prep sliders in stages throughout the day, which reduces stress when you’re hosting. Cook the bacon in the morning. Form your patties after lunch. Set up your assembly station an hour before guests arrive. Then you’re just cooking meat and putting everything together when it’s time to eat.
The presentation factor shouldn’t be ignored either. A big platter of sliders looks impressive and inviting. They photograph well for social media if that’s your thing. More importantly, they signal to your guests that you put thought and effort into the food without spending all day in the kitchen.
I think the best part about BBQ bacon cheeseburger sliders is how they bring people together. Everyone reaches for the same platter, serves themselves, and naturally starts talking. The casual, shareable nature of sliders creates a relaxed atmosphere that formal plated meals just can’t match.


How to Make the Perfect BBQ Bacon Cheeseburger Sliders
Now that you understand why these little burgers are so amazing, let’s get into the kitchen and actually make them. I’m going to walk you through my tried-and-true bacon cheeseburger sliders recipe that’s never let me down.
First, let’s talk about what you’ll need. For twelve sliders, grab one and a half pounds of ground beef. I prefer 80/20 ground chuck because the fat keeps everything juicy and flavorful. You’ll also need twelve strips of bacon, twelve slices of cheddar cheese, one package of Hawaiian rolls, about half a cup of your favorite BBQ sauce, and basic seasonings like salt, pepper, garlic powder, and onion powder. Some butter for toasting the buns makes a difference too.
Start with the bacon because it takes the longest and you can do other things while it cooks. I lay my bacon strips on a foil-lined baking sheet and pop them in a 400-degree oven for about fifteen to twenty minutes. Oven bacon cooks more evenly than stovetop, plus you’re not standing there dodging grease splatters. Once it’s crispy, set it on paper towels to drain. You can do this step hours ahead or even the day before.
While the bacon cooks, season your ground beef. Here’s where I see people make their first mistake. Don’t oversalt the meat before forming patties. The salt draws out moisture and makes the patties tough. Instead, put your beef in a bowl and add about a teaspoon each of garlic powder and onion powder, plus a generous amount of black pepper. Mix gently with your hands until just combined.
Forming the patties requires a light touch. Divide your seasoned beef into twelve equal portions, roughly two ounces each. Roll each portion into a ball, then gently press it into a patty about the same diameter as your slider buns. Make a small dimple in the center of each patty with your thumb. This prevents the patties from puffing up into little meatballs when they cook. Trust me on this one. I learned it the hard way after making dome-shaped sliders that rolled right off the buns.
Season the outside of each patty with salt right before cooking. This is the right time for salt. It forms a nice crust without messing with the texture inside. Heat a large skillet or griddle over medium-high heat. You want it hot enough that a drop of water sizzles immediately.
Cook the patties for about three minutes per side for medium doneness. Don’t press down on them with your spatula! I know it’s tempting, but pressing squeezes out all those delicious juices. Just let them cook undisturbed. Flip once, cook the other side, then remove them to a plate.
Here’s a trick I picked up from a diner cook in my hometown. After flipping the patties, add a tablespoon of water to the pan and immediately cover it with a lid. The steam melts the cheese perfectly in about thirty seconds. Way easier than trying to melt cheese on patties in the open air.
Now for assembly, which is honestly my favorite part. Slice your entire pack of Hawaiian rolls in half horizontally while they’re still connected. You end up with a top sheet and a bottom sheet of twelve rolls. Place the bottom sheet in a 9×13 baking dish. Brush the cut side with melted butter and toast them under the broiler for about two minutes until golden.
Layer your cooked patties on the toasted bottom buns. Add the cheese-covered patties first, then break each bacon strip in half and lay two halves on each slider. Drizzle BBQ sauce over everything. How much sauce depends on personal preference, but I use about a tablespoon per slider. Similar to how I balance flavors in my smoked BBQ pulled pork sandwich, you want enough sauce to taste it in every bite without making things soggy.
Place the top sheet of rolls over everything. Brush the tops with more melted butter and sprinkle with sesame seeds if you’re feeling fancy. Cover the whole pan with foil and bake at 350 degrees for ten minutes. This melds all the flavors together and gets everything warm and melty.
The texture should be soft and yielding when you bite in, with that slight resistance from the toasted bottom bun. If your sliders come out dry, you either overcooked the beef or didn’t use enough sauce. Add more next time. Better to have extra sauce on the side than sliders that taste like cardboard.
Flavor-wise, you’re looking for balance. The sweet rolls, savory beef, salty bacon, tangy BBQ sauce, and rich cheese should all play together nicely. If one element overpowers the others, adjust your ratios. Maybe use less bacon or a milder BBQ sauce. The beauty of this bbq bacon cheeseburger sliders recipe is that you can tweak it until it matches your taste perfectly.
Variations and Creative Twists
Once you’ve mastered the basic recipe, it’s time to get creative. I’ve experimented with dozens of variations over the years, and some have become regular requests at my gatherings.
The bacon cheeseburger sliders on pretzel bun version adds a whole different dimension. The salty, chewy pretzel buns pair incredibly well with sharp cheddar and spicy brown mustard instead of BBQ sauce. I actually discovered this combo by accident when my grocery store was out of Hawaiian rolls. Sometimes the best recipes come from improvisation. The pretzel version feels more sophisticated, perfect for when you want to impress without seeming like you’re trying too hard.
Funny enough, my brother-in-law won’t eat sliders any other way now. He claims the pretzel buns have better structural integrity, which is just his engineering brain overthinking food. But he’s not wrong. The denser pretzel dough does hold up better to juicy patties and lots of toppings.
Speaking of toppings, let’s talk about getting adventurous. Caramelized onions transform these sliders into something restaurant-worthy. Cook thinly sliced onions low and slow in butter for about thirty minutes until they’re golden brown and sweet. The process reminds me of building layers of flavor like I do with grilled steak with chimichurri sauce, where each component adds depth.
Jalapeños and pepper jack cheese create a spicy version that disappears even faster than the original. I slice fresh jalapeños thin and layer them right on top of the patties. The heat level stays manageable for most people, but it adds enough kick to keep things interesting.
For a Southern twist, try adding pimento cheese instead of regular cheddar. Spread it on the buns before adding the patties. The creamy, slightly spicy pimento cheese melts into all the nooks and crannies. My friend from Georgia introduced me to this variation, and now I make it whenever she visits.
The bacon cheeseburger slider bake method works great when you’re feeding twenty or more people. Press your seasoned ground beef into a greased 9×13 pan, making sure it’s evenly distributed and reaches all the corners. Bake it at 400 degrees for about twenty minutes until cooked through. Let it rest for five minutes, then use a sharp knife to cut it into twelve equal rectangles that match your bun size.
This approach saves considerable time and effort. No standing over a hot stove flipping individual patties. The meat cooks evenly, and you can prep other dishes while it’s in the oven. The technique works especially well for outdoor parties when your stovetop space is limited. Much like how I streamline cooking smoky BBQ chicken drumsticks for a crowd, efficiency matters when you’re feeding a bunch of hungry people.
Another fun variation swaps BBQ sauce for a special sauce made from mayo, ketchup, relish, and a dash of hot sauce. It tastes like a famous fast-food burger sauce but better because you made it yourself. Mix equal parts mayo and ketchup with about a tablespoon of sweet pickle relish and a few dashes of your preferred hot sauce.
Blue cheese lovers should try crumbling blue cheese over the patties instead of using sliced cheddar. Add some arugula for peppery bite and a balsamic glaze for sweetness. Suddenly your casual sliders become upscale party food. I served these at a holiday party last year, and three different people asked if I’d catered.
For a breakfast-inspired version, add a fried egg to each slider. Cook the eggs in a muffin tin to get perfectly round shapes that fit the buns. This turns sliders into brunch food that’s way more exciting than another frittata.
Kids often prefer simpler versions with just cheese and ketchup. Make half the batch plain for the little ones and load up the other half with everything for the adults. Everyone stays happy, and you’re not making two completely different meals.
The option to customize individual sliders makes them perfect for accommodating dietary restrictions too. Use turkey or chicken instead of beef for people who don’t eat red meat. The cooking method stays the same, though you’ll want to be extra careful not to overcook poultry. Just like when I’m preparing grilled honey garlic chicken skewers, timing matters more with leaner proteins.
Vegetarian guests can enjoy portobello mushroom caps marinated in balsamic vinegar and grilled until tender. They fit perfectly on slider buns and satisfy even committed carnivores. My cousin became vegetarian two years ago, and I’ve gotten pretty good at making veggie versions of classic recipes that don’t feel like compromises.


Serving and Pairing Suggestions for Your BBQ Bacon Cheeseburger Sliders
Here’s the thing about serving sliders at a party. Presentation matters almost as much as taste. I learned this the hard way when I just dumped a pile of sliders on a regular dinner plate at my first big gathering. They looked sad and uninviting, even though they tasted amazing. Now I know better.
The best way to present BBQ bacon cheeseburger sliders is on a large wooden cutting board or a rectangular platter. Arrange them in neat rows with the cut sides facing up so guests can see all those beautiful layers of bacon, cheese, and BBQ sauce. If you’ve got fresh parsley or cilantro hanging around, tuck a few sprigs between the sliders. That pop of green makes everything look more intentional and appetizing.
I also keep the sliders in their connected sheet until right before serving. Slice them apart at the last minute so they stay warm and the cheese stays melty. Nobody wants to bite into a slider with cold, congealed cheese. When you cut them apart, use a sharp serrated knife and a gentle sawing motion. Pressing down with a dull knife squishes everything and makes your beautiful sliders look messy.
Temperature control becomes crucial when you’re hosting. One trick I picked up from my aunt who caters on the side is using a warming tray. You can buy one for about thirty bucks, and it keeps food at the perfect serving temperature for hours. Place your platter of sliders on the warming tray, and they’ll stay hot without drying out or getting soggy.
If you don’t have a warming tray, keep assembled sliders in a covered pan in a 200-degree oven until serving time. They’ll stay warm for up to an hour without overcooking. Just make sure to cover them loosely with foil so they don’t dry out. I’ve also used my slow cooker on the warm setting with decent results, though you need to be careful not to let them sit too long or the buns get mushy.
By the way, setting up a slider bar is probably the most fun way to serve these at a casual party. Cook your beef patties and bacon ahead of time, then let guests build their own sliders. Set out different cheeses, various BBQ sauces, pickles, onions, lettuce, tomatoes, and any other toppings you can think of. People love customizing their food, and it takes pressure off you to guess what everyone wants.
For a slider bar, I arrange everything in small bowls or on divided serving trays. Those compartmentalized chip and dip platters work perfectly. Label each topping with little chalkboard signs if you’re feeling fancy. Last summer I hosted a backyard party with a slider bar, and it became the main entertainment. Everyone got creative with their combinations and compared results.
Now let’s talk about what to serve alongside your sliders. The sides can make or break the whole meal. Classic potato chips are the easy choice, but they’re boring. Instead, try homemade sweet potato fries. Cut sweet potatoes into thin strips, toss them with olive oil and sea salt, and bake at 425 degrees for about twenty-five minutes, flipping halfway through. They’re naturally sweet and pair beautifully with the savory sliders.
Coleslaw is another winner. The cool, crunchy texture contrasts nicely with the warm, soft sliders. I make mine with a vinegar-based dressing rather than mayo-heavy because it feels lighter and more refreshing. Shred cabbage and carrots, then toss with a mixture of apple cider vinegar, a touch of sugar, salt, pepper, and celery seeds. Let it sit for at least thirty minutes before serving so the flavors meld.
Baked beans round out the classic BBQ spread perfectly. I’m not above using canned beans as a base and doctoring them up with extra brown sugar, diced bacon, and a splash of bourbon. Simmer everything together for twenty minutes, and suddenly store-bought beans taste homemade. Nobody needs to know your secret unless you want to share it.
Pasta salad works well for feeding a crowd because you can make a huge batch ahead of time. My go-to version has rotini pasta, cherry tomatoes, cucumber, red onion, and a tangy Italian dressing. It sits well at room temperature and actually tastes better after the flavors have time to blend. I make it the morning of the party and don’t think about it again until serving time.
Grilled vegetables add color and give your health-conscious guests something to feel good about. Zucchini, bell peppers, and red onions all work great. Slice them thick so they don’t fall through the grill grates, brush with olive oil, and season with salt and pepper. Grill until they’ve got nice char marks and have softened up. I usually do this right before cooking the burger patties so the grill is already hot.
For drinks, you want options that won’t overpower the food. Ice-cold beer is the classic choice, and it pairs perfectly with bacon cheeseburger sliders. I usually have a light lager and a slightly hoppier IPA available to cover different preferences. Keep a big cooler filled with ice near the food table so people can help themselves.
Lemonade offers a non-alcoholic option that cuts through the richness of the sliders. Make it fresh if you have time. The difference between fresh-squeezed and powder mix is huge. Juice about ten lemons, add a cup of sugar and eight cups of cold water, then adjust the sweetness to taste. Serve it over ice with lemon slices floating on top.
Iced tea is another crowd-pleaser, especially sweet tea if you’re catering to Southern tastes. I brew a strong batch using six tea bags per gallon, add sugar while it’s still hot so it dissolves completely, then pour it over ice to cool it down quickly. For variety, try adding fresh mint or peach slices.
Funny enough, I’ve found that sparkling water has become increasingly popular at parties. Keep a few bottles of flavored sparkling water on hand for people who want something refreshing but not sugary. Lime and grapefruit flavors seem to disappear fastest at my gatherings.
Presentation extends to the whole table setup, not just the food. Use a checkered tablecloth for that classic picnic vibe. Mason jars make great drinking glasses and add a rustic touch. Disposable plates and napkins are fine, but invest in sturdy ones that won’t fall apart when loaded with food. Nothing ruins a party faster than a plate folding in half and dumping sliders on someone’s lap.
I always set out more napkins than seems necessary. The fat content in beef, bacon, and cheese means these sliders can get delightfully messy. Better to have napkins within easy reach than watch guests frantically searching while BBQ sauce drips down their hands. I put them at both ends of the food table and scatter extra stacks around the party area.
Condiment stations need some thought too. Put out extra BBQ sauce in small bowls with spoons so people can add more if they want. Ketchup and mustard bottles should be available for traditionalists. I also set out pickles, both dill slices and whole dill spears. Some folks like to eat pickles on the side rather than on their sliders.
Hot sauce deserves its own spot on the table. I usually offer two or three varieties with different heat levels clearly marked. Some people want just a hint of spice while others want to sweat through their shirts. Let them make their own choices and avoid any complaints about the food being too spicy or too bland.
Dessert should be simple after heavy sliders. I like serving ice cream sandwiches because they’re easy and nostalgic. Keep them in a cooler filled with ice and let people grab them whenever they’re ready. Brownies or cookies work well too, especially if you’re not in the mood to deal with plates and utensils for dessert.
Timing your meal service makes a difference in how the party flows. I aim to have sliders ready about an hour after guests arrive. This gives people time to show up, grab a drink, and chat before diving into food. If you serve too early, latecomers miss out. Too late, and everyone gets hangry and the mood suffers.
Music sets the atmosphere more than people realize. Create a playlist ahead of time so you’re not fumbling with your phone while trying to host. Keep the volume at a level where people can talk comfortably without shouting. Classic rock or upbeat country usually works well for backyard gatherings with sliders on the menu.
Outdoor parties need some attention to logistics. Set up your food table in a shaded area if possible so nothing sits in direct sunlight. Flies and other bugs love BBQ bacon cheeseburger sliders as much as humans do, so invest in some mesh food covers. Those pop-up mesh tents that go over dishes are cheap and actually work.
Weather contingency plans matter too. I always have a backup indoor space ready in case rain shows up uninvited. Nothing kills a party faster than scrambling to move everything inside while guests stand around getting soaked. Check the forecast obsessively in the days leading up to your event.
Speaking of outdoor gatherings, if you’re into experimenting with different grilled recipes beyond sliders, you might enjoy exploring more options in the BBQ and grilling category where I share plenty of techniques that work great for summer entertaining.
The cleanup strategy should be thought out before the party starts. Put trash cans in obvious spots with clear bags so you can see when they’re getting full. I use one can for trash and another for recyclables. Makes cleanup faster and keeps environmentally conscious guests happy. Have someone you trust help with basic cleanup during the party so things don’t pile up. My husband usually takes on trash duty while I focus on keeping food replenished.
One final thought on serving sliders: don’t stress about perfection. I’ve thrown parties where sliders came out slightly overcooked, where I forgot to put out forks, where the playlist repeated the same song three times because I messed up the settings. Guests still had a great time. The point is bringing people together over good food, not achieving Instagram-worthy perfection.
The memories your friends and family take away won’t be about whether every detail was flawless. They’ll remember laughing together, enjoying delicious food, and feeling welcomed in your home. That’s what matters most when you’re serving up a platter of sliders and watching everyone dig in with genuine appreciation.
Frequently Asked Questions About BBQ Bacon Cheeseburger Sliders
Can I make these sliders ahead of time?
You can definitely prep components ahead, which is honestly the smartest approach when hosting. Cook your bacon up to two days in advance and store it in the fridge. Form your patties the night before and keep them covered in the refrigerator. You can even assemble the entire sliders up to an hour before guests arrive and keep them covered in the oven on warm. I wouldn’t recommend making them more than an hour ahead though, because the buns can get soggy and the quality drops. The best strategy is prepping everything separately and doing final assembly right before serving.
What are some good side dishes to serve with BBQ bacon cheeseburger sliders?
Classic cookout sides work beautifully with sliders. Sweet potato fries, coleslaw, baked beans, and pasta salad are all solid choices that I rotate through depending on the crowd. Grilled vegetables add a lighter option for health-conscious guests. Potato salad is always popular, especially a vinegar-based German potato salad that’s not too heavy. Corn on the cob, either grilled or boiled, rounds things out nicely. I usually pick three sides maximum so I’m not overwhelmed with cooking and so the food table doesn’t look cluttered.
How do I keep the sliders warm during a party?
A warming tray is your best friend for keeping sliders at the perfect temperature throughout the event. If you don’t have one, keep assembled sliders loosely covered with foil in a 200-degree oven until you’re ready to serve them. They’ll stay warm for about an hour without drying out. Another option is using a slow cooker on the warm setting, though you need to be careful the buns don’t get mushy. For outdoor parties, I’ve had success with insulated food carriers that keep things hot for surprisingly long periods.
Can I use different types of cheese in the sliders?
Absolutely, and experimenting with different cheeses can completely change the flavor profile. Sharp cheddar is my standard choice because it melts well and has great flavor. American cheese creates that classic diner burger taste and melts incredibly smoothly. Pepper jack adds nice heat if you want some spice. Swiss cheese works if you’re going for a more subtle flavor. Blue cheese crumbles create an upscale version. I’ve even used brie for fancy gatherings, and it was surprisingly delicious.
Is there a vegetarian version of this recipe?
You can easily make vegetarian sliders that are just as satisfying as the meat version. Grilled portobello mushroom caps work wonderfully as a beef substitute. Black bean patties are another great option that holds up well and has good flavor. Beyond Burger or Impossible Burger products cook up almost identically to regular beef if you want something that closely mimics the meat experience. Keep the bacon, cheese, BBQ sauce, and buns the same, and your vegetarian guests will be perfectly happy. I always make a few meatless options when I know vegetarians are coming.
What’s the best way to reheat leftover sliders?
Leftover sliders happen rarely at my house, but when they do, reheating them properly makes all the difference. Wrap individual sliders in foil and warm them in a 325-degree oven for about ten minutes. The foil keeps moisture in so they don’t dry out. Microwaving works in a pinch, but the buns can get rubbery and the texture suffers. Air fryers actually do a decent job of reheating sliders if you’ve got one. Just keep the temperature around 300 degrees and check them after five minutes.
How do I prevent the buns from getting soggy?
Soggy buns are the enemy of good sliders, but they’re easy to prevent with a few tricks. Toast the bottom buns lightly before assembly to create a barrier against moisture. Don’t add sauce too early. Wait until right before serving to drizzle on BBQ sauce. Pat your cooked burger patties with paper towels to remove excess grease before putting them on buns. If you’re using juicy toppings like tomatoes, place a lettuce leaf between the tomato and the bun to act as a moisture barrier. These small steps keep your sliders structurally sound throughout the party.
Can I freeze assembled sliders for later?
Freezing fully assembled sliders doesn’t work well because the buns get weird and the vegetables turn mushy when thawed. However, you can freeze the cooked patties separately with great results. Stack them between layers of parchment paper in a freezer bag, and they’ll keep for up to three months. Thaw overnight in the fridge, then reheat gently before assembling fresh sliders. Cooked bacon freezes beautifully too. This approach gives you a huge head start on future meals without sacrificing quality.
What size should I make the beef patties for sliders?
Each patty should be about two ounces of meat, which creates a patty roughly three inches in diameter. This size fits perfectly on Hawaiian rolls or standard slider buns. Make the patties slightly wider than your buns because they’ll shrink a bit during cooking. The thickness should be about a half inch before cooking. Remember to create that small dimple in the center with your thumb to prevent puffing. Using a kitchen scale to portion the meat ensures all your sliders are uniform in size, which means they cook evenly.
How many sliders should I plan per person?
Plan on three sliders per adult and two per child as a general rule. If sliders are the only main dish and you’re serving light sides, bump it up to four per adult. Teenage boys can easily put away five or six, so factor that in if you’re feeding teenagers. I always make about twenty percent more than I think I’ll need because running out of food is embarrassing, and leftover sliders are never a problem. Better to have extras than to watch disappointed faces when the platter empties too soon.
Making BBQ bacon cheeseburger sliders doesn’t have to be complicated or stressful. Start with quality ingredients, follow the techniques I’ve shared, and don’t be afraid to make the recipe your own with different toppings and variations. The most important thing is gathering people around good food and creating memories that last long after the last slider disappears from the platter.
Ingredients
Equipment
Method
- Préchauffez le four à 400°F.
- Disposez les tranches de bacon sur une plaque de cuisson recouverte de papier aluminium et faites cuire pendant 15 à 20 minutes jusqu'à ce qu'elles soient croustillantes.
- Pendant que le bacon cuit, assaisonnez le boeuf haché avec la poudre d'ail, la poudre d'oignon et le poivre noir, en mélangeant délicatement.
- Divisez le boeuf en 12 portions égales et formez des galettes de la même taille que les petits pains.
- Faites une petite empreinte au centre de chaque galette pour éviter qu'elles ne se gonflent pendant la cuisson.
- Assaisonnez l'extérieur des galettes avec du sel juste avant la cuisson.
- Chauffez une poêle ou une plancha à feu moyen-vif et faites cuire les galettes pendant environ 3 minutes de chaque côté pour une cuisson à point.
- Après avoir retourné chaque galette, ajoutez une cuillère à soupe d'eau dans la poêle et couvrez avec un couvercle pour aider à faire fondre le fromage.
- Coupez les petits pains hawaïens en deux horizontalement et placez la partie inférieure dans un plat de cuisson 9x13.
- Badigeonnez le côté coupé des petits pains avec du beurre fondu et faites-les dorer sous le gril pendant environ 2 minutes jusqu'à ce qu'ils soient dorés.
- Disposez les galettes cuites sur les petits pains inférieurs, puis ajoutez les tranches de bacon et arrosez de sauce BBQ.
- Placez la partie supérieure des petits pains sur les sliders, badigeonnez de beurre fondu et saupoudrez de graines de sésame si désiré.
- Couvrez de papier aluminium et faites cuire à 350°F pendant 10 minutes pour mélanger les saveurs et réchauffer les sliders.