Welcome to My Cookie Dough Kitchen
Last week, I caught my daughter sneaking spoonfuls of cookie dough from the mixing bowl when she thought I wasn’t looking. I had to laugh because I used to do the exact same thing as a kid. The difference? Now I make Chocolate Chip Cookie Dough Bites that are actually meant to be eaten raw, and nobody has to feel guilty about it.
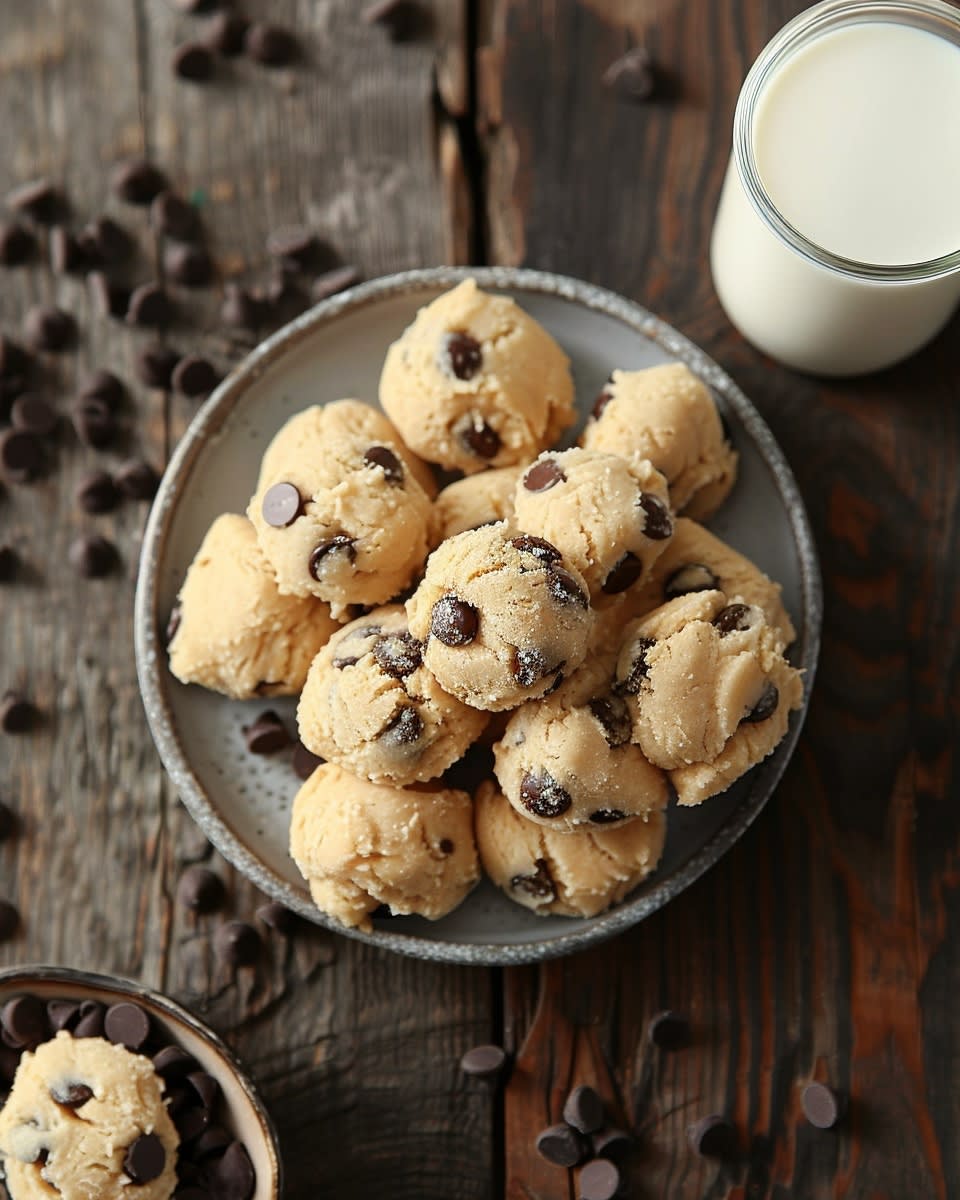
These little treats have completely changed snack time at my house. They’re safe to eat straight from the fridge, they taste incredible, and you can make a batch in about 15 minutes. I keep a container of them in the fridge at all times now. My kids grab them after school, I pop one when I need an afternoon pick-me-up, and guests always ask for the recipe.
This article will show you how to make these amazing bites in different ways. We’ll cover everything from cookie dough balls healthy enough for everyday snacking to rich, indulgent versions for special occasions. You’ll learn about no bake cookie dough truffles, discover options like paleo cookie dough bites for those with dietary restrictions, and even find out how to make sugar free cookie dough recipe variations that still taste great.
The best part? You don’t need any fancy equipment or hard-to-find ingredients. Most recipes use things you already have in your pantry. Whether you’re making raw cookie dough balls for a party or just want a sweet treat for yourself, I’ve got you covered.
Why Everyone Loves Chocolate Chip Cookie Dough Bites
There’s real magic in the combination of sweet, creamy dough and rich chocolate chips. I think it’s because cookie dough hits all the right taste notes at once. You get buttery richness, brown sugar sweetness, a hint of vanilla, and those perfect bursts of chocolate throughout.
Traditional edible chocolate cookie dough solves a problem we’ve all faced. Growing up, we were always told not to eat raw cookie dough because of the eggs and raw flour. But let’s be honest—we all did it anyway. Now you can make versions that are completely safe to eat without baking. No raw eggs, properly treated flour, and all the delicious taste.
These bites are also incredibly practical. I make a big batch on Sunday afternoon, and they last all week in the fridge. Some people even ask about cookie dough bites bulk options for parties or events. You can easily double or triple any recipe I share.
The texture is another reason people love these treats. They’re soft but not mushy, sweet but not overwhelming, and the chocolate chips add a satisfying crunch. When you bite into one, it feels indulgent even though many versions are quite healthy.
A common question I get is, “Can I put Cookie Dough Bites in the oven?” The short answer is no, not really. These are specifically designed to be eaten unbaked. The recipes use heat-treated flour and no eggs, which means they won’t rise or bake properly like traditional cookie dough. If you bake them, you’ll just end up with hard, dense little pucks instead of cookies. Trust me, I learned that the hard way when I was experimenting.
That said, you can freeze these bites and eat them frozen. They take on this amazing fudge-like texture that’s perfect on hot summer days. I’ve seen cookie dough bites ben and jerrys style variations that people make specifically for freezing.
Classic Chocolate Chip Cookie Dough Bites Recipe
Let me share my go-to recipe that I’ve perfected over the past year. This version tastes just like traditional cookie dough but it’s completely safe to eat raw. I’ve made this recipe at least 50 times, and it comes out perfect every single time.
What You’ll Need:
- 1 cup all-purpose flour (heat-treated)
- 1/2 cup unsalted butter, softened to room temperature
- 1/2 cup brown sugar, packed
- 1/4 cup white sugar
- 2 tablespoons milk (any kind works)
- 1 teaspoon vanilla extract
- 1/4 teaspoon salt
- 3/4 cup mini chocolate chips
Step-by-Step Instructions:
First, you need to heat-treat your flour. This is the most important step for food safety. Spread your flour on a baking sheet and bake it at 350°F for about 5 minutes. Let it cool completely before using. I usually do this step ahead of time and keep treated flour in a jar.
In a large bowl, beat the softened butter with both sugars until the mixture looks light and fluffy. This takes about 2 minutes with a hand mixer or wooden spoon. The mixture should be creamy, not grainy.
Add the milk and vanilla extract to your butter mixture. Mix until everything combines smoothly. The mixture might look a little loose at this point, but that’s normal.
Stir in the heat-treated flour and salt. Mix just until you don’t see any dry flour streaks. Don’t overmix here or your dough will get tough.
Fold in the chocolate chips. I use mini chips because they distribute better throughout small bites, but regular chips work too.
Now comes the fun part. Use a small cookie scoop or your hands to roll the dough into balls about 1 inch across. I can usually get around 24 bites from this recipe. Place them on a plate or baking sheet lined with parchment paper.
Pop the whole tray in the fridge for at least 30 minutes. This firms them up and makes them easier to handle. They’ll also taste better cold.
Tips for Perfect Cookie Dough Bites:
The butter temperature matters a lot. It should be soft enough to press your finger into easily, but not melted or greasy. I leave mine on the counter for about an hour before starting.
Don’t skip the heat-treating step for the flour. Some people ask if they can skip it, but raw flour can contain bacteria. Those 5 minutes in the oven make these bites safe to eat.
If your dough seems too dry and won’t hold together, add milk one teaspoon at a time until it comes together. If it’s too sticky, add a tablespoon more flour.
Store these bites in an airtight container in the fridge. They’ll stay fresh for up to a week, though mine never last that long. You can also freeze them for up to 3 months.
Many recipes like chocolate chip cookie dough truffles allrecipes or pioneer woman chocolate chip cookie dough truffles add a coating of melted chocolate. That’s a great option if you want to dress these up for a party or gift.
Someone once asked me, “What happens if you add an extra egg to chocolate chip cookie dough?” That’s a question about regular baked cookies, not these bites. But for reference, an extra egg makes regular cookies more cake-like and puffy. For these no-bake bites, we don’t use eggs at all, which is what makes them safe to eat raw.
The beauty of this basic recipe is that it’s super flexible. Once you master this version, you can experiment with different add-ins or make healthier versions. I’ll share those variations in the next sections.


Healthy and Special Diet Variations
Once you’ve mastered the basic recipe, you might start thinking about tweaking it to fit your lifestyle or dietary needs. I remember when my friend Sarah asked if I could make a version for her daughter who can’t have sugar. That challenge sent me down a rabbit hole of experimenting with different ingredients, and honestly, some of those “healthier” versions ended up being my favorites.
Sugar-Free Cookie Dough Recipe
The sugar free cookie dough recipe I developed actually surprised me. I was skeptical at first because I thought removing sugar would make them taste bland or weird. Turns out, when you use the right sweetener, you can barely tell the difference. My neighbor, who’s diabetic, keeps asking me to make batches for him.
Here’s what makes this version work. Instead of regular sugar, I use a combination of erythritol and stevia. Erythritol has the bulk and texture of sugar without the blood sugar spike, while stevia adds extra sweetness without the cooling effect you’d get from erythritol alone. You need both to get that classic cookie dough taste.
For the sugar-free version, start with one cup of heat-treated flour just like before. Cream together half a cup of softened butter with three-quarters cup of erythritol and a quarter teaspoon of liquid stevia. The mixture won’t get quite as fluffy as regular sugar does, but don’t worry about that. Add two tablespoons of almond milk instead of regular milk for a slightly richer flavor, plus one and a half teaspoons of vanilla extract. Mix in your treated flour with a quarter teaspoon of salt, then fold in three-quarters cup of sugar-free chocolate chips.
The dough will seem a bit drier than the regular version. That’s normal with sugar substitutes. If it’s too crumbly to roll, add almond milk one teaspoon at a time until it holds together. Roll them into balls and chill for at least an hour. These actually taste better after sitting overnight because the sweeteners need time to fully dissolve.
One thing I learned the hard way—not all sugar-free chocolate chips taste the same. Some brands have a weird aftertaste. I’ve had the best luck with Lily’s brand, though they’re a bit pricey. You could also chop up a sugar-free chocolate bar if you want to save money.
Paleo Cookie Dough Bites
My paleo cookie dough bites recipe came about when I was trying to eat cleaner last January. You know how New Year’s resolutions go—I lasted about three weeks on strict paleo before I was dreaming about cookie dough. So I figured out how to make it work within those guidelines.
The cool thing about paleo versions is they use almond flour instead of regular flour, which means you don’t even need to heat-treat it. Almond flour is safe to eat raw. That saves you a step right there. You’ll need two cups of finely ground almond flour, a third cup of coconut oil that’s solid but scoopable, a third cup of maple syrup, two tablespoons of coconut milk, one teaspoon of vanilla extract, a pinch of sea salt, and half a cup of paleo-friendly dark chocolate chips.
The technique is slightly different here. Since coconut oil behaves differently than butter, you want to make sure it’s at the right temperature. Too cold and it won’t mix properly. Too warm and your dough will be oily. I usually leave mine on the counter for about twenty minutes before starting.
Mix the coconut oil with the maple syrup until smooth. This won’t get fluffy like butter and sugar, so don’t expect that. Stir in your vanilla and coconut milk, then add the almond flour and salt. The dough should come together pretty quickly. Fold in your chocolate chips and roll into balls about three-quarters of an inch across. These end up smaller than regular cookie dough bites because almond flour is denser.
Here’s something interesting—these actually freeze better than the regular version. The coconut oil gets really firm when frozen, giving them this amazing truffle-like texture. I keep mine in the freezer and eat them straight from there. If you want a treat that reminds you of those fancy recipes like rich pasta dishes with decadent sauces, these frozen paleo bites have that same luxurious mouthfeel.
No-Bake Cookie Dough Truffles
Now, no bake cookie dough truffles are basically cookie dough bites dressed up for a party. The inside is the same safe-to-eat dough, but you dip them in melted chocolate for an extra fancy presentation. I make these when I need to bring something to gatherings, and people always assume I spent hours on them.
You can use any of the base recipes I’ve shared—regular, sugar-free, or paleo. The truffle part is all about the coating. After you’ve made your dough balls and chilled them until firm, melt about twelve ounces of chocolate. I usually use semi-sweet chocolate chips because they melt smoothly and aren’t too sweet.
Melt your chocolate in thirty-second bursts in the microwave, stirring between each burst. You want it smooth and liquid but not burning hot. Drop one dough ball into the chocolate at a time, use a fork to roll it around until it’s completely coated, then lift it out letting the excess chocolate drip back into the bowl. Set each truffle on parchment paper to harden.
The hardest part is being patient while the chocolate sets. I usually stick the whole tray in the fridge for fifteen minutes to speed things up. Before the chocolate fully hardens, you can sprinkle them with sea salt, crushed nuts, or even tiny chocolate chips for decoration. My kids like when I drizzle white chocolate over the top in a zigzag pattern.
By the way, these truffles make incredible gifts. I package them in small boxes during the holidays, and people act like I gave them something from a fancy bakery. Nobody needs to know they took me twenty minutes to make. Sometimes I think about how much effort goes into complicated dishes like layered desserts with multiple components, and I’m grateful that these truffles are so straightforward.
Speaking of special occasions, someone asked me the other day, “Can I eat cookie dough while pregnant?” That’s a smart question because traditional raw cookie dough is off-limits during pregnancy due to raw eggs and flour. But here’s the good news—all the recipes I’m sharing are made specifically to be eaten raw and they don’t contain eggs. The heat-treated flour and egg-free formulas make them safe for pregnant women to enjoy. Of course, I’m not a doctor, so definitely check with yours if you have any concerns. But from a food safety standpoint, these edible cookie dough recipes solve the pregnancy cookie dough craving problem perfectly.
One more thing about these variations—you can mix and match elements from different recipes. Maybe you want the paleo version but with the truffle coating. Or the sugar-free recipe but with nuts added. That’s the beauty of having these base formulas down. Once you understand how the ingredients work together, you can customize them however you want.
I’ve noticed that the cookie dough balls healthy versions actually satisfy my sweet tooth better than the regular ones sometimes. Maybe it’s psychological, but knowing I’m eating something with less sugar or more nutritious ingredients makes me enjoy it more. Plus, almond flour adds protein and healthy fats, so you’re getting some actual nutrition along with your treat. It’s not exactly the same as eating a balanced meal with protein and vegetables, but it’s definitely better than straight sugar.
The texture differences between these variations are worth noting too. Regular cookie dough bites are soft and creamy. Sugar-free ones are slightly firmer and less sweet. Paleo versions have a subtle nuttiness and denser texture. And the truffles, well, they’re just pure indulgence with that chocolate shell cracking when you bite into them.
I keep all three types in my fridge on rotation now. Different days call for different treats. Sometimes you want that classic taste, sometimes you want to be a bit healthier, and sometimes you just want chocolate-covered everything. Having options means you never get bored, kind of like how having various dinner options keeps meal time interesting—whether it’s something quick or something special like a sweet breakfast treat that everyone loves.


Fun and Creative Variations
After making the basic recipes a hundred times, I started getting creative. My kids kept asking for “something different,” and honestly, I was getting a little bored with the same old chocolate chip version too. That’s when I started experimenting with bigger batches for parties and coming up with flavor combinations that honestly rival anything you’d buy at the store.
Bulk Cookie Dough Bites
Last summer, I volunteered to make dessert for my son’s baseball team party. Thirty kids, plus parents. I panicked at first, then realized I could just multiply my cookie dough bite recipe and make cookie dough bites bulk style. Game changer.
Here’s what I learned about making large quantities. First, you need to get organized before you start. When I’m making a triple or quadruple batch, I measure out all my ingredients into separate bowls first. Sounds obvious, but when you’re dealing with four cups of flour and two cups of butter, it’s easy to lose track of what you’ve already added. Trust me, I once forgot if I’d added the sugar and had to throw out an entire batch.
For big batches, I use my stand mixer instead of mixing by hand. My arms would fall off otherwise. The technique stays the same—cream the butter and sugar first, add liquids, then flour—but everything takes longer. You might need to mix for three or four minutes instead of two to get everything properly combined when you’re working with larger volumes.
The rolling part is where things get tricky with bulk batches. I tried to roll all the dough balls by myself once and it took me two hours. My back was killing me by the end. Now I turn it into a family assembly line. Someone scoops, someone rolls, someone arranges them on the trays. We can knock out two hundred bites in about thirty minutes this way. Put on some music and it actually becomes kind of fun.
Storage for bulk batches requires some planning. Those little plastic containers from the grocery store aren’t going to cut it. I use large flat storage containers with tight lids, and I layer the bites with parchment paper between each layer so they don’t stick together. Each container holds about forty bites, and they stack nicely in the fridge.
For parties, I actually prefer to serve these chilled or even frozen. Room temperature cookie dough bites can get a bit soft and messy, especially if you’re outdoors or it’s warm. I arrange them on a platter right before serving, and I always make about twenty percent more than I think I’ll need. People always eat more than you expect, especially kids.
One trick I’ve picked up—if you’re making these for an event that’s not at your house, transport them in a cooler with ice packs. They’ll stay firm and fresh, and you won’t end up with a container of mushed together dough by the time you arrive. I learned that lesson at a potluck where I showed up with what basically looked like one giant cookie dough blob.
Ben & Jerry’s Inspired Cookie Dough Bites
My obsession with cookie dough bites ben and jerrys style started when I was eating their Half Baked ice cream one night. You know those chunks of cookie dough in there? They’re perfect, right? I thought, why not make edible bites that taste exactly like those chunks, minus the ice cream?
After some trial and error, I figured out what makes Ben & Jerry’s cookie dough special. It’s richer and denser than regular cookie dough, with a higher butter-to-flour ratio and more vanilla. They also use bigger chocolate chunks instead of chips, which makes each bite more indulgent.
For my Ben & Jerry’s inspired version, you’ll need one cup of heat-treated flour, two-thirds cup of softened butter instead of the usual half cup, three-quarters cup of packed brown sugar, one-third cup of white sugar, three tablespoons of heavy cream instead of milk, two teaspoons of vanilla extract (double the normal amount), half a teaspoon of salt, and one cup of chocolate chunks. Not chips—chunks. You can buy them or just chop up a chocolate bar into irregular pieces.
The technique is similar to the basic recipe, but the extra butter makes the dough richer and softer. Beat that butter and sugar for a full three minutes until it’s really fluffy and pale. Add the heavy cream and vanilla, then mix in your flour and salt. The dough will be softer than usual, almost like frosting consistency. That’s exactly what you want. Fold in those chocolate chunks—be generous, you want chocolate in every bite.
Here’s where it gets a bit different. Instead of rolling these into perfect balls, I actually prefer to scoop them with a small cookie scoop and freeze them on a tray. Once they’re frozen solid, I transfer them to a container and keep them in the freezer. Eat them straight from the freezer for that authentic ice cream cookie dough chunk experience. They get this amazing texture—not rock hard, but firm and fudgy and incredible.
My teenager likes to make actual ice cream with these. She makes vanilla ice cream in our ice cream maker, then chops up these frozen bites and stirs them in during the last few minutes. Boom, homemade Half Baked ice cream. Way better than store-bought, and she gets to brag about it to her friends.
Snoop Dogg’s Cookie Recipe
So this is kind of a funny story. My nephew came over and asked, “What is Snoop Dogg’s cookie recipe?” Apparently he’d seen something online about Snoop’s legendary cookies. I did some digging, and while Snoop has talked about various recipes over the years, his approach to cookies is basically to make them extra indulgent with unexpected flavor additions.
I created my own Snoop-inspired version based on his cooking style, which tends to be generous with flavors and never boring. This recipe takes the basic cookie dough bite formula and kicks it up several notches with some grown-up flavor combinations.
Start with your base of one cup heat-treated flour, half cup butter, and sugars, but here’s where we switch things up. Add one tablespoon of bourbon or rum extract for a sophisticated depth of flavor. Mix in a quarter teaspoon of cinnamon and a tiny pinch of cayenne pepper—just enough to add warmth without making it spicy. Use three tablespoons of strong brewed coffee that’s cooled instead of milk, which intensifies the chocolate flavor. Then fold in half a cup of dark chocolate chips and half a cup of toffee bits or crushed pretzels for that sweet and salty combination.
The coffee and spices give these bites a more complex, grown-up flavor that’s perfect for evening gatherings. The toffee or pretzel adds a salty crunch that balances the sweetness. When I make these for adults-only parties, they always disappear first. Someone once told me they tasted like a fancy cocktail in cookie dough form, which I took as a huge compliment.
I usually roll these a bit larger than regular cookie dough bites, about an inch and a half across, and I press a few flakes of sea salt on top of each one before chilling. That extra salt really makes the flavors pop. They’re definitely more indulgent than the healthy versions, but sometimes you just want something that feels special and a little bit fancy.
By the way, if you’re curious about actual nutrition facts for homemade treats versus store-bought versions, it’s worth checking reliable sources. I find that making things at home generally gives you more control over what goes into your food, which matters to me as a parent.
The cool thing about this Snoop-inspired version is that you can customize the “adult” elements based on what you like. Not into coffee? Use milk and add espresso powder instead. Don’t want the alcohol extract? Use extra vanilla and add some maple syrup. The spirit of the recipe is about being bold with your flavors and not holding back on the good stuff.
I’ve made these for game nights and book club meetings, and they’re always a hit with people who think they’ve outgrown cookie dough. There’s something about the unexpected flavors that makes people take notice. Plus, telling people you’re serving “Snoop Dogg-inspired cookie dough” is a great conversation starter. Everyone wants to know what makes them special, and then they want the recipe.
All these creative variations remind me why I love making desserts at home. You can find inspiration anywhere—from ice cream flavors to celebrity cooks to your own random ideas—and turn them into something delicious. Sometimes when I’m browsing through dessert recipes online for new ideas, I’ll see something totally unrelated that sparks an idea for a new cookie dough bite flavor. That’s the fun of home cooking.
Whether you’re making a massive batch for your kid’s team party, recreating your favorite ice cream flavor, or channeling your inner Snoop with bold flavors, the basic formula stays reliable. Heat-treated flour, softened butter, sugar, a liquid, vanilla, and mix-ins. Once you’ve got that foundation down, the possibilities really are endless. I’ve got a running list on my phone of flavor combinations I want to try next—everything from chai spice to strawberry to peanut butter pretzel. My family thinks I’m obsessed, and honestly, they’re probably right.
The best advice I can give you is to start with the basic recipe, make it a few times until you’re comfortable with the technique, and then just start playing around. Use different extracts. Swap the chocolate chips for other mix-ins. Adjust the sweetness level. Add spices or citrus zest or nuts or dried fruit. The worst that can happen is you make something that’s not quite right, and even then, it’ll probably still taste pretty good. I’ve had very few complete failures in my cookie dough bite experiments, and even those were edible, just not exactly what I was going for.
Give yourself permission to be creative and have fun with it. These aren’t precious, complicated desserts that require perfect technique. They’re fun, forgiving treats that welcome experimentation. That’s part of what makes them so perfect for home cooks.
Final Thoughts
Making Chocolate Chip Cookie Dough Bites at home has honestly become one of my favorite kitchen activities. There’s something satisfying about whipping up a batch in minutes, knowing they’re safe to eat, and watching everyone’s face light up when they taste them. Whether you go with the classic version, try a healthier alternative, or get creative with bold flavors, you really can’t go wrong. Pick a recipe that speaks to you, gather your ingredients, and just start mixing. I promise, once you taste that first bite of homemade edible cookie dough, you’ll understand why I always keep a batch in my fridge.
Frequently Asked Questions
Can I eat cookie dough while pregnant?
Yes, you can safely eat the cookie dough bites from these recipes while pregnant because they don’t contain raw eggs or untreated flour. Traditional cookie dough is risky during pregnancy because of potential salmonella from raw eggs and E. coli from raw flour. All my recipes use heat-treated flour and no eggs, making them safe for pregnant women. That said, I always recommend checking with your doctor about your specific dietary needs. These treats should be eaten in moderation like any dessert, especially if you’re watching your sugar intake during pregnancy.
What is Snoop Dogg’s cookie recipe?
While Snoop Dogg has shared various cookie recipes over the years, his style typically involves bold flavors and generous amounts of good ingredients. My Snoop-inspired version includes bourbon or rum extract, coffee instead of milk, warm spices like cinnamon and cayenne, and a combination of chocolate chips with toffee or pretzels. The key is not being shy with flavors and adding unexpected elements that make the cookies more interesting. His cooking philosophy is about making food that’s indulgent and fun, which is exactly what these bites deliver. You can customize the recipe based on your preferences while keeping that bold, flavorful spirit.
Can I put Cookie Dough Bites in the oven?
No, you shouldn’t bake these cookie dough bites. They’re specifically formulated to be eaten raw and won’t bake properly like traditional cookie dough. The recipes use heat-treated flour and no eggs, which means they lack the structure needed to rise and bake into proper cookies. If you try to bake them, you’ll end up with hard, dense pucks instead of cookies. These bites are meant to be enjoyed chilled or frozen, which gives them the perfect texture. If you want actual baked cookies, you’ll need to use a traditional cookie recipe with eggs and untreated flour.
What happens if you add an extra egg to chocolate chip cookie dough?
Adding an extra egg to traditional baked chocolate chip cookies makes them more cake-like, puffy, and soft rather than crispy or chewy. The additional egg adds more moisture and leavening, which changes the texture significantly. However, this question doesn’t apply to the edible cookie dough bites I’ve shared because those recipes don’t use any eggs at all. That’s what makes them safe to eat raw. If you’re baking traditional cookies and accidentally add an extra egg, your cookies will still be edible, just different in texture than you might expect.
How long do cookie dough bites last in the fridge?
Cookie dough bites stay fresh in the refrigerator for up to one week when stored in an airtight container. I usually place parchment paper between layers to prevent them from sticking together. Make sure your container seals tightly to prevent the dough from drying out or absorbing other food odors from your fridge. If you want them to last longer, you can freeze them for up to three months in a freezer-safe container or bag. I actually prefer eating some versions frozen because they take on this amazing fudge-like texture. Just let them sit at room temperature for a few minutes if you want them softer.
Do I really need to heat-treat the flour?
Yes, heat-treating flour is an essential step for food safety. Raw flour can contain harmful bacteria like E. coli, which has caused actual outbreaks in the past. The heat-treating process is simple—just spread flour on a baking sheet and bake it at 350°F for five minutes, then let it cool completely. This step kills any potential bacteria and makes the flour safe to eat raw. Some people skip this step thinking it’s unnecessary, but it only takes a few minutes and gives you peace of mind. I always heat-treat a larger batch and store it in a jar so it’s ready whenever I want to make cookie dough bites.
Can I use salted butter instead of unsalted?
You can use salted butter if that’s what you have on hand, but you should reduce or eliminate the added salt in the recipe. Salted butter contains about a quarter teaspoon of salt per stick, so adjust accordingly. I prefer using unsalted butter because it gives me better control over the final saltiness of the dough. Some brands of salted butter are saltier than others, which can make your results inconsistent. If you do use salted butter and find your cookie dough bites taste too salty, try reducing the added salt by half next time. You can always add a bit more salt if needed, but you can’t take it out once it’s mixed in.
Why is my cookie dough too dry or too wet?
Cookie dough consistency can vary based on several factors including how you measured your flour, the temperature of your butter, and humidity levels. If your dough is too dry and crumbly, add milk or cream one teaspoon at a time until it holds together. If it’s too wet and sticky, add flour one tablespoon at a time. The butter temperature makes a huge difference—if your butter is too cold, the dough won’t come together properly, and if it’s too melted, the dough will be oily. Aim for butter that’s soft enough to leave a fingerprint but not greasy or shiny. Also, make sure you’re measuring flour correctly by spooning it into your measuring cup and leveling it off rather than scooping directly from the bag.
Can I make these without dairy?
Absolutely! You can make dairy-free cookie dough bites by using coconut oil or vegan butter instead of regular butter, and any non-dairy milk like almond, oat, or coconut milk. The paleo version I shared uses coconut oil, which works great. For vegan butter, I’ve had good results with Earth Balance and Miyoko’s brands—they cream nicely and have good flavor. Just make sure your chocolate chips are also dairy-free if that’s a concern. The texture might be slightly different from the traditional version, but they’re still delicious. Some people actually prefer the coconut oil version because it has a nice subtle flavor and the bites get firmer when chilled.
What’s the best way to transport cookie dough bites to a party?
Transport cookie dough bites in a cooler with ice packs to keep them firm and fresh during travel. I use shallow, wide containers rather than tall ones so the bites don’t get crushed under their own weight. Layering them with parchment paper prevents sticking. If you’re going somewhere within fifteen minutes, a regular container should be fine, but for longer trips, temperature control matters. I learned this the hard way when I showed up to a potluck with melted, mushed together bites. Now I always err on the side of keeping them too cold rather than too warm. Once you arrive, you can leave them in the cooler until right before serving, or transfer them to a serving platter if there’s fridge space available.
Ingredients
Equipment
Method
- Chauffez la farine en l'étalant sur une plaque de cuisson et en la cuisant à 350°F pendant environ 5 minutes; laissez-la refroidir complètement.
- Dans un grand bol, battez le beurre ramolli avec les deux sucres jusqu'à ce qu'ils soient légers et aérés (environ 2 minutes).
- Ajoutez le lait et l'extrait de vanille au mélange de beurre; mélangez jusqu'à ce que ce soit homogène.
- Incorporez la farine traitée par la chaleur et le sel; mélangez jusqu'à ce qu'il n'y ait plus de traces de farine sèche.
- Incorporez délicatement les pépites de chocolat.
- Roulez la pâte en boules d'environ 1 pouce à l'aide d'une cuillère à biscuit ou de vos mains; placez-les sur une assiette ou une plaque de cuisson doublée de papier sulfurisé.
- Réfrigérez le plateau pendant au moins 30 minutes pour raffermir.