My Quest for the Perfect Crispy Orange Chicken (Without the Deep Fryer!)
Let’s be honest. We’ve all craved that perfect orange chicken—crispy, saucy, sweet, and tangy. But the thought of deep-frying? The splatter, the smell, the leftover oil? No, thank you! My mission was clear: create a baked orange chicken recipe that was just as good as the takeout version. After many, many trials (my family was very patient taste-testers), I nailed it. This recipe gives you that incredible crunch and sticky-sweet sauce without any of the fuss. It’s a winner for busy weeknights and a total crowd-pleaser.
A Little Story Behind Our Crispy Orange Chicken
Orange chicken, as we know it in America, is a beautiful creation born in Chinese-American restaurants. It’s not a traditional dish from China, but rather a delicious adaptation that became a fast-food superstar. The classic version is almost always deep-fried. My spin honors those fantastic flavors but takes a friendlier, home-cooking approach. By baking the chicken with a special panko trick, we get all the crunch. The sauce? It’s a vibrant, glossy, and perfectly balanced mixture that comes together in one pan. It’s tradition meets a busy home cook’s reality!
Why You’ll Fall in Love With This Recipe
You’ll love this because it’s simply easier and cleaner than frying. The chicken gets so crispy in the oven you won’t believe it. The sauce is freshly bright from real orange zest and juice, not just sugar. It’s also highly adjustable—make it spicier, less sweet, or use what you have on hand. It’s the kind of meal that makes everyone at the table happy and asking for seconds.
Perfect Occasions for This Baked Orange Chicken
This dish is your new secret weapon. It’s perfect for a fun Friday family dinner. It’s a hit for casual gatherings with friends—just double the batch! It also packs well for lunches (keep the sauce separate until you’re ready to eat). If you’re looking for other fantastic chicken dinners, you might enjoy our Spicy Honey Lime Chicken Thighs for another sweet-and-spicy option.
What You’ll Need: Baked Orange Chicken Ingredients
Gathering your ingredients is the first step to deliciousness. Here’s your shopping and prepping list for this easy orange chicken bake.
For the Crispy Chicken:
- 2 pounds boneless, skinless chicken thighs, cut into small chunks
- 1 cup panko breadcrumbs
- ½ cup all-purpose flour
- 2 large eggs, beaten
- 1 tablespoon vegetable oil, divided
- Cooking spray or a bit more oil for brushing
For the Amazing Orange Sauce:
- ⅔ cup fresh orange juice (from about 2 oranges)
- Zest of 1 orange
- 10 tablespoons white sugar
- 10 tablespoons white vinegar
- 3 tablespoons low-sodium soy sauce
- 2 tablespoons rice wine or dry white wine
- 1 tablespoon cornstarch
- 1 tablespoon fresh ginger, minced
- 2 teaspoons garlic, minced
- ½ teaspoon crushed red pepper (adjust to taste)
- 1 teaspoon sesame oil
No Worries! Handy Ingredient Substitutions
- Chicken: Boneless, skinless chicken breasts work fine. Just watch the baking time, as they can dry out faster than thighs.
- Panko: If you don’t have a food processor, you can use regular fine breadcrumbs. The panko, when pulsed, gives a superior crunch.
- Orange Juice: Freshly squeezed is best for flavor, but a good-quality store-bought juice will work in a pinch.
- Rice Wine: Dry sherry or even a bit more orange juice can substitute.
- Flour: For a gluten-free version, use a 1:1 gluten-free flour blend and certified gluten-free panko breadcrumbs.
How to Make Incredible Baked Orange Chicken: Step-by-Step
Let’s get cooking! Follow these steps for a foolproof, delicious meal. The smell will have your family gathering in the kitchen.
Step 1: Preheat and Prep Your Panko
First, crank your oven to 400°F (200°C). While it heats, let’s tackle the panko secret. Pour the cup of panko breadcrumbs into a food processor. Pulse it several times until the crumbs look much finer, like sandy, regular breadcrumbs. This is a pro tip! Finer crumbs pack onto the chicken better and create a more even, crispier coating that holds up to the sauce.
Step 2: Set Up Your Breading Station
Get out three shallow bowls or plates. In the first, place your flour. In the second, beat your two eggs until smooth and bubbly. In the third, place your processed panko crumbs. Line a baking sheet with parchment paper and drizzle or brush on half of the tablespoon of vegetable oil. Having everything in a row makes the breading process fast and neat.
Step 3: Bread the Chicken Pieces
Take a chunk of chicken and dredge it in the flour, shaking off any excess. Next, dip it fully into the beaten egg, letting the extra drip off. Finally, press it firmly into the panko crumbs, coating all sides. Place each piece on your prepared baking sheet. Repeat with all the chicken. Give the tops a light spray with cooking spray or a brush of oil—this helps them turn golden brown.
Step 4: Bake to Crispy Perfection
Slide the baking sheet into your hot oven. Bake for 20-25 minutes. You’re looking for the chicken to be cooked through (no pink inside) and the coating to be a beautiful, deep golden brown and crispy. The aroma of toasting panko will start to fill your kitchen. While it bakes, you have the perfect window to make the magic sauce.
Step 5: Create the Sticky Orange Sauce
Heat the remaining half tablespoon of oil in a medium saucepan over medium heat. Add the minced ginger, garlic, and crushed red pepper. Stir and cook for just about 30 seconds until wonderfully fragrant—be careful not to burn it! Sprinkle in the cornstarch and cook, stirring, for another 30 seconds. This cooks out the raw starch flavor. Now, pour in the rice wine, orange juice, soy sauce, sugar, vinegar, and add the orange zest and sesame oil.
Step 6: Simmer and Thicken
Whisk everything together and bring the mixture to a gentle boil. Once bubbling, reduce the heat to a simmer. Let it cook for 3-5 minutes, stirring often. You’ll see the sauce transform from thin and cloudy to gloriously thick, shiny, and translucent. It should coat the back of a spoon nicely. Remove it from the heat.
Step 7: The Grand Finale – Toss and Serve!
Once the chicken is out of the oven and beautifully crisp, transfer the pieces to a large bowl. Pour that gorgeous, warm orange sauce over the top. Using a big spoon or spatula, gently toss and fold until every single piece is gleaming and coated in sauce. Serve it immediately! It’s fantastic over steamed jasmine rice with a side of steamed broccoli. For another great one-pan meal, check out our One Pot Lemon Herb Chicken and Orzo.
Chef’s Tip: The Ultimate Crisp
For the absolute crispiest result, place a wire cooling rack on your baking sheet and put the breaded chicken on the rack. This allows hot air to circulate all around the chicken, preventing any soggy bottoms and ensuring an all-over crunch.
Timing Your Baked Orange Chicken Dinner
- Prep Time: 20 minutes
- Cook Time: 25 minutes
- Total Time: 45 minutes
- Servings: 4-6 people
A Secret for the Brightest Flavor
My number one secret? The zest. Before you juice your oranges, use a fine grater or zester to remove the bright orange part of the peel. This zest is packed with aromatic oils that give the sauce a true, vibrant orange essence that bottled juice alone just can’t provide. It’s the difference between good and “wow!”
A Fun Fact About Oranges
Did you know the color of an orange doesn’t always indicate ripeness? In some climates, oranges stay greenish even when ripe! They often get their bright orange color from a process called “degreening” after harvest. For the best juice and zest, choose oranges that feel heavy for their size and have smooth, firm skin. For more on selecting quality produce, you can reference food-based nutrition and agricultural resources.
Equipment You’ll Need
- Food processor (for the panko)
- 3 shallow bowls or plates
- Baking sheet
- Parchment paper or a wire rack
- Medium saucepan
- Whisk
- Zester or fine grater
How to Store Your Leftover Orange Chicken
The best way to store leftovers is to keep the crispy chicken and sauce separate if possible. Place the plain baked chicken in an airtight container in the fridge for up to 3 days. The sauce can be stored in a separate jar or container for the same amount of time. This prevents the chicken from getting soggy.
If you’ve already mixed everything, it will still be tasty! Store it in the fridge in a sealed container. The coating will soften in the sauce, but the flavors will still be delicious. It reheats well in the microwave at a reduced power or in a skillet over low heat, though it won’t regain its crispness.
You can also freeze the baked (unsauced) chicken pieces. After baking and cooling, flash-freeze them on a tray before transferring to a freezer bag. Reheat from frozen in a 400°F oven until hot. Then, make a fresh batch of sauce to toss it in for the best texture.
My Best Tips and Advice
- Cut your chicken pieces evenly so they cook at the same rate.
- Don’t skip the step of cooking the cornstarch with the ginger and garlic. It makes the sauce smooth, not chalky.
- For a thicker sauce, let it simmer a minute longer. For a thinner sauce, add a splash of water or orange juice.
- If you love heat, add more crushed red pepper or a dash of sriracha to the sauce.
- This recipe pairs wonderfully with our Creamy Garlic Butter Chicken and Rice Skillet if you’re serving a big crowd with diverse tastes!
Presentation Ideas to Make It Shine
- Serve over a bed of fluffy white or brown rice, garnished with thin slices of green onion and a sprinkle of sesame seeds.
- For a colorful plate, pair it with bright green steamed broccoli or snap peas.
- Place the saucy chicken in a large, shallow serving bowl and let everyone help themselves family-style.
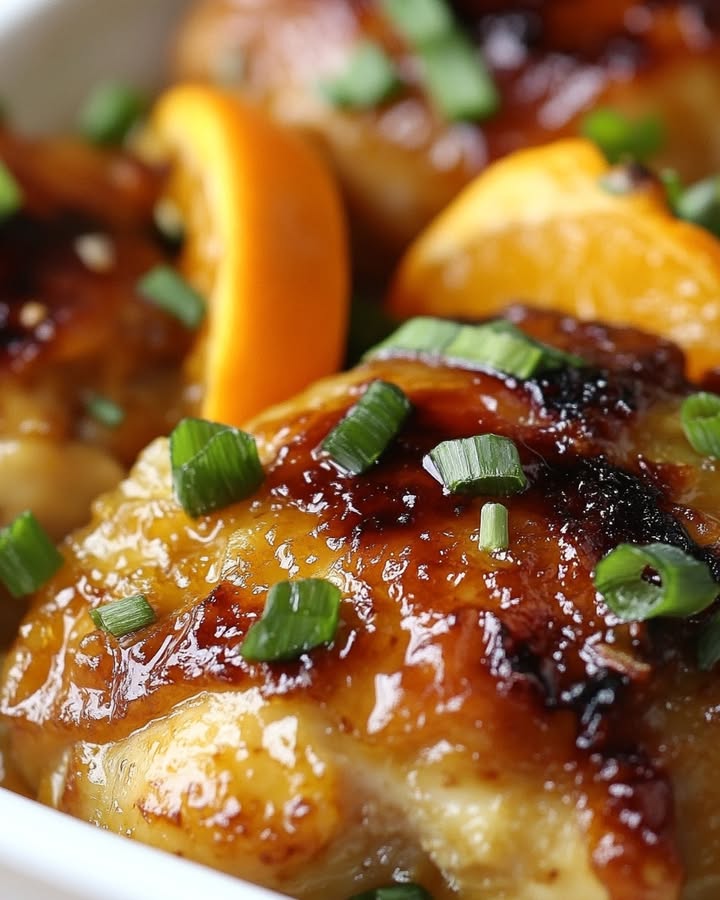
- Add fresh orange slices or twists of zest on top for a beautiful, fresh finish.
6 Tasty Variations to Try
Love this recipe? Mix it up! Here are six fun twists on our baked orange chicken.
- Spicy Orange Chicken: Double the crushed red pepper and add a tablespoon of sambal oelek or gochujang to the sauce for a fiery kick.
- Pineapple Orange Chicken: Replace half the orange juice with pineapple juice and add ½ cup of small pineapple chunks to the sauce when simmering.
- Honey Orange Chicken: Swap half the sugar for an equal amount of honey. It gives a lovely floral depth to the sweetness.
- Baked Lemon Chicken: Use lemon juice and zest instead of orange, and reduce the sugar slightly for a sharper, tangier dish.
- Teriyaki Orange Chicken: Add a tablespoon of mirin to the sauce and garnish with lots of toasted sesame seeds for a Japanese-inspired fusion.
- Extra Veggie Packed: Add bell peppers, onions, and broccoli florets to the baking sheet for the last 10 minutes of cooking, then toss it all together with the sauce for a complete meal.
Common Mistakes to Avoid
Even simple recipes have pitfalls. Here’s how to steer clear and guarantee success.
Mistake 1: Using Big, Whole Panko Crumbs
If you skip pulsing the panko, the large crumbs don’t stick to the chicken well. They create a patchy, flaky coating that can fall off. Processing them finer gives you a consistent, sand-like texture that adheres perfectly and crisps up evenly in the oven. It’s the key to that restaurant-style crust.
Mistake 2: Overcrowding the Baking Sheet
Packing all the chicken pieces too close together on the pan is a common error. They steam each other instead of roasting, leading to soggy, not crispy, results. Give each piece a little room to breathe. If needed, use two baking sheets. The hot air needs to flow around the food to work its crisping magic.
Mistake 3: Adding Raw Cornstarch Directly to Liquid
If you just whisk cornstarch into cold juice and pour it in, you risk a lumpy sauce. The method of cooking it for 30 seconds with the ginger and garlic in oil (making a “slurry” in the pan) coats the starch molecules in fat. This prevents clumping and allows it to thicken the sauce smoothly and effectively. Always cook out that raw flour taste!
Mistake 4: Tossing the Chicken Too Early
Patience is a virtue here! If you pour the sauce over the chicken while it’s still on the baking sheet or in a deep dish, the bottom pieces will get soggy immediately. Always transfer the crispy baked chicken to a big, wide bowl. Then add the sauce and toss quickly but thoroughly. Serve right away to preserve that wonderful texture contrast.
Mistake 5: Using Old, Dull Spices
Crushed red pepper flakes and ground ginger lose their potency over time. If yours have been in the pantry for years, they won’t give your sauce the intended zip and warmth. For the best flavor, use fresh ginger and check your spice dates. A pro tip: store spices in a cool, dark place, not above the stove.
If you’re looking for more inspiration for easy and delicious dinners, explore all our fantastic main dish recipes for your next culinary adventure.
Your Baked Orange Chicken Questions, Answered
Can I make this baked orange chicken ahead of time?
You can do some prep ahead to save time! You can cut the chicken, zest and juice the oranges, and mince the garlic and ginger the day before. Store them separately in the fridge. You can also make the sauce a day ahead and gently reheat it before tossing with the freshly baked chicken. I don’t recommend breading the chicken ahead, as the coating can get gummy. For a great make-ahead chicken meal, our Mediterranean Chicken and Couscous Bowl is a fabulous cold option.
How do I know when the baked chicken is fully cooked?
The safest way is to use a meat thermometer. Insert it into the thickest piece of chicken. It should read 165°F (74°C). If you don’t have a thermometer, cut into the largest piece. The meat should be white all the way through with no traces of pink or translucent flesh. The juices should run clear, not pink. The coating will be a deep golden brown and feel firm and crisp to the touch.
My sauce is too thin. How can I thicken it?
If your sauce hasn’t thickened after simmering, you may need a bit more cornstarch. Mix one extra teaspoon of cornstarch with one tablespoon of cold water in a small bowl until smooth. This is called a slurry. While the sauce is simmering, slowly whisk in this slurry. Bring it back to a bubble for a minute. It should thicken up nicely. Remember, the sauce will also thicken slightly as it cools.
Can I use chicken breasts instead of thighs?
Yes, you can. Chicken breasts are leaner and can dry out if overcooked. I recommend cutting them into slightly larger chunks than thighs, as they cook faster. Check them a few minutes early, around the 18-minute mark. The internal temperature should still be 165°F. Many people prefer thighs because they stay juicier and more forgiving during baking, but breasts will work if that’s what you have.
Is there a way to make this recipe gluten-free?
Absolutely! To make gluten-free baked orange chicken, use a 1-to-1 gluten-free all-purpose flour blend for the dredging. Make sure to use certified gluten-free panko breadcrumbs (they are available) or make your own crumbs from gluten-free bread. Also, double-check that your soy sauce is a gluten-free tamari. All other ingredients are naturally gluten-free.
What can I serve with orange chicken besides rice?
This chicken is very versatile! Try it over quinoa, cauliflower rice, or even mashed potatoes for a comfort food twist. For sides, steamed broccoli, snap peas, sautéed bok choy, or a simple Asian-inspired cucumber salad are all fantastic. It also goes well with lo mein noodles or ramen noodles for a change from rice.
Can I freeze the cooked orange chicken?
You can, but with a caveat. The texture of the crispy coating will not survive freezing and reheating if it’s already sauced. It will become soft. For best results, freeze the baked but unsauced chicken pieces. Let them cool, then flash-freeze on a tray before bagging. Freeze the sauce separately. Reheat the chicken from frozen in the oven at 400°F until hot, then toss with the reheated sauce.
Why is my chicken coating soggy?
Sogginess usually comes from three things: not using enough oil/spray on top before baking, overcrowding the pan, or letting the sauced chicken sit too long before serving. Ensure you lightly coat the breaded chicken with oil, space them out on the pan, and toss with sauce right before you eat. Using a wire rack on the baking sheet is the ultimate defense against sogginess.
How can I reduce the sugar in this recipe?
The sugar balances the sharp acidity of the vinegar. You can reduce it slightly, but taste as you go. Start by reducing the sugar to 8 tablespoons. You could also substitute a portion with a natural sweetener like honey or maple syrup, but this will change the flavor profile. Remember, the sauce is meant to be a sweet-and-sour style, so some sweetness is essential for the right taste.
What’s the best orange to use for juice and zest?
Navel oranges are perfect for this. They are sweet, easy to peel, seedless, and have a great amount of zest. Valencia oranges are also excellent for juicing. Whatever you choose, pick oranges that feel heavy for their size—they are the juiciest. Always wash the outside well before zesting, even if you plan to peel it.
Ready, Set, Bake!
So there you have it! My go-to recipe for a healthier, happier, homemade version of a takeout classic. This baked orange chicken proves you don’t need a deep fryer to achieve amazing crunch and flavor. It’s a recipe filled with little tips (that panko trick!) that make a big difference. I hope it brings as much joy to your table as it does to mine. Now, go preheat that oven and get ready for some seriously delicious compliments! Happy cooking!
Crispy Orange Chicken
Ingredients
Equipment
Method
- Preheat oven to 400°F (200°C) and prepare panko by pulsing in a food processor until fine.
- Set up a breading station with flour in one bowl, beaten eggs in a second bowl, and processed panko in a third bowl.
- Coat chicken pieces in flour, dip in egg, then cover with panko and place on a lined baking sheet.
- Spray or brush tops of chicken with cooking spray or oil.
- Bake for 20-25 minutes until chicken is cooked through and coating is golden brown.
- Meanwhile, heat remaining oil in a saucepan, add ginger, garlic, and crushed red pepper, stirring until fragrant.
- Add cornstarch, stir for 30 seconds, then mix in orange juice, vinegar, soy sauce, sugar, and orange zest. Bring to a gentle boil.
- Reduce heat to simmer for 3-5 minutes, stirring frequently until sauce thickens.
- Transfer baked chicken to a bowl, pour sauce over, and toss gently until coated.