Why This Banana Pudding Icebox Cake Will Become Your Go-To Dessert
Last summer, I showed up to a family cookout with a fancy layered dessert that took me three hours to make. My cousin walked in five minutes later with a simple banana pudding icebox cake. Guess which one disappeared first? Hers. Every single bite was gone before anyone even touched my elaborate creation. I learned something important that day: the best desserts don’t need to be complicated.
A banana pudding icebox cake is one of those magical desserts that looks impressive but comes together in minutes. You layer everything in a pan, pop it in the fridge, and let time do the work. No baking required. No stress. Just pure creamy goodness that makes people think you spent hours in the kitchen.
The best part? You can make this dessert your own. Love strawberries? Try a strawberry banana pudding icebox cake. Want something more decadent? Go for a banana split icebox cake with chocolate and cherries. The basic recipe stays the same, but the variations are endless.
What Makes a Banana Pudding Icebox Cake So Special
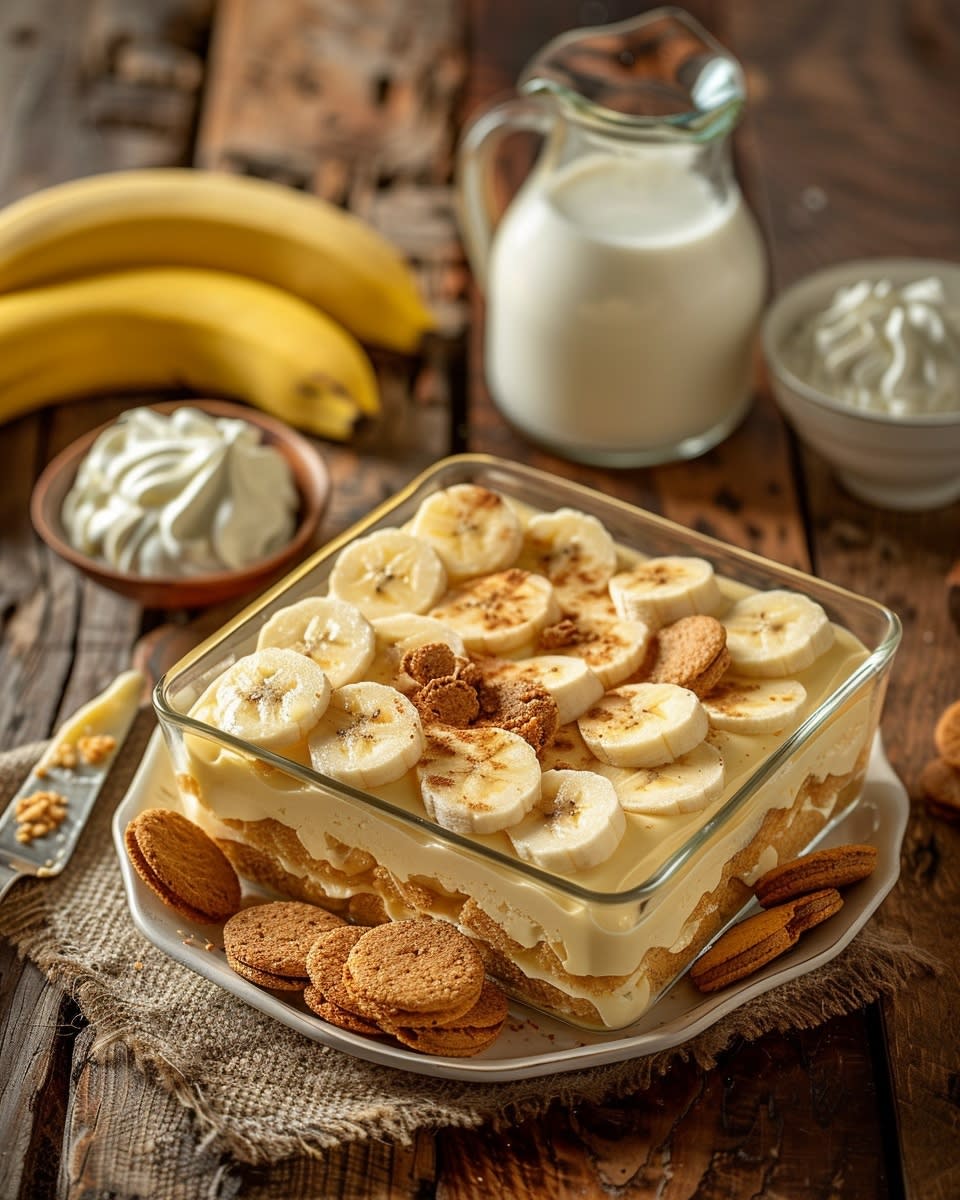
Let me explain what this dessert actually is. A banana pudding icebox cake combines layers of cookies or crackers with cream, pudding, and fresh bananas. You stack these layers in a dish and refrigerate the whole thing for several hours. During that time, the cookies soften and everything melds together into something that tastes like a cross between traditional banana pudding and cake.
The term “icebox cake” dates back to the 1930s when home refrigerators were called iceboxes. People discovered that if you layered cookies with whipped cream and chilled them overnight, the cookies would soften and create a cake-like texture. Pretty clever, right? This method meant anyone could make a fancy dessert without turning on their oven.
The classic banana icebox cake with vanilla wafers uses these key ingredients:
- Fresh ripe bananas (the main star)
- Vanilla wafers or graham crackers (your base layer)
- Cool whip or homemade whipped cream (for that fluffy texture)
- Vanilla pudding mix (for extra flavor and creaminess)
That’s it. A 4 ingredient banana icebox cake really is as simple as it sounds. Some recipes add cream cheese or condensed milk, but you can make an amazing version with just the basics. I’ve done it dozens of times when I needed a quick dessert for unexpected guests.
The magic happens in your refrigerator. As the dessert sits, moisture from the cream mixture seeps into the cookies or crackers. Hard vanilla wafers become soft and cake-like. Graham crackers transform into tender layers. After about four hours, you can barely tell that cookies were involved at all.
Why Everyone Falls in Love With This Dessert
The texture of this dessert is what gets people hooked. Each bite gives you something creamy, something slightly firm, and something sweet all at once. The bananas add natural sweetness and a fresh taste that cuts through the richness. The vanilla wafers bring a hint of crunch at the edges while staying soft in the middle.
I love making this for people who think they don’t like banana desserts. The flavors are balanced in a way that traditional banana pudding sometimes isn’t. The cream lightens everything up. The layers create visual interest. And somehow, the combination tastes fresher and less heavy than pudding served in a bowl.
My friend Sarah makes a frozen banana pudding cake version during hot summer months. She uses the same recipe but freezes it instead of just chilling it. The result is like an ice cream cake but easier to make and easier to slice. Kids go absolutely wild for it at pool parties.
The delish banana pudding icebox cake recipe that went viral a few years ago introduced thousands of people to this dessert. It showed how something so simple could be so impressive. You don’t need fancy equipment or special skills. Just a baking dish, a spatula, and some patience while it chills.
Here’s what makes this recipe so flexible:
- You can use store-bought pudding or make your own from scratch
- Swap vanilla wafers for graham crackers if that’s what you have on hand
- Add fresh strawberries between layers for a fruity twist
- Drizzle chocolate sauce on top for a banana split icebox cake vibe
- Use sugar-free ingredients if you’re watching your sugar intake
- Make it dairy-free with coconut whipped cream
I once made a banana pudding graham crackers cool whip version when I ran out of vanilla wafers. Honestly? Some people liked it even better. The graham crackers added a hint of honey flavor that complemented the bananas perfectly. That’s when I realized this recipe is almost impossible to mess up.
The banana icebox cake with graham crackers also holds together better when you’re slicing it. Graham crackers are slightly larger than vanilla wafers, so you get cleaner cuts and prettier servings. If you’re making this for a party where presentation matters, graham crackers might be your best bet.
Another reason I keep coming back to this dessert is how forgiving it is. Forgot to slice your bananas evenly? No problem. Used a bit too much cool whip? Still delicious. Let it chill for eight hours instead of four? Even better. The longer it sits, the more the flavors develop and the softer those cookies become.
The vanilla wafers icebox cake approach works for other fruits too. I’ve made versions with sliced peaches in summer and even added crushed pineapple once. But banana remains the favorite in my house. There’s something about that classic combination that just feels right.
This dessert also travels well, which makes it perfect for potlucks and picnics. Just keep it covered and in a cooler until you’re ready to serve. It actually tastes better after bouncing around in a car for twenty minutes because all those layers settle together even more.


Making Your First Classic Banana Pudding Icebox Cake
Now that you know why this dessert is such a crowd-pleaser, let’s actually make one together. I’m going to walk you through the process like I’m standing right there in your kitchen with you.
Start by gathering your ingredients. For a classic banana icebox cake with vanilla wafers, you’ll need a box of vanilla wafers (about 11 ounces), two large packages of instant vanilla pudding mix, three cups of cold milk, one container of cool whip (8 ounces), and four to five ripe bananas. That’s basically it. Sometimes I add a bit of cream cheese to make the filling extra rich, but that’s totally optional.
Here’s how I always do the layering. Grab a 9×13 inch baking dish. Don’t bother greasing it. Arrange your first layer of vanilla wafers across the bottom of the dish. They don’t need to be perfectly lined up like soldiers. Just cover the bottom as best you can. Some gaps are fine because everything will meld together anyway.
While you’re doing that, mix your pudding according to the package directions. I like to use a whisk and get it really smooth. Once the pudding is mixed, fold in about half of the cool whip. The mixture should be light and fluffy, kind of like mousse. This step makes all the difference because straight pudding can be too heavy and dense for an icebox cake.
Slice your bananas. I learned the hard way to slice them about a quarter inch thick. Too thin and they disappear into the layers. Too thick and you get big banana chunks that make slicing difficult later. Spread about a third of your pudding mixture over the vanilla wafers, then add a layer of sliced bananas on top. Make sure the banana slices overlap a little so you get banana in every bite.
Repeat this process two more times: wafers, pudding mixture, bananas. You should end up with three complete layers. On the very top layer, spread the remaining cool whip instead of pudding mixture. This gives you a pretty white top that you can decorate however you want. I usually crush a few vanilla wafers and sprinkle them on top, or sometimes I arrange banana slices in a decorative pattern.
Here’s the hardest part: waiting. Cover your dish with plastic wrap and stick it in the fridge for at least four hours. Six is better. Overnight is perfect. The waiting allows the cookies to soften and all the flavors to marry together. I know it’s tempting to sneak a bite early, but trust me on this one. The texture won’t be right if you don’t give it enough time.
Speaking of texture, the success of your banana pudding icebox cake really depends on the chilling time. I made this mistake once when I was in a hurry for a dinner party. I only chilled it for two hours and the wafers were still crunchy in the middle. It wasn’t bad, but it wasn’t that magical cake-like texture everyone loves.
Tips That Will Save You Time and Frustration
Let me share some tricks I’ve picked up over the years. First, use bananas that are ripe but still firm. Those brown-spotted super soft ones? Save those for banana smoothies instead. You want bananas that slice cleanly without turning to mush.
Second, don’t skimp on the cool whip in the pudding mixture. That’s what makes this dessert light instead of heavy. If you’re making homemade whipped cream instead of using cool whip, add a tablespoon of powdered sugar to help it stay stable in the fridge.
Another thing: some people ask if they can make this ahead of time. Absolutely. In fact, this is one of those desserts that tastes better on the second day. The flavors develop more and everything gets even softer. Just keep it covered tightly so the bananas don’t brown too much on top. A little browning is normal and doesn’t affect the taste at all.
By the way, if you’re worried about the bananas turning brown throughout the dessert, you can toss the banana slices in a tiny bit of lemon juice before layering. Just a light coating. Too much and you’ll taste the lemon, which isn’t what we’re going for here.
Creative Variations That Will Blow Your Mind
Once you’ve mastered the basic version, it’s time to have some fun. The banana icebox cake with graham crackers is my go-to when I want something that cuts more neatly. Use full graham cracker sheets instead of vanilla wafers and follow the exact same layering process. The graham crackers give you those perfect rectangular slices that look bakery-worthy.
For chocolate lovers, add a layer between the bananas and pudding. I usually melt some chocolate chips with a tiny bit of cream and drizzle it over the banana layer before adding the next layer of wafers. This turns your dessert into a banana split icebox cake without much extra effort. Add some chopped maraschino cherries on top and you’ve got yourself a showstopper.
Funny enough, my teenage nephew who claims to hate bananas devours the chocolate version every time. Something about the chocolate makes the banana flavor more subtle. It’s similar to how chocolate no-bake desserts balance rich flavors with sweet components.
The strawberry banana pudding icebox cake is perfect for spring and summer gatherings. Simply add sliced fresh strawberries alongside your banana slices in each layer. I like to hull and slice about two cups of strawberries for a 9×13 pan. The strawberries add a bright pop of color and a slight tartness that complements the sweet bananas beautifully. If strawberries aren’t in season, frozen ones work fine, just thaw them first and drain off the excess liquid.
Want to try a frozen banana pudding cake? Make the recipe exactly as written but freeze it instead of refrigerating. Let it freeze for at least four hours, then remove it about ten minutes before serving to make slicing easier. This version is amazing during hot weather. It’s like eating ice cream cake but with way less effort than actual ice cream cake requires.
Here’s the thing about the frozen version: it changes the texture in an interesting way. The cool whip gets firmer and more ice cream-like. The cookies stay slightly soft but not as cake-like as the refrigerated version. Some people prefer it, some don’t. Make both versions and see which one your family likes better.
Getting Creative With Your Own Signature Version
The beauty of this dessert is that it’s basically a blank canvas. I’ve seen people add crushed pineapple to make it tropical. Others use banana pudding graham crackers cool whip as the base but swap in chocolate pudding mix instead of vanilla. One of my coworkers makes hers with cream cheese mixed into the pudding layer, which gives it a texture similar to no-bake cheesecake bars.
You can also play with the cookie base. Nilla wafers are traditional, but I’ve successfully used chocolate wafers, ginger snaps, and even shortbread cookies. Each one gives you a different flavor profile. The ginger snap version was surprisingly good, with the spice complementing the banana in an unexpected way.
If you’re making this for a party and want to impress people, consider assembling it in individual serving glasses instead of one large pan. Layer everything in clear cups or mason jars so people can see all the pretty layers. This works especially well for the delish banana pudding icebox cake presentation that looks fancy but takes the same amount of time.
Don’t be afraid to experiment with toppings either. Crushed toffee bits add a nice crunch. Toasted coconut gives it a tropical vibe. Chocolate shavings make it look elegant. I even drizzled caramel sauce over mine once when I was feeling adventurous. It was rich but definitely worth the extra calories.
The 4 ingredient banana icebox cake proves you don’t need a complicated recipe to make something special. But adding your own touches makes it yours. Maybe you always add a splash of vanilla extract to the pudding mixture. Maybe you prefer using banana pudding mix instead of vanilla. That’s the fun part about cooking – making recipes work for your taste.
One last suggestion: keep a backup box of vanilla wafers in your pantry. Once people taste your vanilla wafers icebox cake, they’re going to request it all the time. I’ve been asked to bring mine to so many gatherings that I now consider it my signature dish. It’s the recipe people associate with me, which is kind of funny considering how simple it is to make. But sometimes simple is exactly what people want, especially when it tastes this good and reminds them of comforting homemade treats from their childhood.


Making Your Banana Pudding Icebox Cake Shine at Any Gathering
So you’ve made this beautiful banana pudding icebox cake and it’s been chilling in your fridge for the perfect amount of time. Now comes the fun part – serving it in a way that makes people stop mid-conversation and say “wow, did you really make that?” The presentation doesn’t need to be complicated, but a few simple touches can take your dessert from homemade to Instagram-worthy.
When I serve mine, I always grab a sharp knife and run it under hot water first. Dry it off quickly, then make your cuts. The warm blade slices through those softened vanilla wafers like butter. After each cut, wipe the knife clean and run it under hot water again. This gives you those clean edges that look professional. I learned this trick from my aunt who worked in a bakery, and it changed everything about how my slices looked on the plate.
For garnishes, keep it simple but elegant. A small dollop of whipped cream on each slice is classic. Add a fresh banana slice on top, maybe a whole vanilla wafer standing upright, and you’re done. If you want to get a bit fancy, dust some cocoa powder through a small strainer over the top. Or drizzle a thin line of caramel or chocolate sauce across each plate in a zigzag pattern. My husband rolls his eyes at me when I do this because he says the dessert is perfect without it, but I like making things pretty.
Here’s something I do when I’m serving this at outdoor events: I keep the banana pudding icebox cake in a cooler with ice packs until about fifteen minutes before serving time. Then I transfer it to the dessert table. This keeps everything at the perfect temperature and prevents any food safety issues. The USDA offers great guidelines on safe food handling for desserts containing dairy products, which is especially important during warm weather gatherings.
Individual servings work wonderfully for more formal occasions. I portion everything into clear dessert cups or small mason jars before the party even starts. This saves time during the event and gives everyone their own perfect serving. Plus, people love seeing those distinct layers through the glass. Each cup becomes its own little work of art.
Keeping Your Icebox Cake Fresh and Delicious
Storage is actually easier than you might think. The whole point of this dessert is that it lives in your refrigerator, so keeping it fresh is built right into the concept. Just make sure you cover it tightly with plastic wrap or aluminum foil. I prefer plastic wrap because it clings directly to the surface and prevents air from getting in. Air is the enemy here because it can cause the bananas to brown faster and the cool whip to develop that weird dried-out texture on top.
Your banana pudding icebox cake will stay fresh in the fridge for about three to four days. Honestly, I’ve never had one last that long in my house because people keep sneaking slices. But if you’re making it ahead for an event, four days is your safe window. Beyond that, the bananas start breaking down and the texture gets a bit watery. You’ll notice liquid pooling at the bottom of the dish, which isn’t dangerous or anything, just not as appealing.
The question I get asked most often is about freezing. Yes, you absolutely can freeze this dessert, and it transforms into something entirely different in the best way possible. When you freeze a frozen banana pudding cake, wrap it extremely well. I use plastic wrap first, then a layer of aluminum foil, then slide the whole thing into a freezer bag if possible. This triple protection prevents freezer burn and keeps out any weird freezer smells from your leftover onions or whatever else is lurking in there.
Frozen, this dessert will keep for up to two months. When you’re ready to serve it, you have two options. You can let it thaw in the refrigerator overnight for the original texture, or serve it partially frozen for that ice cream cake experience. If you’re going the frozen route, I recommend slicing it while it’s still pretty solid. Once it starts to thaw, it gets messier to cut cleanly.
One trick I discovered by accident: if you’re only serving part of the cake and want to save the rest, place a piece of parchment paper or wax paper against the cut edge before covering it. This creates a barrier that helps prevent the exposed layers from drying out or the bananas from browning too quickly. It’s one of those small things that makes a real difference over a couple of days.
Perfect Occasions for This Crowd-Pleasing Dessert
This dessert fits almost any occasion, which is part of why I love it so much. Family reunions? Absolutely. The delish banana pudding icebox cake feeds a crowd and travels well in a covered dish. Church potlucks? Perfect, because you can make it the night before and it actually gets better sitting in the fridge. Birthday parties? Kids and adults both love it, which is rare for any dessert.
I’ve brought my banana icebox cake with vanilla wafers to summer barbecues more times than I can count. It’s refreshing after heavy grilled foods, and nobody wants to eat something warm and heavy when it’s ninety degrees outside. The cool, creamy texture is exactly what people crave on a hot day. Plus, it pairs wonderfully with the casual vibe of outdoor gatherings.
Holiday dinners are another great opportunity for this dessert, especially as an alternative to the usual pies. Last Thanksgiving, my sister-in-law brought three traditional pies and I brought my icebox cake. Mine was gone before anyone even finished their second slice of pie. I felt a little guilty about it, but also secretly proud. Sometimes people want something lighter and less traditional, especially after a massive holiday meal.
Here’s where this dessert really shines: last-minute gatherings. Someone calls you at noon and says they’re having people over at six. No problem. You can whip up a 4 ingredient banana icebox cake in twenty minutes, let it chill for four hours, and show up with a stunning dessert. Try doing that with most other impressive desserts. It’s nearly impossible.
Office parties and work celebrations are ideal for this recipe too. It’s easy to transport in the pan you made it in, which means fewer dishes to worry about. Just cover it well and keep it cold during transit. I’ve carried mine in a small cooler with an ice pack for longer drives. At the office, pop it straight into the break room refrigerator until it’s time for cake.
Extra Tips That Make All the Difference
Let me share a few more insights I’ve picked up through trial and error. If you’re serving this at an event where it might sit out for a while, consider making the banana icebox cake with graham crackers version. Graham crackers hold up slightly better at room temperature than vanilla wafers do. They don’t get quite as soft, which helps maintain structure when the dessert isn’t ice cold.
For presentation at buffet-style events, I sometimes partially slice the cake before setting it out. I cut about three-quarters of the way through each serving, leaving them connected at the bottom. This makes it super easy for guests to serve themselves without worrying about messy cuts. They can just slide the spatula under a pre-cut portion and lift. This works especially well when you’ve got a long line of hungry people who don’t want to spend five minutes trying to cut a neat slice.
When you’re planning your dessert menu, think about what else you’re serving. This banana pudding cake pairs beautifully with coffee, which makes it perfect for afternoon gatherings or brunch events. It’s also light enough to follow heavy meals without making people feel uncomfortably stuffed. If you’re serving it alongside other sweets, choose desserts with different textures. Maybe some cookies or brownies to contrast with the creamy layers.
By the way, portion sizes are always tricky with desserts this good. I typically cut a 9×13 pan into twelve generous servings or fifteen more modest ones. People can always come back for seconds, and honestly, they usually do. I’ve found that cutting slightly smaller pieces at first means more people get to try it, and everyone walks away happy rather than a few people getting huge slices while others miss out entirely.
Funny enough, leftover icebox cake makes an amazing next-day breakfast. Don’t judge me. I’ve definitely eaten a small slice with my morning coffee more than once. There’s something wonderful about starting your day with something sweet and indulgent, especially when it’s sitting right there in your fridge calling your name. My mom used to say life’s too short not to eat dessert for breakfast sometimes, and I think she was onto something.
If you’re looking for more inspiration to expand your dessert-making skills beyond icebox cakes, there are so many other simple dessert recipes that deliver impressive results without requiring advanced baking techniques. The beauty of no-bake desserts is that they give you confidence in the kitchen and free up your oven for other dishes.
FAQs About Making the Perfect Banana Pudding Icebox Cake
How long does it take to make a banana pudding icebox cake?
The actual hands-on preparation time is only about 20 to 25 minutes. You’re just mixing ingredients and layering them in a pan, which is incredibly quick. However, the dessert needs at least four to six hours of refrigeration time for the cookies to soften and all the layers to set properly. If you can make it the night before, even better. The total time from start to finish is about four and a half hours minimum, but most of that is passive chilling time where you’re not doing anything.
Can I use other fruits besides bananas in the icebox cake?
Absolutely, this recipe is super flexible when it comes to fruit substitutions. Strawberries work beautifully and create a gorgeous pink-tinted dessert. I’ve also used sliced peaches, crushed pineapple, and even mixed berries with great success. The key is to use fruits that aren’t too watery, or if they are, drain them well before layering. Mangoes are another fantastic option that gives you a tropical vibe. Just keep in mind that different fruits have different sweetness levels, so you might want to taste your pudding mixture and adjust accordingly.
Is there a way to make this dessert gluten-free?
Yes, making a gluten-free version is actually pretty simple. Just swap out the vanilla wafers or graham crackers for gluten-free versions, which are now available in most grocery stores. Many brands make gluten-free vanilla cookies that work perfectly for this recipe. You can also use gluten-free graham crackers if you prefer that base. Everything else in the recipe is naturally gluten-free as long as you check your pudding mix labels. Some brands add ingredients that contain gluten, so just read the package carefully before buying.
How many days can I store the banana pudding icebox cake in the fridge?
Your icebox cake will stay fresh in the refrigerator for three to four days when properly covered. The bananas are really what limits the storage time since they start to break down and get mushy after a few days. Make sure you cover the dessert tightly with plastic wrap or keep it in an airtight container. If you notice the bananas starting to turn very brown or the texture becoming watery, it’s time to finish it up or toss it. That said, I’ve never had one last the full four days because it always gets eaten first.
Can I freeze the banana pudding icebox cake?
You definitely can freeze this dessert, and it creates a whole different eating experience that many people actually prefer, especially in summer. Wrap it very well in plastic wrap, then aluminum foil, and freeze for up to two months. You can serve it completely frozen for an ice cream cake texture, or let it thaw in the fridge overnight to return to the original creamy consistency. When serving frozen, let it sit at room temperature for about ten minutes to make slicing easier. Just know that the texture of the bananas changes slightly when frozen, becoming a bit firmer and less creamy.
What are some creative toppings for the banana pudding icebox cake?
The topping options are basically endless and depend on your personal taste. Crushed vanilla wafers or graham crackers on top add a nice textural contrast. Fresh banana slices arranged in a pretty pattern look elegant. Chocolate shavings, caramel drizzle, or hot fudge sauce make it feel more indulgent. Toasted coconut flakes give it a tropical twist, while crushed toffee bits add crunch and sweetness. I’ve even seen people top theirs with fresh whipped cream and a sprinkle of cinnamon. You could also add chopped nuts like pecans or walnuts if you want some crunch and nutty flavor.
Can I use homemade whipped cream instead of cool whip?
Yes, homemade whipped cream works wonderfully in this recipe and actually gives you a lighter, more natural taste. When you’re whipping your cream, add a couple tablespoons of powdered sugar to help stabilize it and keep it from weeping in the fridge. Make sure you whip it to stiff peaks, not just soft peaks, so it holds up better when folded into the pudding mixture. The only downside is that homemade whipped cream doesn’t stay quite as stable as cool whip over several days, so if you’re making this more than two days ahead, cool whip might be the better choice for structure.
How do I prevent the vanilla wafers from getting too soggy?
Here’s the thing: the vanilla wafers are supposed to get soft and cake-like, that’s the whole point of an icebox cake. But if you find them getting too mushy for your taste, try reducing the amount of liquid in your pudding mixture slightly by using a bit less milk than the package calls for. You can also let your pudding mixture sit for a few minutes after mixing to thicken up before spreading it on the wafers. Another option is to use thicker cookies like graham crackers, which maintain a bit more structure even after softening. Don’t worry too much though, because the texture is supposed to be soft and creamy throughout.
What’s the best way to transport this dessert to a party?
Transportation is actually one of the easiest parts about this dessert. Keep it in the dish you made it in and cover it tightly with plastic wrap or aluminum foil. If you’re driving for more than fifteen minutes, place the dish in a cooler with ice packs to keep it cold. A small cooler works perfectly for a 9×13 pan. Make sure the dish is on a flat surface in your car so it doesn’t slide around and mess up your layers. If you’re really worried about it moving, you can place a damp kitchen towel under the dish to create some grip, then another one on top before closing the cooler. I’ve driven mine over an hour this way without any problems.
Can I make individual servings instead of one large pan?
Individual servings are actually a brilliant way to serve this dessert, especially for parties or events where people are standing and mingling. Use clear plastic cups, small mason jars, or dessert glasses to create personal portions. Just layer your ingredients the same way you would in a pan: cookies broken into smaller pieces, pudding mixture, bananas, and repeat. The clear containers let people see all the pretty layers, which makes the presentation even more impressive. These individual servings are also great for portion control and make cleanup easier since people can just toss their cups when they’re done.
Making a banana pudding icebox cake really does change how you think about desserts. You realize that impressive doesn’t have to mean complicated, and delicious doesn’t require hours of work. This is one of those recipes you’ll make again and again, tweaking it here and there until you’ve created your own signature version. So grab those vanilla wafers and bananas, and make something that’ll have people asking for the recipe. They’ll be shocked when you tell them how easy it actually is.
Ingredients
Equipment
Method
- Rassemblez vos ingrédients.
- Disposez une couche de gaufrettes vanillées dans un plat de cuisson de 9x13 pouces.
- Mélangez le pouding selon les instructions de l'emballage jusqu'à consistance lisse.
- Incorporez la moitié du Cool Whip dans le mélange de pouding jusqu'à ce qu'il soit léger et aéré.
- Coupez les bananes en tranches d'environ un quart de pouce d'épaisseur.
- Étalez un tiers du mélange de pouding sur les gaufrettes, puis ajoutez les tranches de bananes par-dessus.
- Répétez le processus deux fois de plus.
- Sur la couche supérieure, étalez le reste du Cool Whip pour créer une finition décorative.
- Couvrez le plat avec du film plastique et réfrigérez pendant au moins quatre heures (idéalement toute la nuit).
- Coupez et servez.