Welcome to My Kitchen: Let’s Talk About Oven-Baked Chicken Thighs
Last Tuesday, I stood in front of my open fridge at 5:30 PM with absolutely no dinner plan. My kids would be home in thirty minutes, and I needed something fast but satisfying. That’s when I spotted the package of chicken thighs I’d picked up the day before. Forty-five minutes later, my family was enjoying crispy, juicy oven-baked chicken thighs that tasted like I’d spent hours in the kitchen. This happens at least twice a week in my house, and honestly, I’m not even a little bit sorry about it.
If you’ve never made oven-baked chicken thighs before, you’re missing out on one of the easiest and most forgiving recipes in your cooking arsenal. These little pieces of chicken magic are practically impossible to mess up. They stay moist even if you accidentally overcook them by a few minutes. They develop the most beautiful crispy skin without any deep frying. And they cost less than most other cuts of chicken while delivering way more flavor.
Why I love oven-baked chicken thighs goes beyond just convenience. They’re versatile enough to pair with practically any side dish you can imagine. Rice and vegetables? Perfect. Mashed potatoes? Absolutely. A simple salad? Works every time. You can season them a hundred different ways and never get bored. I’ve made them with Italian herbs on Monday and Asian-inspired flavors on Wednesday, and my family thinks I’m some kind of culinary genius.
In this guide, I’m going to walk you through everything you need to know about making perfect oven-baked chicken thighs. We’ll talk about picking the right chicken at the store, preparing it properly, and getting that ideal combination of crispy skin and tender meat. I’ll answer common questions like how long does it take for chicken thighs to cook at 400 degrees and whether you should cover them while baking. By the end, you’ll feel completely confident making this dish any night of the week.
Choosing the Right Chicken Thighs for Baking
Walking down the chicken aisle can feel overwhelming with all the different options. Let me break down what you need to know about the types of chicken thighs available and which ones work best for different situations.
Bone-in, skin-on chicken thighs are my personal favorite for oven baking. The bone helps the meat cook evenly and adds extra flavor during the cooking process. The skin gets incredibly crispy in the oven and protects the meat from drying out. When someone asks me is it better to bake bone-in chicken thighs at 350 or 400, I always recommend 400 degrees for bone-in varieties because that higher heat creates the crispiest skin.
Boneless, skinless chicken thighs are the weeknight warrior option. They cook faster than bone-in thighs, usually in about 20 to 25 minutes. They’re easier for kids to eat and simpler to portion. The tradeoff is that you need to watch them more carefully because they can dry out if overcooked. I use these when I’m making dishes where the chicken gets chopped up, like tacos or grain bowls.
Boneless, skin-on thighs give you crispy skin without the bone. These are less common at most stores, but they’re great if you find them. They cook slightly faster than bone-in versions but still give you that satisfying crispy texture.
Here’s what I look for when selecting quality chicken thighs at the store:
- The meat should look pink and fresh, never gray or discolored
- Packages should be cold to the touch and properly sealed
- Check the sell-by date and choose the furthest date available
- The thighs should smell fresh, not sour or unpleasant
- Look for packages without excess liquid pooling at the bottom
- Choose thighs that are similar in size so they cook evenly
I buy organic or free-range chicken when my budget allows. The flavor difference is noticeable, and the texture tends to be better. But regular chicken thighs work perfectly fine too. Don’t let perfect be the enemy of good here.
The type of chicken thigh you choose directly affects your cooking time and final result. Bone-in thighs need 35 to 45 minutes at 400 degrees. Boneless thighs only need 20 to 30 minutes at the same temperature. Skin-on varieties will give you crispy texture, while skinless options work better for dishes where you’re adding sauce or serving the chicken in pieces.
Preparing Your Chicken Thighs for the Oven
Good preparation makes the difference between okay chicken and restaurant-quality results. The good news is that preparing chicken thighs doesn’t require fancy skills or expensive equipment.
Essential tools you’ll need:
- A rimmed baking sheet or roasting pan
- Paper towels for patting the chicken dry
- A meat thermometer for checking doneness
- Tongs for flipping if needed
- A small bowl for mixing seasonings
- Aluminum foil or parchment paper (optional but helpful for cleanup)
Basic ingredients for simple oven-baked chicken thighs:
- Chicken thighs (obviously!)
- Salt and black pepper
- Olive oil or melted butter
- Garlic powder and onion powder
- Your favorite herbs or spices
Start by removing your chicken thighs from the refrigerator about 15 to 20 minutes before cooking. Room temperature chicken cooks more evenly than cold chicken straight from the fridge. While the chicken sits, preheat your oven to 400 degrees.
Pat each chicken thigh completely dry with paper towels. This step is critical for getting crispy skin. Moisture is the enemy of crispiness. I learned this the hard way after making soggy-skinned chicken for weeks before figuring out this simple trick.
If you’re using bone-in thighs, check for any small bone fragments from the butchering process. Run your fingers along the edges and remove any sharp pieces you find. This takes about thirty seconds but makes eating much more pleasant.
For skin-on thighs, I sometimes trim excess skin that hangs off the edges. This prevents burning and makes the final presentation look cleaner. You don’t need to be perfect here. Just snip off any flappy bits with kitchen scissors.
Now comes the fun part: seasoning. At minimum, coat each thigh with a thin layer of olive oil or melted butter, then season generously with salt and pepper on both sides. Don’t be shy with the salt, especially on the skin side. It needs more than you think to develop proper flavor and crispiness.
Simple marinating options can take your chicken from good to amazing. You don’t need to marinate for hours either. Even 30 minutes makes a difference.
My go-to quick marinade combines olive oil, minced garlic, lemon juice, and dried herbs like thyme or rosemary. Mix everything in a bowl, add the chicken thighs, and let them sit while the oven preheats.
For Asian-inspired flavors, I use soy sauce, sesame oil, ginger, and a touch of honey. This creates a beautiful glaze as the chicken bakes.
A Mediterranean version uses yogurt, lemon zest, garlic, and oregano. The yogurt tenderizes the meat while adding tangy flavor.
If you’re wondering should I cover my chicken thighs when I bake them in the oven, the answer is usually no. Uncovered chicken develops that crispy exterior we’re after. The only time I cover chicken is if I’m reheating leftovers or if the skin is browning too quickly before the meat cooks through.
Arrange your prepared thighs on the baking sheet with space between each piece. Crowding causes steaming instead of roasting, which means soggy skin. Give each thigh room to breathe.
The question of how long do you cook chicken thighs in the oven for depends on several factors. Bone-in thighs at 400 degrees take 40 to 45 minutes. Boneless thighs need only 25 to 30 minutes. The only way to know for sure is using a meat thermometer. The internal temperature should reach 165 degrees in the thickest part of the meat.
I always check the temperature in multiple thighs because ovens have hot spots. The thigh in the back left corner might be done while the one in the front right needs five more minutes. Taking this extra step ensures everything comes out perfectly cooked.


Seasoning Magic: Flavor Combinations That Make Your Chicken Sing
Now that you’ve got your chicken prepped and ready, let’s talk about the most fun part—making it taste incredible. Honestly, this is where you can get really creative and turn simple chicken thighs into something your family asks for by name.
Classic seasoning combinations never go out of style for a reason. My absolute go-to is what I call the “Sunday dinner blend”—garlic powder, onion powder, paprika, dried thyme, salt, and black pepper. Mix equal parts of everything except the salt (use about double the amount of salt compared to the other spices). This combination works with literally any side dish and smells like comfort food while it bakes.
The Italian herb route is another winner in my kitchen. Combine dried oregano, basil, rosemary, and thyme with garlic powder and a generous pinch of red pepper flakes. I add some lemon zest to this mixture when I’m feeling fancy. It pairs beautifully with roasted vegetables or pasta on the side, kind of like the flavor profile you’d find in a creamy Marsala dish with mushrooms.
Here’s the thing about making your own rubs—it’s so much easier than people think. I keep a small jar in my spice cabinet that I refill every few weeks. Start with a base of brown sugar (about 2 tablespoons), then add 1 tablespoon each of paprika, garlic powder, and onion powder. Mix in 2 teaspoons of salt, 1 teaspoon of black pepper, and half a teaspoon of cayenne if you like some heat. Done. This sweet and smoky rub creates a gorgeous caramelized crust that rivals anything from a barbecue joint.
For those nights when I want something different, I reach for my Asian-inspired spice blend. Five-spice powder, ginger, garlic, and a touch of white pepper create flavors that transport you straight to your favorite takeout spot. I brush the thighs with a mixture of soy sauce and sesame oil before applying this blend.
Mediterranean flavors work wonders too. Za’atar (if you can find it), sumac, dried mint, and sesame seeds make chicken thighs taste like they came from a Middle Eastern restaurant. My neighbor taught me this combination, and my kids actually request it now.
Want to know my secret for spice rubs that really stick? I add a tiny bit of oil to the dry spices to create a paste consistency. This helps the seasonings cling to the chicken instead of falling off into the pan. Just enough oil to make it spreadable—we’re talking maybe a tablespoon or two for four chicken thighs.
Marinades deserve their own moment of appreciation. Unlike quick rubs, marinades penetrate deeper into the meat. The basic formula I follow is fat plus acid plus aromatics plus time. The fat (olive oil, sesame oil, or even yogurt) carries flavor. The acid (lemon juice, vinegar, or wine) tenderizes. The aromatics (garlic, herbs, spices) add complexity.
My favorite marinade for weeknights combines olive oil, balsamic vinegar, minced garlic, Dijon mustard, and fresh rosemary. Everything goes in a zip-top bag with the chicken. Even thirty minutes makes a difference, though overnight is obviously better. The mustard might seem weird, but it acts as an emulsifier and adds a subtle tang that people can never quite identify.
The yogurt-based marinade I mentioned earlier genuinely changes the texture of the chicken. Greek yogurt mixed with lemon juice, garlic, cumin, and coriander creates tender, flavorful meat. The lactic acid in the yogurt works magic. I learned this trick from a friend who grew up eating traditional slow-roasted dishes, kind of like how slow-roasted lamb shanks develop incredible tenderness over hours in the oven.
The resting period matters more than you’d think. After you season your chicken, let it sit for at least 15 minutes before it goes in the oven. Room temperature, uncovered, just hanging out on the counter. This does two important things: it lets the salt penetrate the meat, and it helps the chicken cook more evenly because it’s not ice-cold when it hits the hot oven.
When I’m really planning ahead, I season my chicken thighs the night before and let them sit uncovered in the fridge. The skin dries out even more (hello, crispiness), and the flavors have time to really sink in. This technique is called dry-brining, and it’s what fancy restaurants do.
By the way, don’t waste money on expensive pre-made spice blends when you can make better ones at home. I used to buy those little bottles of “poultry seasoning” until I realized I was paying for mostly salt and packaging.
Getting Them in the Oven: Temperature, Timing, and Techniques
Alright, your chicken is seasoned and ready. Let’s talk about actually baking these beauties to perfection.
The great temperature debate: is it better to bake bone-in chicken thighs at 350 or 400? I’m firmly in the 400-degree camp for most situations. That higher heat creates crispy skin and seals in juices faster. At 350 degrees, you get perfectly cooked chicken, but the skin tends to be softer rather than crispy. I only use 350 if I’m making a saucy dish where crispy skin doesn’t matter, or if I’m cooking alongside something else that needs lower heat.
Higher temperature also means shorter cooking time, which matters on busy weeknights. At 425 degrees, you can even shave off a few more minutes, though you need to watch more carefully to prevent burning.
Always preheat your oven completely. I know it’s tempting to throw the chicken in while the oven is still heating up, but that leads to uneven cooking. The oven needs to be at full temperature before the chicken goes in. I’ve learned this lesson the hard way with rubbery skin and unevenly cooked meat.
So, how long does it take for chicken thighs to cook at 400 degrees? Bone-in, skin-on thighs need 40 to 45 minutes. Boneless, skinless thighs need only 25 to 30 minutes. These times assume your chicken started at room temperature. If you’re working with cold chicken straight from the fridge, add about 5 minutes.
People always ask me, should I cover my chicken thighs when I bake them in the oven? Almost never. Covering traps steam, which is the enemy of crispy skin. The only exception is if your skin is getting too dark before the inside is cooked through. In that case, I loosely tent some foil over the top for the last 10 minutes. This has only happened to me a handful of times, usually when my oven was running hot.
Funny enough, the biggest mistake I see people make is flipping the chicken halfway through. Don’t do it! Start with the skin side up and leave it alone. Flipping causes you to lose that beautiful crispy skin you’ve been working toward. The only time I flip is when I’m making boneless, skinless thighs and want even browning on both sides, similar to how you’d handle pan-seared filet mignon for perfect crust development.
Checking doneness is non-negotiable. The only reliable method is using a meat thermometer. Stick it into the thickest part of the thigh without touching the bone. You’re looking for 165 degrees Fahrenheit (74 degrees Celsius). This is the safe temperature where harmful bacteria are destroyed.
I check the temperature around the 35-minute mark for bone-in thighs, just to see where we’re at. If they’re at 155 degrees, I know they need just a few more minutes. If they’re only at 145, I give them another 10 minutes before checking again.
The juices should run clear when the chicken is fully cooked. If you pierce the thickest part and see pink or red liquid, it needs more time. Clear juices mean you’re good to go.
Here’s a trick for extra crispy skin that I picked up from a chef friend: after your chicken reaches 165 degrees, turn on the broiler for 2 to 3 minutes. Watch it like a hawk because the skin can go from perfectly crispy to burned in seconds. This final blast of high heat creates restaurant-quality crispiness.
The position of your oven rack matters too. Middle rack is usually perfect. Too close to the top and the skin burns before the inside cooks. Too low and you lose that crispy top while the bottom can get soggy from sitting in rendered fat.
I use a rimmed baking sheet rather than a deep roasting pan because it allows better air circulation. The chicken isn’t sitting in a pool of its own juices. Some people use a wire rack set inside the baking sheet for even better results, though I honestly find that’s overkill for weeknight cooking.
Once your chicken comes out of the oven, resist the urge to cut into it immediately. Let it rest for 5 to 10 minutes. This allows the juices to redistribute throughout the meat instead of running all over your cutting board. I know it’s hard to wait when it smells so good, but this step makes the difference between juicy chicken and dry chicken.
During this resting time, the internal temperature actually continues to rise slightly—usually about 5 degrees. This is called carryover cooking. So if you pull your chicken at exactly 165 degrees, it’ll end up closer to 170 by the time you eat it.
The rendered fat and drippings in your pan are liquid gold. Don’t throw them away! I use them to make quick pan sauces or drizzle them over roasted vegetables. Sometimes I save them in a jar in the fridge for cooking potatoes later in the week. Waste not, want not, right?
If you want to get fancy, you can create a simple pan sauce while the chicken rests. Pour off most of the fat, leaving just a tablespoon in the pan. Add some wine or chicken broth to deglaze, scraping up all those browned bits. Let it reduce for a few minutes, maybe whisk in a pat of butter at the end. Suddenly your weeknight chicken feels like fine dining, much like finishing crispy chicken cutlets with spicy honey takes them from ordinary to extraordinary.


Making Your Oven-Baked Chicken Thighs Shine: Perfect Pairings and Smart Storage
You’ve got these gorgeous, crispy-skinned chicken thighs coming out of the oven. Now what? Let me share some of my favorite ways to serve them and what to do with any leftovers—though in my house, leftovers are actually pretty rare with this dish.
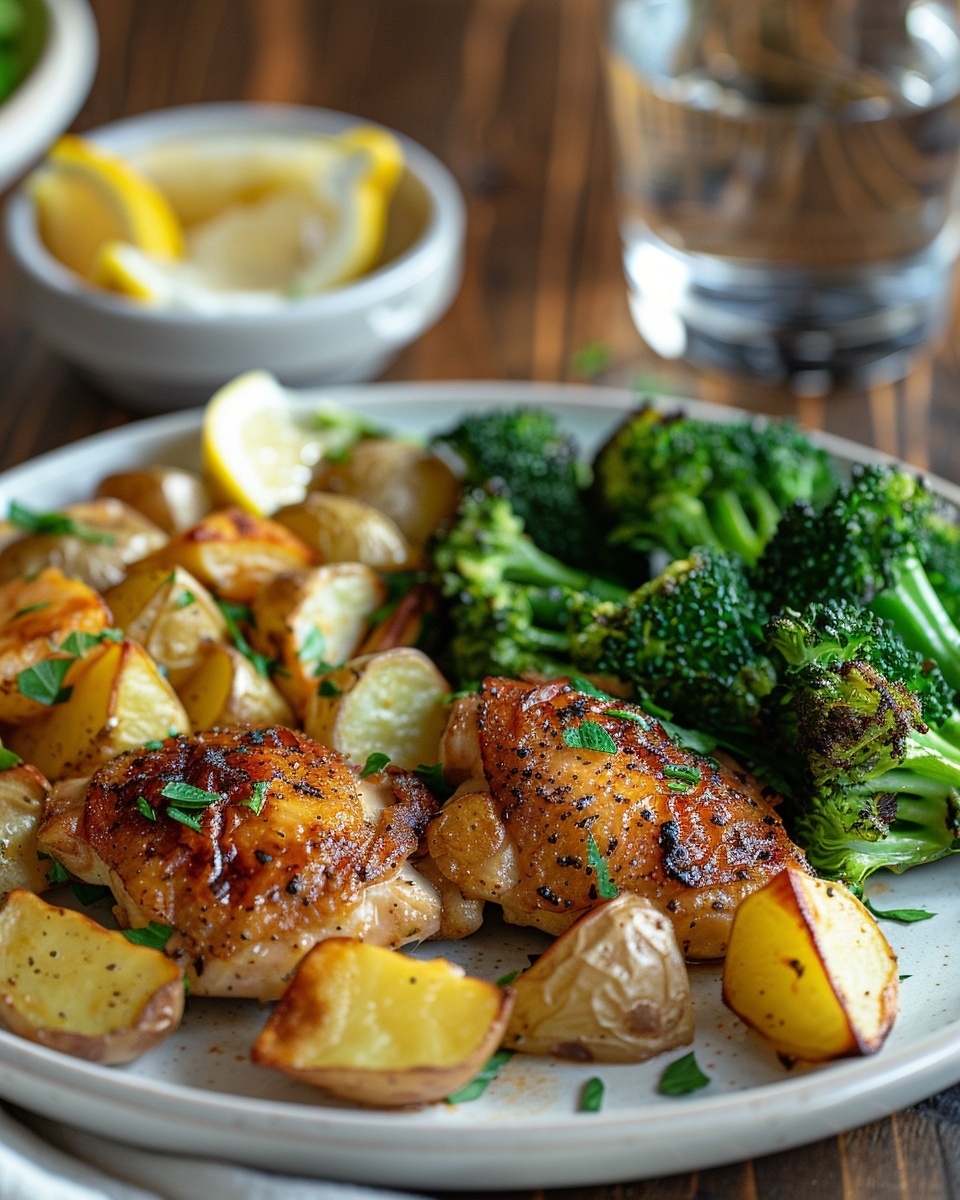
Side dishes that make the meal complete can honestly be as simple or elaborate as you want. My weeknight default is roasted vegetables. I throw whatever I have on hand—Brussels sprouts, carrots, bell peppers, zucchini—onto a separate baking sheet, toss them with olive oil and salt, and stick them in the oven alongside the chicken. Everything finishes around the same time, and I’ve got a complete meal with minimal effort.
Mashed potatoes are obviously a classic pairing. The creamy texture contrasts beautifully with the crispy chicken skin. I make mine with plenty of butter and cream, and I’m not ashamed to admit I sometimes use the instant kind on particularly hectic evenings. Your secret is safe with me.
Rice pilaf works wonderfully too. I cook mine with chicken broth instead of water, throw in some toasted almonds and dried cranberries, and suddenly it looks like I tried way harder than I actually did. The fluffy rice soaks up any pan drippings you might drizzle over everything.
Here’s something I started doing last year that changed my dinner game: sheet pan meals. I arrange baby potatoes and thick onion wedges around the chicken thighs on the same pan. Everything roasts together, the vegetables get crispy edges from the chicken fat, and I only have one pan to wash. Game changer for cleanup.
Fresh salads provide a lighter contrast if you’re not in the mood for heavy sides. A simple arugula salad with lemon vinaigrette cuts through the richness of the chicken perfectly. Sometimes I add cherry tomatoes, shaved parmesan, and pine nuts when I’m feeling fancy.
Coleslaw is another favorite in my house, especially during summer. The cool, crunchy texture against the hot, crispy chicken just works. I make mine with a vinegar-based dressing rather than mayo-based because I find it complements the chicken better without feeling too heavy.
Garlic bread or dinner rolls are always welcome. My kids will eat literally anything if there’s bread involved. I brush the rolls with some of that rendered chicken fat from the pan and toast them for a few minutes. They taste like they came from a restaurant.
For a complete comfort food experience, try serving your chicken thighs with macaroni and cheese. I know it sounds indulgent, but sometimes you just need that kind of meal. Add a simple green vegetable on the side so you can pretend you’re being balanced.
Storing leftovers properly ensures you can enjoy your chicken thighs for days after you make them. Let the chicken cool completely before storing—I usually give it about 30 minutes at room temperature. Putting hot chicken directly into the fridge raises the temperature inside and can affect other foods.
I store my leftover chicken thighs in airtight containers in the refrigerator. They’ll stay good for 3 to 4 days. If you’re stacking multiple thighs, put a piece of parchment paper between layers to prevent them from sticking together.
For longer storage, freeze them. Wrap each thigh individually in plastic wrap, then put all the wrapped thighs into a freezer bag. This way you can pull out just one or two at a time rather than thawing the whole batch. Frozen chicken thighs stay good for about 3 months. I always write the date on the bag because my freezer is basically where food goes to be forgotten.
The USDA provides helpful guidelines on food transparency and proper storage temperatures that have helped me understand exactly how long different foods stay safe. It’s worth checking out their resources if you’re ever unsure about food safety.
Reheating without losing that crispy skin is totally possible if you do it right. The microwave is your enemy here. It’ll make everything soggy and sad. Instead, reheat in the oven at 350 degrees for about 15 minutes. Put the chicken on a wire rack over a baking sheet so air can circulate. This helps restore some of that crispiness.
Another method I love is reheating in a skillet. Heat a bit of oil in a pan over medium heat, place the chicken thigh skin-side down, and let it crisp up for about 5 minutes. Flip it, warm the other side for another 3 to 4 minutes, and you’re done. This method actually gives you crispier skin than when it was fresh.
The air fryer works brilliantly for reheating too. Just 5 minutes at 375 degrees brings everything back to life. The skin gets crispy again, and the inside stays moist. This is probably my favorite reheating method when I’m only doing one or two thighs.
Transforming leftover chicken into new meals is where things get really fun. I never feel like I’m eating the same thing twice when I get creative with leftovers.
Chicken tacos are the easiest transformation. Pull the meat off the bone, chop it up, warm it in a pan with some taco seasoning, and stuff it into tortillas with your favorite toppings. I add shredded lettuce, cheese, sour cream, and salsa. My kids request this version almost as much as the original chicken.
Chicken salad is another go-to. Dice the leftover chicken, mix it with mayo, diced celery, grapes, and pecans. Serve it on croissants or over lettuce. It tastes nothing like the original dish, which somehow makes it feel special rather than repetitive.
I make chicken fried rice with leftover thighs at least once a month. Dice the chicken, fry it up with day-old rice, frozen peas and carrots, scrambled eggs, and soy sauce. It’s better than takeout and uses up multiple leftovers at once.
Chicken quesadillas happen frequently in my kitchen. Shred the leftover chicken, layer it with cheese between two tortillas, and cook in a skillet until crispy. Cut into wedges and serve with guacamole and sour cream. Quick lunch sorted.
Here’s something I discovered by accident: chicken and waffles. I reheated leftover chicken thighs in the oven while making waffles for Sunday breakfast. Drizzled everything with maple syrup, and my family lost their minds. Now it’s a requested weekend breakfast.
Pasta dishes work beautifully with leftover chicken. I’ve added diced chicken thighs to carbonara, alfredo, and even simple marinara. It turns a side dish into a complete meal and adds protein without much effort.
Chicken soup is perfect for using up those bone-in thighs. Pull the meat off, throw the bones in a pot with water, vegetables, and herbs to make stock. Add the chicken meat back in with noodles or rice, and you’ve got homemade soup that tastes like you spent all day on it.
By the way, if you’re looking for more inspiration on different ways to prepare poultry and other proteins, browsing through various meat and poultry recipes can give you tons of ideas for weeknight dinners and special occasions alike.
Pizza topping is another unexpected use. Dice the chicken, scatter it over pizza dough with barbecue sauce, red onions, and cheese. Homemade barbecue chicken pizza that rivals anything from a restaurant.
Grain bowls have become my healthy lunch option. Layer quinoa or brown rice with roasted vegetables, diced chicken thigh, avocado, and a tahini dressing. It feels virtuous but actually tastes good, which is rare.
Chicken pot pie filling is worth the effort when you have leftover chicken. Make a simple white sauce, add frozen mixed vegetables and diced chicken, pour it into a pie crust, and bake. Comfort food at its finest, and nobody needs to know it started as leftovers.
The versatility of leftover oven-baked chicken thighs means you’re never stuck eating the exact same meal twice. With just a few additional ingredients and a little creativity, you can create entirely different dishes throughout the week.
Remember, the key to making oven-baked chicken thighs a regular part of your routine is keeping it simple most of the time. Master the basic technique, then experiment with different seasonings and serving options. Some nights you’ll go all out with homemade rubs and elaborate sides. Other nights you’ll do salt, pepper, and whatever vegetables are in the crisper drawer. Both approaches are completely valid, and both will result in delicious chicken that your family actually wants to eat. The confidence you’ll gain from mastering this one simple dish will spill over into other areas of your cooking, I promise.
Frequently Asked Questions About Oven-Baked Chicken Thighs
How long do you cook chicken thighs in the oven for?
Cooking time depends on whether you’re using bone-in or boneless thighs. Bone-in, skin-on chicken thighs need 40 to 45 minutes at 400 degrees. Boneless, skinless thighs cook much faster, usually in 25 to 30 minutes at the same temperature. The only foolproof way to know they’re done is checking the internal temperature with a meat thermometer. You’re looking for 165 degrees Fahrenheit in the thickest part of the meat. If your chicken is cold from the fridge rather than room temperature, add about 5 minutes to these times.
How long does it take for chicken thighs to cook at 400 degrees?
At 400 degrees, bone-in chicken thighs typically take 40 to 45 minutes to cook through completely. This temperature is ideal because it creates crispy skin while keeping the meat juicy inside. Boneless thighs need significantly less time, usually 25 to 30 minutes. I always start checking the temperature around the 35-minute mark for bone-in thighs to avoid overcooking. The thickness of your thighs and whether they started at room temperature also affect cooking time, so a meat thermometer is really your best friend here.
Is it better to bake bone-in chicken thighs at 350 or 400?
I recommend 400 degrees for bone-in chicken thighs if you want crispy skin. The higher temperature creates better browning and crispiness while still cooking the meat through properly. At 350 degrees, your chicken will be perfectly safe and cooked, but the skin tends to be softer and less appealing. The only time I use 350 is when I’m making a saucy dish where crispy skin doesn’t matter, or if I need to coordinate with other dishes in the oven that require lower heat. For standalone roasted chicken thighs, 400 degrees wins every time.
Should I cover my chicken thighs when I bake them in the oven?
No, you shouldn’t cover chicken thighs while baking them if you want crispy skin. Covering creates steam that makes the skin soggy instead of crispy. I only cover chicken thighs with foil if the skin is browning too quickly before the inside cooks through, which is pretty rare. In that case, I loosely tent foil over the top for the last 10 minutes of cooking. For the crispiest results, leave your chicken uncovered for the entire cooking time and make sure you’ve patted the skin completely dry before seasoning.
Can I bake frozen chicken thighs?
Technically yes, but I don’t recommend it. Frozen chicken thighs take about 50% longer to cook and often release excess moisture that prevents the skin from getting crispy. The texture is never quite as good as when you start with thawed chicken. If you’re in a pinch, you can bake them from frozen at 400 degrees for about 60 to 70 minutes, but plan to check the temperature carefully. For best results, thaw chicken thighs overnight in the refrigerator or use the cold water method, which takes about an hour or two.
Why is my chicken skin not crispy?
The most common reason for soggy skin is moisture. If you don’t pat the chicken completely dry with paper towels before seasoning, the skin will steam instead of crisp up. Other culprits include overcrowding the pan (which traps steam), using too low a temperature, or covering the chicken while it bakes. For crispiest results, dry the skin thoroughly, use 400 degrees or higher, leave space between thighs on the pan, and keep them uncovered. Some people even dry-brine their chicken overnight in the fridge for extra crispy skin.
Do bone-in chicken thighs take longer to cook than boneless?
Yes, bone-in chicken thighs definitely take longer to cook than boneless ones. The bone acts as an insulator, slowing down heat transfer to the center of the meat. Bone-in thighs need 40 to 45 minutes at 400 degrees, while boneless thighs only need 25 to 30 minutes. However, the bone adds flavor and helps keep the meat juicy during cooking. If you have the extra time, bone-in thighs are worth it for the superior flavor and texture. For quick weeknight meals, boneless thighs are the better choice.
Can I use chicken thighs in recipes that call for chicken breasts?
Absolutely! Chicken thighs actually work better than breasts in most recipes because they’re more forgiving and stay moist even if slightly overcooked. The main difference is that thighs have more fat and a slightly richer flavor. They work perfectly in casseroles, stir-fries, soups, and pasta dishes. Just adjust the cooking time since thighs take a bit longer than breasts to reach safe internal temperature. I’ve substituted thighs in nearly every chicken breast recipe I’ve encountered, and the results are usually even better than the original.
What temperature should chicken thighs be when done?
Chicken thighs should reach an internal temperature of 165 degrees Fahrenheit to be safe to eat. This is the temperature at which harmful bacteria are destroyed. I use an instant-read meat thermometer inserted into the thickest part of the thigh, being careful not to touch the bone, which can give a false reading. Some people prefer to cook dark meat to 175 degrees for a more tender texture, since chicken thighs can handle the extra heat without drying out. I usually pull mine at 165 and let carryover cooking bring them up a few more degrees while they rest.
How do I know when chicken thighs are done without a thermometer?
While a thermometer is the most reliable method, you can check doneness by piercing the thickest part with a knife and checking the juices. They should run clear, not pink or red. The meat should also feel firm to the touch rather than squishy. You can also wiggle the bone—if it moves very easily and the meat is pulling away from the bone, it’s probably done. However, I really recommend investing in a cheap meat thermometer because guessing can lead to undercooked chicken, which isn’t safe, or overcooked chicken, which isn’t enjoyable. A basic digital thermometer costs less than ten dollars and takes all the guesswork out of cooking.
Oven-Baked Chicken Thighs
Ingredients
Equipment
Method
- Remove chicken thighs from the refrigerator 15 to 20 minutes before cooking to bring them to room temperature.
- Preheat your oven to 400 degrees F (200 degrees C).
- Pat chicken thighs dry with paper towels to ensure a crispy skin.
- If using bone-in thighs, check for any small bone fragments and remove them.
- Trim any excess skin from skin-on thighs as needed.
- Coat each thigh with olive oil or melted butter, then season generously with salt and pepper on both sides.
- Optional: Marinate the chicken for at least 30 minutes with your choice of marinade (olive oil, minced garlic, lemon juice, and herbs; or soy sauce, sesame oil, ginger, and honey).
- Arrange the seasoned thighs on a rimmed baking sheet with space between each piece.
- Bake bone-in thighs for 40 to 45 minutes or boneless thighs for 25 to 30 minutes, or until the internal temperature reaches 165 degrees F (74 degrees C).
- Optional: For extra crispy skin, turn on the broiler for 2 to 3 minutes at the end of cooking.
- Allow the chicken to rest for 5 to 10 minutes before serving.