Classic New York Cheesecake Bars: A Dessert Worth Every Bite
I’ll never forget the first time I tasted a real New York cheesecake. I was visiting a small bakery in Brooklyn, and one bite changed everything I thought I knew about desserts. That dense, creamy texture paired with the buttery graham cracker crust made me close my eyes and savor every single moment. Since then, I’ve been on a mission to recreate that magic at home. The best part? I discovered that Classic New York Cheesecake Bars deliver all that rich, dreamy flavor in a format that’s easier to make and even easier to share.
These bars have become my go-to dessert for every occasion. Birthday parties, holiday gatherings, or just a random Tuesday when I need something special. There’s something about cutting into perfect squares that makes dessert feel both elegant and approachable. No fancy plating required, no stress about slicing the perfect wedge. Just pure, unadulterated cheesecake goodness that never fails to impress.
What makes these bars such a crowd favorite goes beyond convenience. They combine everything people love about traditional New York cheesecake with the casual, shareable appeal of a bar dessert. Kids love them because they can hold them in their hands. Adults love them because they taste like something from a fancy restaurant. I love them because they disappear from my kitchen faster than any other dessert I make.
What Makes Classic New York Cheesecake Bars Special?
The magic of Classic New York Cheesecake Bars lies in their texture. This isn’t your light and fluffy Japanese cheesecake or your tangy European version. New York-style cheesecake stands proud with its rich, dense, and incredibly creamy body that melts on your tongue. Each bite feels luxurious without being heavy. The cream cheese base creates this silky smooth texture that’s hard to describe until you’ve experienced it yourself.
The secret to achieving this perfect texture comes from using full-fat cream cheese and plenty of it. No shortcuts here. The original New York-style recipes don’t mess around with reduced-fat options or cream cheese substitutes. They commit fully to richness, and that commitment pays off in every single bite. When I make these bars, I always use cream cheese at room temperature. This one simple step prevents lumps and creates that signature smooth consistency.
But richness alone doesn’t make a great cheesecake. The perfect balance of sweetness sets these bars apart from overly sugary desserts. Classic New York Cheesecake Bars walk a fine line between sweet and tangy. The cream cheese brings a natural tanginess that keeps the dessert from becoming cloying. The sugar sweetens just enough to complement the dairy without overwhelming your taste buds. This balance means you can eat a whole bar without feeling like you need a glass of water to wash away the sugar.
I’ve served these bars to people who claim they don’t like cheesecake. They usually change their minds after the first bite. The key is that subtle tang from the cream cheese mixed with just enough vanilla extract to add warmth. Some recipes call for sour cream or heavy cream in the filling, which adds another layer of complexity to the flavor profile.
The Story Behind New York-Style Cheesecake
New York cheesecake has a history as rich as its taste. The style we know and love today took shape in the early 1900s. A Jewish deli owner named Arnold Reuben claims to have created the first New York cheesecake. His version used cream cheese, which had been invented just a few decades earlier by a dairy farmer in upstate New York.
Before cream cheese came along, most cheesecakes in Europe used cottage cheese or ricotta. The American invention of cream cheese transformed cheesecake into something entirely new. It created that dense, smooth texture that defines New York-style to this day. Junior’s restaurant in Brooklyn eventually made the dessert famous beyond New York City limits. Their recipe became the gold standard that home bakers like me try to recreate.
The traditional New York cheesecake is a tall, round cake baked in a springform pan. It usually has no toppings, letting the pure cheesecake flavor shine through. Some versions include a sour cream topping, but purists prefer it plain. This simplicity shows confidence in the recipe. When your dessert tastes this good, you don’t need to hide it under fruit compote or chocolate sauce.
The bar format takes this classic and makes it more practical for home bakers. Instead of worrying about a springform pan leaking or a cheesecake cracking down the middle, you bake everything in a regular rectangular pan. The results are just as delicious but with less stress and more flexibility.
Why the Bar Format Changes Everything
Baking Classic New York Cheesecake Bars instead of a traditional round cake offers several real advantages. First, the square or rectangular pan distributes heat more evenly than a springform pan. This means fewer cracks and more consistent baking throughout. I used to stress about cracks in my cheesecakes until I switched to bars. Now I barely worry about appearance because bars are much more forgiving.
The bar format also makes portion control simple. You can cut small squares for a light dessert or larger pieces for serious cheesecake lovers. At parties, I’ve noticed people are more likely to try a small bar than commit to a large slice. This means more people get to enjoy the dessert, and I get to hear more compliments on my baking.
Storage becomes easier with bars too. They stack neatly in containers without the awkward triangular shape of traditional slices. I can fit more servings in my fridge, and they’re easier to wrap individually for freezing. When unexpected guests drop by, I pull a few bars from the freezer, let them thaw for thirty minutes, and dessert is served.
Transportation is another win for the bar format. Taking a whole cheesecake to a potluck always made me nervous. One sudden stop in the car could mean disaster. Bars travel in their baking pan with a simple foil cover. They stay put, stay fresh, and arrive looking as good as they did coming out of the oven.
For home bakers who feel intimidated by traditional cheesecake, bars offer a gentler entry point. The technique is the same, but the pressure is lower. Your first attempt might not be perfect, but it will still taste amazing. That’s what matters most when you’re sharing food with people you care about.


Gathering Your Ingredients for the Perfect Classic New York Cheesecake Bars
Now that you understand why bars make cheesecake so much more approachable, let’s talk about what actually goes into making them. I remember my first shopping trip for cheesecake ingredients. I stood in the dairy aisle for probably fifteen minutes, reading cream cheese labels like they held the secrets of the universe. Turns out, they kind of do.
The crust requires just three simple things: graham crackers, melted butter, and a bit of sugar. I use about a cup and a half of graham cracker crumbs, which translates to roughly nine full crackers. You can buy pre-made crumbs, but honestly, crushing them yourself in a food processor or even in a zip-top bag with a rolling pin gives you better control over the texture. I like mine somewhere between sandy and coarse. The butter needs to be melted, about six tablespoons worth, and I add two tablespoons of sugar to give the crust a little extra sweetness.
The filling is where things get serious. You’ll need four packages of cream cheese, which is thirty-two ounces total. This is not the time to scrimp or substitute. Full-fat, real cream cheese makes all the difference. I’ve tried reduced-fat versions before, and they just don’t deliver that luxurious mouthfeel we’re after. The cream cheese needs to sit at room temperature for at least an hour before you start. Cold cream cheese creates lumps that no amount of mixing will fix. Trust me on this one.
Along with the cream cheese, you’ll need one cup of granulated sugar. Some recipes call for more, but I find this amount hits that sweet spot between indulgent and balanced. Three large eggs go into the filling as well. These should also be at room temperature because cold eggs can cause the cream cheese to seize up and create an uneven texture. If you forget to take them out ahead of time, just place them in a bowl of warm water for about ten minutes.
For flavor, I use two teaspoons of pure vanilla extract and about a tablespoon of fresh lemon juice. The vanilla adds warmth and depth, while the lemon juice brightens everything up without making it taste citrusy. Some people skip the lemon, but I think it’s essential for balancing the richness. Finally, I add half a cup of sour cream to the filling. This ingredient is optional, but it contributes extra tanginess and a silkier texture that reminds me of the cheesecakes from my favorite bakery.
Here’s the thing about choosing cream cheese: always go for the brick-style packages, not the spreadable kind that comes in tubs. Those spreadable versions contain additives that change the texture. Philadelphia is the classic choice for a reason, though I’ve had good results with store brands too. Just check that the first ingredient is actually cream and milk, not stabilizers or gums.
When shopping for eggs, I usually grab the ones labeled large. Baking recipes are calibrated to large eggs, and using different sizes can throw off your ratios. The same goes for measuring your sugar accurately. I learned this the hard way after a batch came out way too sweet because I packed the measuring cup instead of leveling it off.
Room temperature ingredients cannot be overstated. I know I sound like a broken record, but this detail separates okay cheesecake bars from exceptional ones. When everything is the same temperature, it blends together smoothly without overworking the batter. Overworking creates air bubbles, and air bubbles lead to cracks and uneven texture. It’s similar to how making a breakfast skillet requires all your ingredients prepped before you start cooking.
Creating Your Classic New York Cheesecake Bars from Start to Finish
Let me walk you through this process exactly as I do it in my own kitchen. First, preheat your oven to 325 degrees Fahrenheit. Line a 9×13 inch baking pan with parchment paper, leaving some overhang on the sides. This overhang becomes your handles for lifting the bars out later, which is a total game-changer for clean slicing.
Start with the crust. In a medium bowl, combine your graham cracker crumbs with the melted butter and sugar. Mix it with a fork until everything looks like wet sand. You should be able to squeeze a handful and have it hold together. Press this mixture firmly into the bottom of your prepared pan. I use the bottom of a measuring cup to really pack it down evenly. The firmer you press, the less likely your crust will crumble when you cut the bars later.
Bake the crust by itself for about ten minutes. This pre-baking step, which some people skip, makes a huge difference. It creates a barrier between the crust and the filling, preventing sogginess. While the crust bakes and then cools slightly, you can start on the filling. By the way, this is when I usually clean up my workspace a bit. A tidy counter makes the next steps less chaotic.
In a large mixing bowl, beat the room-temperature cream cheese with an electric mixer on medium speed until it’s completely smooth. This takes about two minutes. Don’t rush this step. Any lumps now will be lumps in your finished bars. Once the cream cheese is silky, add the sugar and beat for another minute until well combined.
Now add the eggs one at a time. This is important. After adding each egg, mix on low speed just until incorporated. I cannot stress enough how crucial it is to mix on low once the eggs are in. High-speed mixing incorporates too much air, which creates those annoying cracks on top and sometimes even a puffy texture that later sinks. If you’re making something like a cottage cheese breakfast bake, you want air for fluffiness. For cheesecake bars, you want density and smoothness.
After all three eggs are mixed in, add your vanilla extract, lemon juice, and sour cream. Mix on low speed just until everything comes together into one uniform mixture. The batter should look pale yellow and pour easily but not be runny like water. If you see any cream cheese lumps at this point, use a spatula to press them against the side of the bowl to break them up.
Pour this filling over your pre-baked crust. Use a spatula to spread it evenly into all the corners. Tap the pan gently on the counter a few times to release any air bubbles trapped in the batter. You might see a few small bubbles rise to the surface, which is exactly what you want.
Bake the bars for about forty-five to fifty minutes. You’re looking for the edges to be set while the center still has a slight jiggle when you gently shake the pan. This jiggle freaked me out the first few times. I kept thinking it wasn’t done. But that jiggly center will firm up perfectly as it cools. If you bake until the center is completely firm, you’ll end up with dry, overcooked bars.
Here’s where patience becomes your best friend. Turn off the oven and crack the door open about an inch. Let the cheesecake bars sit in the cooling oven for one hour. This gradual temperature change prevents the dreaded crack that plagues so many cheesecakes. After an hour, remove the pan from the oven and let it cool completely on the counter. This takes another hour or two.
Once the bars reach room temperature, cover the pan with plastic wrap and refrigerate for at least four hours, but preferably overnight. I know waiting is torture, especially when your kitchen smells incredible. But cold cheesecake slices so much cleaner than warm cheesecake. You’ve come this far, so give it the time it needs. Think of it like waiting for no-bake desserts to set up in the fridge.
When you’re ready to slice, use the parchment paper overhang to lift the entire block of cheesecake out of the pan. Place it on a cutting board. Get a long, sharp knife and run it under hot water, then wipe it dry. Make your first cut, then rinse and dry the knife again before the next cut. This hot knife trick creates clean edges without dragging the filling.
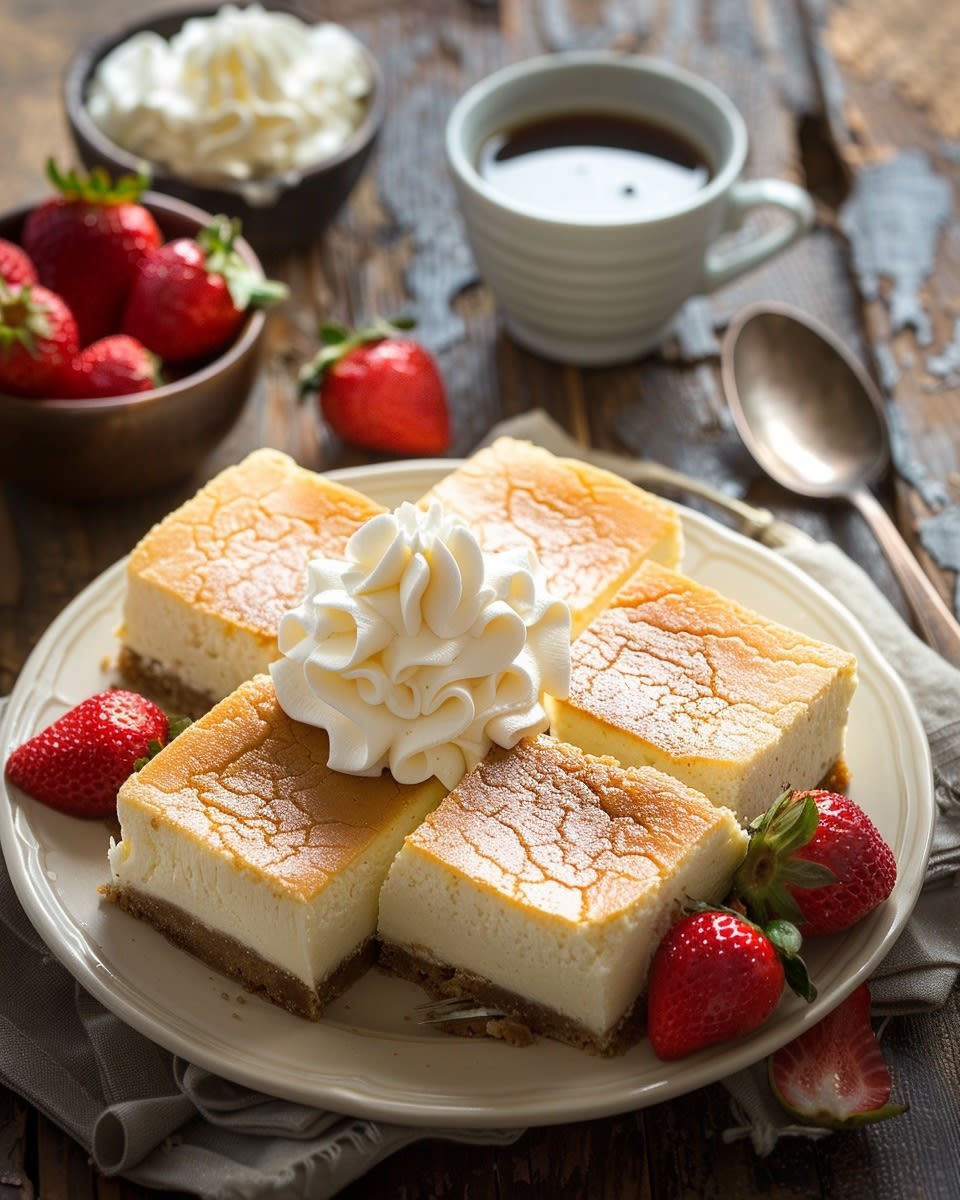
I usually cut my bars into twelve large pieces or twenty-four smaller ones, depending on the occasion. For a fancy presentation, you can dust them with powdered sugar, add a dollop of whipped cream, or place a fresh berry on top. Honestly though, they’re perfect just as they are. The simplicity lets that classic cheesecake flavor shine through.
Funny enough, the hardest part isn’t making these bars. It’s not eating them all in one sitting. The smooth, creamy texture and that perfect tang make them dangerously addictive. Sometimes I’ll grab one with my morning coffee, which probably isn’t the healthiest choice but feels absolutely right. It’s definitely better than just having a quick smoothie and calling it breakfast.
These bars keep well in the refrigerator for up to five days, covered tightly. They also freeze beautifully for up to three months. Just wrap individual bars in plastic wrap, then place them in a freezer bag. Thaw in the fridge overnight when you want one. Having a stash of these in the freezer feels like having a secret weapon for unexpected guests or sudden dessert cravings.


Tips and Tricks for Perfecting Your Classic New York Cheesecake Bars
After making these bars dozens of times, I’ve learned that small adjustments make enormous differences. One mistake I made early on was opening the oven door constantly to check on them. Every time you open that door, the temperature drops dramatically, and cheesecake hates sudden temperature changes. It’s like inviting cracks to the party. Now I set a timer and resist the urge to peek until at least forty minutes have passed.
Another common pitfall involves overmixing the batter once eggs enter the picture. I used to think more mixing meant smoother results, but the opposite is true. When you beat air into eggs, that air expands during baking and creates cracks or a weird spongy texture. Mix just until you can’t see streaks of egg anymore, then stop. Your arm might want to keep going, but your cheesecake bars will thank you for restraint.
Here’s something nobody tells you about water baths. Traditional cheesecake recipes often call for placing your pan inside a larger pan filled with water. This supposedly prevents cracks by keeping moisture in the oven. I’ve tried it both ways, and honestly, the slow cooling method I mentioned earlier works just as well without the risk of water seeping into your pan. If you do want to try a water bath, wrap your pan tightly in aluminum foil first. Just be careful with proper food safety practices when handling hot pans and steaming water.
The single best trick for preventing cracks is temperature control at every stage. Room temperature ingredients mix smoothly. Gradual oven cooling prevents shock. Patience during refrigeration allows everything to set properly. Rushing any of these steps increases your crack risk exponentially. Think of cheesecake as meditation practice disguised as baking.
Let me share a rescue trick for when cracks happen anyway, because they will eventually. A thin layer of sour cream topping hides everything. Mix one cup of sour cream with two tablespoons of sugar and half a teaspoon of vanilla. Spread it gently over your cooled bars, then refrigerate for another hour. People will think you planned it that way, and the extra tanginess tastes incredible.
When it comes to variations, Classic New York Cheesecake Bars serve as a blank canvas for creativity. I’ve added crushed Oreos to the crust for a cookies-and-cream version that my kids request constantly. Swap regular graham crackers for chocolate ones, and suddenly you have a different dessert entirely. One time I mixed in a swirl of raspberry jam before baking, dragging a knife through the batter to create marbled patterns. The tartness of the berries cut through the richness beautifully.
Topping options run wild too. Fresh strawberries macerated in sugar create a simple compote that looks fancy. Caramel sauce drizzled over individual bars adds sweetness and visual appeal. During the holidays, I’ve sprinkled crushed peppermint candies on top, which sounds weird but tastes like winter in dessert form. Chocolate ganache turns these into something you might pay fifteen dollars for at a bakery.
For a lighter option, whipped cream with a touch of vanilla works wonders. I don’t mean the stuff from a can, though that works in a pinch. Real whipped cream made from heavy cream and powdered sugar takes three minutes with a hand mixer and elevates everything. Add a few lemon zest curls on top for a restaurant-quality presentation.
Storage might seem straightforward, but there are nuances worth knowing. Always store cheesecake bars in the refrigerator, never at room temperature. Dairy-based desserts spoil quickly when left out, and nobody wants food poisoning from dessert. I use an airtight container with parchment paper between layers if I’m stacking bars. Without that paper barrier, they stick together and the presentation suffers.
These bars stay fresh for about five days in the fridge, though they rarely last that long in my house. By day three, the crust might soften slightly, but the flavor remains excellent. Some people actually prefer the texture after a day or two because everything melds together even more.
Freezing these bars has saved me countless times when I needed dessert on short notice. After cutting them into portions, I wrap each piece individually in plastic wrap, then place them all in a freezer-safe container or bag. They keep for up to three months this way. When you want one, move it to the fridge the night before. Slow thawing maintains the texture better than countertop thawing. If you’re impatient like me, thirty minutes at room temperature gets them soft enough to eat, though they’ll be a bit firmer than usual.
Never refreeze thawed cheesecake bars. The texture turns grainy and unpleasant because freezing damages the cream cheese structure. Once thawed, eat them within three days. Mark your containers with dates so you remember when you froze them. I learned this after discovering mystery desserts in my freezer that might have been from last year.
By the way, presentation matters more than people admit. When I bring these to gatherings, I arrange them on a nice platter instead of leaving them in the baking pan. Sometimes I dust them with powdered sugar right before serving, which takes ten seconds but looks impressive. A sprig of fresh mint or a few berries scattered around the platter adds color. People eat with their eyes first, and making your bars look appealing ensures they’ll actually get tasted.
One variation I’ve been experimenting with lately involves citrus zest. Adding a tablespoon of orange or lemon zest to the filling creates brightness without changing the texture. The tiny flavor burst in each bite keeps things interesting. It’s subtle enough that people notice something special but can’t quite identify what. I love when guests ask for the secret ingredient.
For chocolate lovers, mixing melted chocolate into half the batter creates a two-tone effect. Pour the plain batter first, then dollop the chocolate batter on top and swirl them together with a knife. The visual appeal alone makes people reach for seconds. This technique works with any flavor you can mix into cream cheese, like pumpkin puree for fall or strawberry jam for summer.
Temperature matters for serving too. Some people prefer cheesecake cold straight from the fridge, while others like it slightly softened. I fall somewhere in between. Taking the bars out about fifteen minutes before serving allows the flavors to open up without losing that firm, sliceable texture. Cold cheesecake tastes more neutral, while room temperature cheesecake releases more of its vanilla and cream cheese notes.
If you’re really into making desserts at home, these bars deserve a permanent spot in your rotation. The techniques you learn making them transfer to other desserts too, like proper mixing methods and patience with cooling times.
Frequently Asked Questions About Classic New York Cheesecake Bars
What is the difference between cheesecake and cheesecake bars?
The main difference lies in the baking pan and serving style rather than the recipe itself. Traditional cheesecake bakes in a round springform pan and gets sliced into wedges. Cheesecake bars use a rectangular pan and get cut into squares. The bar format typically has a thinner profile, making it easier to achieve even baking. Bars also tend to be more portable and casual, perfect for potlucks or parties where finger foods work better than plated desserts.
Can I use a different type of crust for my cheesecake bars?
Absolutely, and experimentation makes baking fun. Crushed vanilla wafers create a lighter, sweeter base. Chocolate graham crackers or Oreos work beautifully for chocolate lovers. Even crushed pretzels mixed with butter make an interesting sweet-salty combination. Some people use shortbread cookies for a buttery, less sweet option. Just maintain the same ratio of crushed cookies to melted butter, about three parts crumbs to one part butter, and you’ll get a crust that holds together properly.
How do I know when my cheesecake bars are done baking?
Look for edges that appear set and slightly puffed while the center still jiggles gently when you shake the pan. The jiggle should look like gelatin, not liquid sloshing around. Insert an instant-read thermometer into the center if you want precision. The internal temperature should read between 150 and 155 degrees Fahrenheit. Remember that cheesecake continues cooking as it cools, so slightly underdone is better than overdone. A toothpick test doesn’t work well for cheesecake since it should come out with some creamy residue.
What can I do if my cheesecake bars crack?
First, don’t panic because cracks don’t affect taste at all. For covering them up, spread a sour cream topping over the entire surface once the bars cool. Fresh fruit, whipped cream, or chocolate ganache also hide imperfections beautifully. For future batches, prevent cracks by using room temperature ingredients, avoiding overmixing, and cooling gradually. The slow oven cooling method I described earlier makes the biggest difference. Also make sure your oven temperature is accurate by using an oven thermometer.
Can I freeze cheesecake bars, and how should I thaw them?
Yes, cheesecake bars freeze exceptionally well for up to three months. Cut them into individual portions first, then wrap each piece tightly in plastic wrap. Place wrapped bars in a freezer-safe container or bag to prevent freezer burn. For thawing, transfer wrapped bars to the refrigerator the night before you want to serve them. This slow thawing preserves texture better than countertop thawing. If you’re in a hurry, thirty minutes at room temperature works but results in a slightly firmer texture.
Are there any substitutions for cream cheese in cheesecake bars?
Honestly, substituting cream cheese is tricky because it defines the entire texture and flavor of New York-style cheesecake. Mascarpone cheese comes closest, though it’s sweeter and less tangy. Some people use a blend of ricotta and cream cheese, but the texture becomes grainier. Greek yogurt or cottage cheese blended smooth can work for a lighter version, but you’ll lose that signature richness. For the best results, stick with full-fat cream cheese. If you’re lactose intolerant, some brands make lactose-free cream cheese that works perfectly.
How can I make my cheesecake bars less sweet?
Reduce the sugar in the filling by a quarter cup without affecting texture. The cream cheese still provides structure, so the bars will set properly with less sweetness. You can also skip adding sugar to the crust entirely, letting the graham crackers provide their natural sweetness. Adding an extra tablespoon of lemon juice increases tanginess and balances sweetness. Another option involves using sour cream instead of heavy cream in the filling, which adds pleasant acidity. Remember that the cream cheese itself has natural tang that shines through when you reduce sugar.
What are some popular flavor variations for cheesecake bars?
Chocolate chip cheesecake bars add mini chocolate chips folded into the batter right before baking. Pumpkin cheesecake bars mix pumpkin puree and pumpkin spice into the filling for a fall treat. Berry swirl versions layer fruit preserves through the batter for marbled color and flavor. Lemon cheesecake bars increase the lemon juice and add zest for serious citrus lovers. Cookies and cream versions mix crushed Oreos into both the crust and filling. Caramel pecan bars drizzle caramel and sprinkle toasted pecans on top before serving.
Making Classic New York Cheesecake Bars at home isn’t just about following a recipe. It’s about creating something that brings people together, that makes ordinary days feel special, and that fills your kitchen with the kind of aroma that makes everyone ask what you’re baking. Start with quality ingredients, take your time with each step, and don’t stress about perfection. Even slightly imperfect cheesecake bars taste absolutely incredible.
Ingredients
Equipment
Method
- Préchauffez votre four à 325°F (160°C).
- Tapissez un plat de cuisson de 9x13 pouces avec du papier sulfurisé.
- Dans un bol moyen, mélangez les miettes de biscuits Graham, le beurre fondu et 2 cuillères à soupe de sucre jusqu'à ce que cela ressemble à du sable humide.
- Presser le mélange fermement dans le fond du plat préparé.
- Faites cuire la croûte pendant environ 10 minutes et laissez refroidir légèrement.
- Dans un grand bol, battez le fromage à la crème à vitesse moyenne jusqu'à obtenir une consistance lisse, environ 2 minutes.
- Ajoutez 1 tasse de sucre et battez pendant une minute supplémentaire jusqu'à ce que le mélange soit bien combiné.
- Ajoutez les œufs un à un, en mélangeant à basse vitesse jusqu'à incorporation.
- Incorporez l'extrait de vanille, le jus de citron et la crème aigre jusqu'à obtenir une consistance lisse.
- Versez la garniture sur la croûte précuite et étalez-la uniformément.
- Faites cuire pendant 45 à 50 minutes, jusqu'à ce que les bords soient pris et que le centre ait une légère jiggle.
- Éteignez le four et entrouvrez la porte, laissez refroidir la cheesecake dans le four pendant 1 heure.
- Retirez du four et laissez refroidir complètement à température ambiante, environ 1 à 2 heures.
- Couvrez et réfrigérez pendant au moins 4 heures, de préférence toute la nuit.
- Soulevez la cheesecake en utilisant le papier sulfurisé et coupez-la en carrés avec un couteau chaud.