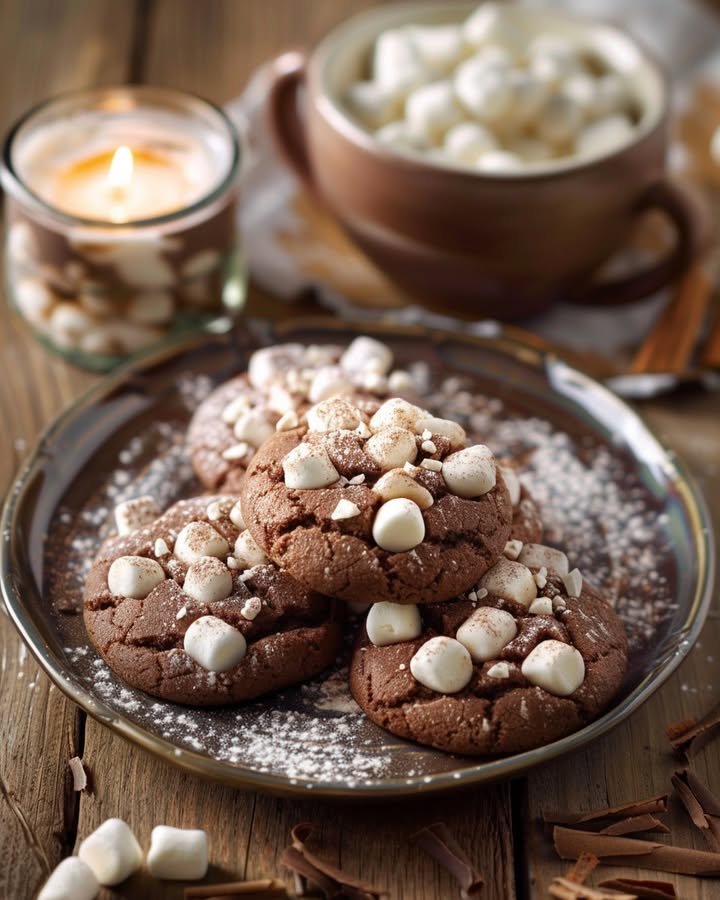
Marshmallow-Surprise Hot Cocoa Cookies: Your New Favorite Treat!
Is there anything cozier than a cup of hot cocoa? I used to think no. Then, one snowy afternoon while my kids were begging for cookies *and* hot chocolate, I had a brilliant (and slightly messy) idea. What if we combined them? After a few hilarious kitchen trials involving melted marshmallows and cocoa powder everywhere, we nailed it. These Marshmallow-Surprise Hot Cocoa Cookies are the magical, gooey, chocolatey answer to winter cravings. They’re like your favorite warm drink transformed into a chewy, fudgy cookie with a melty marshmallow heart and a glossy chocolate hat. Let’s bake some magic!
From Mug to Cookie: A Sweet Evolution
The story of hot cocoa is centuries old, starting with ancient Mesoamerican cultures. They drank a bitter, spiced chocolate beverage. Our modern sweet, creamy version is a fairly recent love affair. The idea of turning drinks into desserts isn’t new either. Think of tiramisu or rum cake. But putting the actual hot cocoa mix *into* a cookie dough? That’s a modern kitchen hack for intense chocolate flavor. I love that this recipe honors the comforting tradition of hot cocoa while breaking all the rules. It’s a fun, playful twist that feels both classic and brand new. Every batch feels like creating a little edible winter wonderland.
Why You’ll Absolutely Love These Cookies
First, the flavor is a deep, rich chocolate double punch from both cocoa powder and the hot cocoa mix. Then, you get that fantastic textural party. The cookie itself is soft and fudgy. The baked marshmallow becomes sticky-sweet and pillow-soft. The final chocolate shell adds a satisfying snap. They are also incredibly fun to make, especially with kids helping to press in the marshmallow halves. But the real reason I keep making them? The pure joy on people’s faces when they bite in and discover the “surprise.” It’s a guaranteed smile-maker.
Perfect Occasions for These Gooey Delights
- Holiday Cookie Swaps: Be the talk of the exchange! These stand out in a sea of sugar cookies.
- Cozy Movie Nights: Pair them with a actual mug of cocoa for the ultimate meta-dessert experience.
- Winter Birthday Parties: They’re a fantastic and festive treat for both kids and adults.
- Care Packages: Once the chocolate shell is fully set, they pack and ship beautifully to spread warmth to faraway friends.
- Just Because It’s Tuesday: Seriously, any day is better with one of these cookies.
Gather Your Ingredients
Here’s what you’ll need to create about 20-22 delicious cookies:
- 1/2 cup (8 Tbsp; 113g) unsalted butter, softened to room temperature
- 1/2 cup (100g) granulated sugar
- 1/2 cup (100g) packed light or dark brown sugar
- 1 large egg, at room temperature
- 1 teaspoon pure vanilla extract
- 1 and 1/2 cups (188g) all-purpose flour (spooned & leveled)
- 1/3 cup (27g) natural unsweetened cocoa powder
- 1/4 cup (40g) dry hot cocoa mix without marshmallows
- 1 teaspoon baking soda
- 1/8 teaspoon salt
- 2 teaspoons (10ml) milk (any kind, dairy or nondairy, is fine)
- 10-11 large marshmallows, cut in half
- 8 ounces (226g) semi-sweet chocolate, finely chopped
Easy Ingredient Swaps
No need to run to the store! You can likely make this with what you have.
- Hot Cocoa Mix: If you only have a mix *with* marshmallows, you can use it. Just know your dough will have a few tiny, crunchy marshmallow bits—still tasty!
- Cocoa Powder: Natural unsweetened cocoa powder works best here. In a pinch, Dutch-processed will work, but it may slightly change the texture.
- Milk: Any liquid you have—dairy milk, almond, oat, even water—works to bring the dough together.
- Chocolate Topping: You can use chocolate chips instead of bar chocolate. Milk or dark chocolate are wonderful alternatives to semi-sweet.
- Butter: Salted butter can be used in place of unsalted. Just omit the extra 1/8 teaspoon salt from the recipe.
Let’s Bake: Step-by-Step Instructions
Step 1: Cream the Butter and Sugars
Grab your large mixing bowl and your softened butter. Add both the granulated and brown sugars. Now, beat them together with a hand mixer or stand mixer for a good 2-3 minutes. You want it to become light, fluffy, and pale in color. This step is not just mixing. It’s incorporating air. That air is what gives your cookies a tender crumb. The smell of butter and brown sugar is already heavenly. Pro tip: Really let it go for the full time. Your patience will be rewarded with the perfect cookie texture.
Step 2: Add the Egg and Vanilla
Crack in your room-temperature egg and pour in the vanilla extract. Beat everything on high speed until it’s fully combined. You’ll see the mixture become smooth and creamy. Remember to stop and scrape down the sides of the bowl with a spatula. We want every bit of that sugary goodness in the mix. The vanilla adds that warm, comforting note that makes the chocolate flavor sing.
Step 3: Whisk the Dry Ingredients
In a separate, medium-sized bowl, whisk together the flour, cocoa powder, hot cocoa mix, baking soda, and salt. Use a fork or a small whisk. You’ll see the dark cocoa dust mix with the lighter flour. This is your double-chocolate power base. Whisking ensures the baking soda and salt are evenly distributed. That means every bite will be perfectly leavened and seasoned.
Step 4: Combine Wet and Dry
With your mixer on low speed, slowly add the bowl of dry ingredients to the wet butter mixture. Watch as the dark, powdery mix disappears into the creamy base. The dough will become very thick and look a bit crumbly. This is normal! Now, add the two teaspoons of milk. Mix on low until the dough suddenly comes together into a soft, pliable, and intensely chocolate-brown ball. It’s rich and fragrant.
Step 5: Chill the Dough
This step is non-negotiable! Tightly cover your dough with plastic wrap. Press it right onto the surface. Now, chill it in the refrigerator for at least 2 hours, or up to 3 days. Chilling firms up the butter. This prevents the cookies from spreading too thin in the oven. It also allows the flour to fully hydrate, deepening the flavor. You can bake a few right away, but trust me, the wait is worth it.
Step 6: Scoop and Bake
Preheat your oven to 350°F (177°C). Line your baking sheets with parchment paper. Take the chilled dough from the fridge. Use a tablespoon to scoop out heaping mounds. Roll them briefly in your hands into rough balls. Place them on the sheets, spacing them about 2-3 inches apart. They need room to spread. Bake for exactly 10 minutes. The cookies will look puffed and set around the edges but still soft in the middle.
Step 7: Add the Marshmallow Surprise
Take the baking sheets out of the oven. Quickly but carefully, press a half marshmallow (sticky cut-side down) into the center of each hot cookie. Get it right in there! Return the sheets to the oven for just 2 more minutes. You’ll see the marshmallows start to puff and soften. Pro tip: Work quickly so the cookies don’t cool down too much before the second bake.
Step 8: Flatten and Cool
Remove the cookies from the oven again. Now, take the back of a spoon and gently press down on each marshmallow. This gives it a nice, flat surface for the chocolate topping and helps it stick. Let the cookies cool right on the baking sheet for 10 minutes. They are too soft to move right away. Then, transfer them to a wire rack to cool completely. The marshmallow will settle into a perfect, gooey layer.
Step 9: The Chocolate Shell Finish
While the cookies cool, chop your semi-sweet chocolate finely. Melt it slowly using a double boiler or in short bursts in the microwave, stirring often. Once the cookies are completely cool, spoon a generous amount of melted chocolate over each one. Cover the marshmallow completely and let it drip a little over the sides. It should look glossy and decadent. Now, let the chocolate set at room temperature for 30-60 minutes. The shell will harden into a beautiful, shiny finish.
Timing Breakdown
Let’s plan your baking adventure!
- Prep Time: 25 minutes
- Chill Time: 2 hours (minimum)
- Cook Time: 12 minutes per batch
- Cooling & Setting Time: 1 hour
- Total Time: About 3 hours 40 minutes (mostly hands-off)
Chef’s Secret
Here’s my little trick: use a high-quality hot cocoa mix. Since it’s a key flavor ingredient, a mix with real cocoa and dairy (like Ghirardelli or Williams-Sonoma) will make your cookies taste richer and more complex than a super cheap, artificially flavored one. It’s the difference between a good cookie and an unforgettable one.
A Fun Cocoa Fact
Did you know the marshmallow in your hot cocoa has a ancient cousin? The original marshmallow was made from the root sap of the mallow plant, mixed with honey. Today’s fluffy treats are mostly sugar and gelatin, but the name stuck. Putting a modern marshmallow into a cookie that tastes like hot cocoa is a fun nod to a very long, sweet history!
Necessary Equipment
- Large mixing bowl
- Medium mixing bowl
- Hand mixer or stand mixer
- Whisk
- Spatula
- Measuring cups and spoons
- Baking sheets
- Parchment paper or silicone baking mats
- Wire cooling rack
- Small saucepan or microwave-safe bowl (for melting chocolate)
How to Store Your Masterpieces
Once the chocolate shell is completely set, these cookies need careful storage. Layer them in an airtight container with parchment paper between each layer. This keeps the chocolate from sticking and prevents any squishing. They are best kept at cool room temperature.
For longer storage, you can freeze them. Place the fully set cookies in a single layer on a tray and freeze until solid. Then, transfer them to a freezer-safe bag or container. They can be frozen for up to 2 months. Thaw at room temperature for about an hour.
Avoid storing them in the fridge. The cold can cause condensation to form on the chocolate shell, making it sticky and dull. The fridge can also dry out the cookie. A cool pantry or countertop is the perfect spot.
Tips and Advice for Success
- Room Temp is Key: Using room temperature butter and egg helps them emulsify with the sugar better. This creates a smoother, more cohesive dough.
- Don’t Skip the Chill: I know it’s tempting to bake right away. But chilling prevents flat, greasy cookies. It’s the secret to a thick, chewy center.
- Use Scissors: Spray your kitchen scissors with a little non-stick spray before cutting the marshmallows. They won’t stick as badly.
- Cool Completely: Make sure the cookies are 100% cool before adding the melted chocolate. If they’re warm, the chocolate will melt into the marshmallow and make a mess.
Pretty Presentation Ideas
- Before the chocolate sets, sprinkle the tops with a tiny pinch of sea salt, crushed candy canes, or festive sprinkles.
- Stack them on a vintage cake stand for a holiday party. They look gorgeous and indulgent.
- Package them in clear cellophane bags tied with a ribbon for lovely homemade gifts.
- Serve them with a small glass of cold milk or a cup of coffee for a perfect pairing.
Healthier & Fun Variations to Try
Want to mix it up? Here are six delicious twists on the classic recipe:
- Peppermint Hot Cocoa Cookies: Add 1/2 teaspoon of peppermint extract to the dough. Crush peppermint candies and sprinkle them over the wet chocolate topping.
- Salty-Sweet Version: Use a salted caramel hot cocoa mix if you can find it. Finish by sprinkling flaky sea salt over the chocolate shell.
- Gluten-Free Marshmallow-Surprise Cookies: Replace the all-purpose flour with a 1:1 gluten-free baking blend. Ensure your cocoa mix is also gluten-free.
- Mocha Madness Cookies: Dissolve 1 tablespoon of instant espresso powder into the 2 teaspoons of milk before adding it to the dough. It enhances the chocolate flavor beautifully.
- Nutty Delight Cookies: Fold 3/4 cup of chopped toasted pecans or walnuts into the dough after mixing in the milk. The nutty crunch is amazing.
- Inside-Out S’mores Cookies: Use a graham cracker-flavored hot cocoa mix, or add 1/2 cup of crushed graham cracker crumbs to the dry ingredients. Top with the marshmallow and chocolate as usual.
Common Mistakes to Avoid
Mistake 1: Using Melted or Too-Soft Butter
This is the biggest culprit for flat, greasy cookies. Butter that is melted or even too warm will cause the dough to spread way too much in the oven. Your cookies will lose their thick, fudgy texture. Your butter should be softened to room temperature but still cool to the touch. When you press it with your finger, it should leave a slight indentation but not sink right in. Simple tip: If your butter gets too soft, just pop the wrapped dough in the fridge for an extra 30 minutes before baking to firm it back up.
Mistake 2: Skipping the Dough Chill Time
I get it. You want cookies now! But rushing this step means your cookies will spread into thin, crispy puddles instead of staying thick and chewy. Chilling solidifies the butter. It also allows the flour to absorb the wet ingredients. This results in a cookie with more flavor and a perfect texture. Plan ahead. Make the dough in the morning for dessert that night.
Mistake 3: Overbaking the Cookies
These cookies continue to cook on the hot baking sheet after you take them out. If you wait for them to look “done” in the oven, they will be dry and hard once cooled. They should look puffed and set at the edges but still very soft in the center when you take them out at the 10-minute mark. They will firm up perfectly as they cool on the sheet. Remember, you’re putting them back in for 2 more minutes with the marshmallow!
Mistake 4: Adding Chocolate To Warm Cookies
Pouring melted chocolate onto a warm cookie is a recipe for a gooey, unrecognizable mess. The heat will melt the marshmallow again and the chocolate will just sink in and disappear. You must let the cookies cool completely on the wire rack. Touch the bottom of the cookie. It should feel completely room temperature. This ensures your beautiful chocolate shell sets up shiny and smooth.
Frequently Asked Questions
Can I use mini marshmallows instead of large ones?
Yes, you can! Instead of cutting large marshmallows in half, you would press 3-4 mini marshmallows into the top of each cookie after the first bake. The melting process is the same. You might just need to press them down a bit more with your spoon to create a flat surface for the chocolate topping. The look will be a little different, but the taste will be just as delicious.
My dough is very crumbly and dry. What did I do wrong?
A crumbly dough usually means the flour was measured with too heavy a hand, or your cocoa powder/hot cocoa mix was particularly “thirsty.” First, always spoon your flour into the measuring cup and level it off. Don’t scoop directly from the bag. Second, don’t worry! Just add an extra teaspoon (or two) of milk, one at a time, and mix until the dough *just* comes together. You want it to hold a ball shape when pressed together, not be wet or sticky.
Can I make the cookie dough ahead of time?
Absolutely, and I recommend it! The dough needs to chill anyway. You can tightly wrap it and keep it in the refrigerator for up to 3 days. You can also freeze the dough balls for later. Scoop the chilled dough into balls, place them on a tray, freeze solid, then transfer to a freezer bag. Bake from frozen, adding 1-2 extra minutes to the first bake time.
Why is my chocolate topping not smooth and shiny?
A few things can cause this. First, the chocolate might have gotten too hot or been stirred too vigorously, causing it to “seize.” Always melt chocolate gently and stir smoothly. Second, if there’s any moisture (like from a not-completely-cool marshmallow) getting into the chocolate, it can become grainy. Finally, adding a tiny teaspoon of coconut oil or vegetable shortening to the chocolate while melting can help create a smoother, shinier shell that sets nicely.
How do I get a clean cut when slicing marshmallows?
Marshmallows are sticky! The best tools are clean kitchen scissors lightly sprayed with cooking spray or dipped in cold water. You can also use a pizza cutter. Some bakers lightly dust the marshmallow and knife with powdered sugar or a bit of the dry cocoa mix from your recipe to prevent sticking. Find the method that works best for you.
Can I use store-bought chocolate frosting instead of melting chocolate?
You can, but the texture and taste will be different. Melted chocolate sets into a firm, snappy shell. Frosting will stay soft and sweet. If you choose to use frosting, I’d recommend a chocolate fudge or ganache-style frosting rather than a fluffy one. It will provide a richer flavor closer to the intended design.
What if I don’t have a double boiler to melt the chocolate?
No problem! The microwave works perfectly. Chop your chocolate finely and place it in a dry, microwave-safe bowl. Heat in 20-second intervals at 50% power, stirring well after each interval. Stop when there are just a few small lumps left. The residual heat will melt them as you stir. This prevents overheating and burning the chocolate.
My marshmallow overflowed and ran off the cookie. What happened?
This usually means the marshmallow was pressed into a cookie that hadn’t baked enough to hold its structure. Make sure the first 10-minute bake is complete and the cookie is set around the edges. Also, press the marshmallow half straight down into the center, don’t wiggle it around. If it still happens, your marshmallows might be extra large—just use a slightly smaller half next time.
Are these cookies kid-friendly to make?
Yes, they are fantastic for kids to help with! They can help scoop the dough (with clean hands!), press in the marshmallows (carefully, it’s hot!), and spoon on the chocolate. The steps are simple and visual. It’s a wonderful way to create sweet memories in the kitchen. Just always supervise around the hot oven.
How long do these cookies stay fresh?
Stored properly in an airtight container at cool room temperature, they are at their absolute best for 2-3 days. The cookie stays soft, and the marshmallow remains perfectly gooey. After that, they are still safe to eat for up to 5 days, but the marshmallow may start to dry out a little and the cookie may soften more. They rarely last that long anyway!
The Cozy Finale
So there you have it! My favorite winter cookie that never fails to impress. It combines the best parts of a rich, fudgy brownie, a toasty campfire marshmallow, and a smooth chocolate bar. It’s a project that’s fun, a little messy, and hugely rewarding. I hope you bake a batch, pour yourself a real mug of cocoa, and enjoy the simple, sweet magic. Your kitchen will smell amazing, and everyone who tries one will ask for the recipe. Happy baking!
Spicy Steak Linguine
Ingredients
Equipment
Method
- Cream the softened butter with the granulated and brown sugars for 2-3 minutes until light and fluffy.
- Add the egg and vanilla extract, mixing until fully combined and smooth.
- In a separate bowl, whisk together the flour, cocoa powder, hot cocoa mix, baking soda, and salt.
- Slowly add the dry ingredients to the wet mixture while mixing on low speed until a thick dough forms; add milk to combine.
- Chill the dough covered in plastic wrap in the refrigerator for at least 2 hours.
- Preheat the oven to 350°F (177°C) and line baking sheets with parchment paper.
- Scoop heaping mounds of dough, roll into balls, and place on the baking sheets.
- Bake for 10 minutes until puffed and set around the edges but soft in the middle.
- Press a half marshmallow into the center of each cookie and bake for an additional 2 minutes.
- Press down gently on each marshmallow with a spoon after removing from the oven.
- Cool cookies on the baking sheet for 10 minutes before transferring to a wire rack to cool completely.
- Melt chopped chocolate, then spoon over each cookie and let it set for 30-60 minutes.