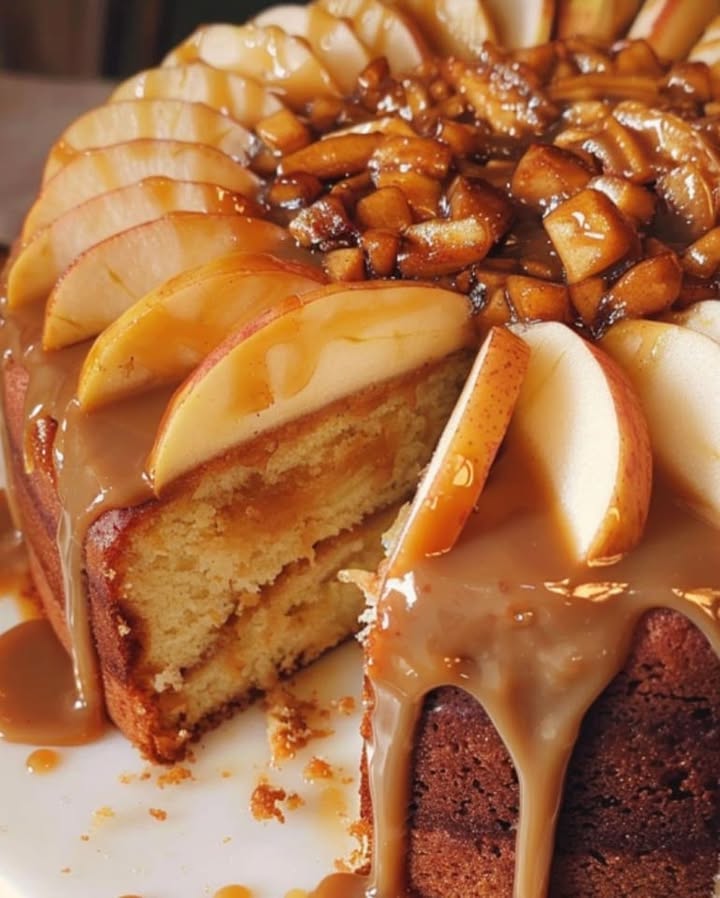
The Coziest Caramel Apple Pie You’ll Ever Bake
There’s nothing quite like the smell of warm apples and caramel wafting through a kitchen on a crisp afternoon. I just pulled my latest creation from the oven, and let me tell you, this caramel apple pie is a hug in dessert form. It’s the perfect blend of sweet, tart, and buttery goodness that makes everyone gather around the table, forks at the ready. Trust me, after one bite of this gooey, spiced masterpiece, you’ll understand why it’s my favorite fall tradition.
A Slice of Pie History: From Orchard to Table
Apple pie has deep roots in American history, but adding caramel is a relatively modern twist of pure genius. Think of it as the classic dessert’s fancier, more indulgent cousin. Traditional recipes often rely on just sugar and spices for sweetness. My version takes inspiration from those gorgeous salted caramel sauces you see everywhere now. I wanted to bridge the gap between a homestyle apple pie and a decadent treat like a Biscoff caramel cheesecake. The result? A pie that feels both familiar and excitingly new. It’s a celebration of autumn’s best harvest with a luxurious, sticky-sweet upgrade.
Why You’ll Fall in Love With This Caramel Apple Pie
First, it’s incredibly forgiving. Even if your lattice top isn’t perfect, the caramel covers a multitude of sins! Second, the flavor combination is unbeatable. Tart apples cut through the rich, buttery caramel in the most wonderful way. Finally, it fills your home with the most incredible, welcoming aroma. Baking this pie is an experience for all the senses, and sharing it creates the warmest memories. It’s a guaranteed crowd-pleaser that looks far more impressive than the effort required.
Perfect Occasions for This Heavenly Pie
This pie is your secret weapon for making any moment special. It’s a must for Thanksgiving, of course, but don’t save it just for the holidays. Bake it for a casual weekend family dinner to spark joy. Bring it to a fall potluck or a Halloween party—it will disappear fast! It’s also the ultimate “welcome to the neighborhood” gift or a comforting treat for a friend who needs cheering up. Any day that calls for a little extra sweetness is the right day for this caramel apple pie.
Gathering Your Caramel Apple Pie Ingredients
Here’s everything you’ll need to create this autumnal masterpiece. Using high-quality, simple ingredients makes all the difference.
- 2 cups all-purpose flour
- 1 1/2 teaspoons baking powder
- 1/2 teaspoon baking soda
- 1/2 teaspoon salt
- 3/4 cup unsalted butter, softened
- 1 cup granulated sugar
- 1/2 cup brown sugar
- 3 large eggs
- 1 teaspoon vanilla extract
- 1 cup buttermilk
- 2 large apples, peeled, cored, and chopped
- 1/2 cup caramel sauce
Simple Ingredient Swaps (No Stress!)
Don’t have exactly what’s listed? No problem! Cooking is about creativity.
- Buttermilk: Make your own by adding 1 tablespoon of lemon juice or white vinegar to a cup of regular milk. Let it sit for 5 minutes until it curdles.
- Apples: Granny Smith are perfect for tartness, but Honeycrisp or Braeburn work great too. Use what’s fresh and local!
- Caramel Sauce: Store-bought is perfectly fine for ease. For a deeper flavor, try melting down soft caramel candies with a splash of cream.
- Nut Allergy Friendly: This recipe is naturally nut-free, making it a safe bet for many gatherings.
Creating Your Masterpiece: Step-by-Step Instructions
Step 1: Preheat and Prepare Your Pan
Start by getting your oven ready. Preheat it to 350°F (177°C). This ensures a steady, even temperature for baking. While it heats, grab your 9-inch pie pan. Give it a good coating of butter or non-stick spray. Then, dust it lightly with flour, tapping out the excess. This little step is your insurance policy. It guarantees your beautiful pie will release cleanly after baking. No stuck-on crust tragedies here!
Step 2: Whisk the Dry Ingredients
Take out a medium-sized mixing bowl. Add your all-purpose flour, baking powder, baking soda, and salt. Now, whisk them all together. You want to see the ingredients become one uniform, pale mixture. This isn’t just mixing. You’re evenly distributing the leavening agents. Doing this prevents weird bitter pockets of baking soda in your final pie. The fluffy cloud of flour is ready to bring structure to your dessert.
Pro tip: For extra-fluffy results, sift your dry ingredients instead of just whisking. It adds more air.
Step 3: Cream the Butter and Sugars
This step is where the magic starts! In a large bowl, combine the softened butter, granulated sugar, and brown sugar. Use an electric mixer on medium speed. Beat them for about 3-4 minutes. Watch the mixture transform from gritty to pale, light, and wonderfully fluffy. The brown sugar will give it a lovely caramel hue. This process incorporates air, which is key for a tender crumb. Don’t rush it. Your patience will be rewarded with texture.
Step 4: Add Eggs and Vanilla
With the mixer on a lower speed, add your eggs one at a time. Let each egg fully blend into the butter-sugar mixture before adding the next. This prevents the batter from curdling or separating. Then, pour in that teaspoon of vanilla extract. That warm, fragrant aroma will hit you immediately. It’s the scent of homemade goodness. Your batter will now be gloriously smooth, thick, and ribbony.
Step 5: Combine Wet and Dry Mixes
Now, we bring everything together. Add about one-third of your flour mixture to the butter bowl. Mix on low until just combined. Follow that with half of the buttermilk. Repeat, ending with the final third of the flour. Mix only until you see no more dry streaks. The batter will be thick and luxurious. Overmixing is the enemy of a tender pie! It develops gluten and makes things tough.
Step 6: Fold in the Apples and Bake
Time for the star ingredient! Add your chopped apples to the batter. Use a gentle folding motion with a spatula to distribute them evenly. You’ll see gorgeous chunks of apple throughout. Pour this fragrant batter into your prepared pan, smoothing the top. Place it in the center of your preheated oven. Bake for 45-50 minutes. Your kitchen will smell absolutely divine. The pie is done when the top is golden brown and a toothpick poked in the center comes out clean.
Step 7: Cool and Drizzle with Caramel
Resist the urge to slice immediately! Let the pie cool in its pan on a wire rack for 10 minutes. This allows it to set so it doesn’t fall apart. Then, carefully turn it out onto the rack to cool completely. The final flourish? Warm your caramel sauce slightly so it’s pourable. Drizzle it artistically over the entire pie. Watch as it cascades down the sides, pooling in the most tempting way. This is the moment it becomes a true caramel apple delight.
Chef’s tip: For a stunning presentation, sprinkle a tiny pinch of flaky sea salt over the caramel drizzle. It elevates all the flavors spectacularly.
Caramel Apple Pie Timing Breakdown
Good baking is all about timing. Here’s the schedule for your perfect pie.
- Prep Time: 20 minutes (Gathering and mixing ingredients)
- Cook Time: 50 minutes (The baking and aroma-building phase)
- Cooling Time: 1 hour (The hardest part—waiting!)
- Total Time: About 2 hours 10 minutes from start to first bite.
- Kcal: Approximately 420 per serving
- Servings: 8 generous slices of happiness
The Secret to Next-Level Flavor
My secret weapon? Toss your chopped apples in a tablespoon of the flour mixture before folding them into the batter. This tiny trick prevents the apples from sinking to the bottom during baking. More importantly, it helps absorb any excess moisture they release. This stops a soggy bottom and ensures every bite has perfect texture and balanced apple flavor from top to crust.
A Fun Fact About Apples in Pie
Did you know using a mix of apple varieties can make your pie even better? Some apples, like Granny Smith, hold their shape and provide tartness. Others, like McIntosh, break down more and create a saucier filling. Combining two types gives you the best of both worlds—defined apple pieces in a lush, flavorful base. It’s a simple trick that professional bakers swear by!
Equipment You’ll Need
You likely have everything already! Here’s your checklist:
- 9-inch pie pan
- Mixing bowls (one medium, one large)
- Electric hand mixer or stand mixer
- Whisk and spatula
- Measuring cups and spoons
- Wire cooling rack
- Apple peeler and corer (optional, but handy!)
Storing Your Caramel Apple Pie
If you have leftovers (a big if!), they need proper storage. Once the pie is completely cool, cover it loosely with plastic wrap or foil. You can keep it at room temperature for up to two days. The caramel topping might get a little sticky, but it will still taste amazing.
For longer storage, the refrigerator is your friend. Place the pie in an airtight container or wrap it well. It will stay fresh and delicious for up to 4-5 days. The cool temperature helps the caramel and apple filling stay perfectly set.
You can also freeze this pie for a future treat. Wrap the whole pie or individual slices tightly in plastic wrap, then in foil. Freeze for up to 3 months. Thaw overnight in the refrigerator before serving. You might want to add a fresh drizzle of caramel after thawing for the best look and taste.
Tips for Pie Perfection
- Ensure your butter is truly softened. It should leave a slight indent when poked, not be melted or rock hard.
- Chop your apples into consistent, bite-sized pieces. This ensures even cooking and distribution.
- Test for doneness with a toothpick, but also look for the pie pulling away slightly from the edges of the pan.
- Let the pie cool completely before cutting. This gives the structure time to set for clean slices.
Presentation Ideas to Impress Your Guests
- Serve each warm slice with a scoop of vanilla ice cream. The hot-cold contrast is legendary.
- Add a dollop of freshly whipped cream and a light dusting of cinnamon on top.
- Drizzle extra caramel sauce on the serving plate in a fun design before placing the slice.
- Garnish with a few thin, fan-cut apple slices or a sprinkle of toasted pecans for crunch.
6 Delicious Recipe Variations to Try
Love this base recipe? Mix it up with one of these fun twists!
- Caramel Apple Crumble Pie: Skip the full top crust. Instead, mix 1/2 cup oats, 1/4 cup flour, 1/4 cup brown sugar, and 4 tbsp cold butter into a crumble. Sprinkle over the apple-filled pie before baking.
- Spiced Chai Caramel Apple Pie: Add 2 teaspoons of chai spice blend to the dry ingredients. It adds a warm, complex flavor that pairs beautifully with the caramel.
- Salty Sweet Pretzel Crust Pie: Replace 1/2 cup of the all-purpose flour with finely crushed pretzels for a salty, crunchy crust that contrasts the sweet filling.
- Deep Dish Caramel Apple Pie: Use a deep dish pie plate and increase the apple filling by 50%. You’ll get an extra tall, impressive pie with more of that delicious filling in every bite.
- Individual Mini Pies: Use a muffin tin! Portion the batter into greased muffin cups. Bake for 20-25 minutes for adorable personal-sized desserts.
- Decadent Bourbon Caramel Apple Pie: Stir 1-2 tablespoons of bourbon into your caramel sauce before drizzling. It adds a wonderful grown-up depth of flavor.
Common Mistakes to Avoid
Mistake 1: Using the Wrong Apples
Choosing apples that turn to mush is a common error. Varieties like Red Delicious lack the structure needed for baking. They dissolve into applesauce, leaving you with a watery, soggy pie. Always pick baking apples that hold their shape. Granny Smith, Honeycrisp, or Braeburn are perfect. They offer a balance of sweet and tart, and they stay firm for a satisfying texture. Mixing two types can give you even better flavor and consistency.
Mistake 2: Not Letting the Pie Cool
We’ve all been tempted to slice into a fresh-from-the-oven pie. This is a recipe for disaster! The filling is essentially a hot, sugary liquid. Cutting it releases all that steam and causes the slices to collapse. The pie needs time to set as it cools. This allows the structure to firm up. For clean, beautiful slices that hold their shape, let the pie cool on a wire rack for at least one hour. I know, the wait is tough, but it’s worth it.
Mistake 3: Overmixing the Batter
Vigorously beating the batter after adding the flour is a surefire way to get a tough pie. Overmixing develops the gluten in the flour. This leads to a dense, chewy texture instead of a light, tender cromb. When combining wet and dry ingredients, mix only until you see no more streaks of flour. A few small lumps are absolutely fine. They will bake out. Remember, gentle folding is key for a soft, perfect pie.
Mistake 4: Skipping the Pan Preparation
Just greasing the pan isn’t always enough, especially for a sweet, sticky batter. If you don’t flour the pan after greasing, the cake-like part of the pie can stubbornly stick. You might end up with a broken, messy pie when trying to turn it out. Taking that extra 30 seconds to grease and flour your pan makes all the difference. It creates a non-stick barrier for a flawless release every single time.
Your Caramel Apple Pie Questions, Answered
Can I make this pie ahead of time?
Yes, you absolutely can. This pie is a great make-ahead dessert. You can bake it completely, let it cool, and store it covered at room temperature for up to a day. If you need to prepare it further in advance, I recommend baking it, cooling it, and then freezing it (well-wrapped) for up to a month. Thaw it in the refrigerator overnight. The caramel drizzle is best added the day you plan to serve it for the freshest look and taste. This makes holiday preparation so much easier.
What’s the best way to store leftover caramel apple pie?
Leftovers should be covered tightly with plastic wrap or stored in an airtight container. You can keep it at room temperature for 1-2 days. For longer storage, refrigerate it for 4-5 days. The texture might firm up a bit in the fridge. To serve, let a slice come to room temperature or warm it briefly in the microwave. The caramel will become soft and gooey again. You can also freeze individual slices for a quick treat later.
My pie is browning too quickly on top. What should I do?
This happens if your oven runs hot or the pie is on a high rack. If you notice the top getting dark brown before the center is cooked, simply tent it with aluminum foil. Loosely place a sheet of foil over the top of the pie pan. This will shield it from direct heat and prevent further browning. The pie can continue baking underneath until the center is fully set. It’s a simple fix that saves your dessert from burning.
Can I use a store-bought pie crust instead?
This particular recipe is for a cake-like pie with a batter, so a standard pastry crust isn’t suitable. However, for a more traditional caramel apple pastry pie, you could use a store-bought crust. You would need to pre-bake (blind bake) the bottom crust first, then fill it with a cooked apple-caramel filling. The method is different, but it’s a great time-saver. For this specific recipe, stick with the batter method as written.
Why did my apples sink to the bottom of the pie?
This usually happens if the apple pieces are too wet or too heavy for the batter. To prevent this, make sure your chopped apples are patted dry with a paper towel. Also, toss them in that tablespoon of flour from the dry mixture before folding them in. The light coating of flour helps “grip” the batter, suspending the apple pieces more evenly throughout the pie as it bakes. It’s a simple trick with a big impact.
Can I use a different type of sugar?
You can experiment somewhat. The brown sugar is important for its molasses flavor and moisture. I wouldn’t replace it fully. You could try using all brown sugar for a deeper, richer taste. Using only white sugar will make the pie less moist and complex. Coconut sugar is a possible substitute for brown sugar, but it will change the flavor. For the best texture and classic taste, I recommend sticking with the mix of white and brown sugars listed.
Is there a way to make this recipe without buttermilk?
Yes, the homemade “soured milk” substitute works perfectly. Add 1 tablespoon of lemon juice or white vinegar to a liquid measuring cup. Then, fill it with regular milk until it reaches the 1-cup line. Stir and let it sit for 5-10 minutes until it looks curdled. This acid reacts with the baking soda to create lift. You can also use plain yogurt thinned with a little milk. The tanginess is key to the recipe’s rise and flavor balance.
How do I know for sure when the pie is done baking?
Use the two-pronged test. First, insert a toothpick or thin skewer into the very center of the pie. It should come out clean or with just a few dry crumbs attached—no wet batter. Second, look at the edges. The pie should be pulling away slightly from the sides of the pan, and the top should be a lovely golden brown. The center might still have a slight jiggle, but it should not look liquidy. If in doubt, err on the side of a few extra minutes.
My caramel sauce is too thick to drizzle. How can I fix it?
This is an easy fix. Simply warm the caramel sauce gently. You can microwave it in a microwave-safe bowl for 10-15 second intervals, stirring between each. Or, place the jar (without the lid) in a bowl of hot water for a few minutes. Adding a tiny splash of heavy cream or milk and stirring can also help loosen it to a perfect drizzling consistency. Just be careful not to make it too runny. Let it cool slightly before drizzling on the pie.
Can I add nuts or other fruits to this recipe?
You can certainly customize it. Adding 1/2 cup of chopped pecans or walnuts would be delicious for a crunchy texture. Fold them in with the apples. For other fruits, be careful with juicy ones like berries, as they can make the batter too wet. Dried cranberries or raisins are a great addition. Just make sure any add-ins are patted dry and not too heavy, so they don’t all sink to the bottom of your beautiful homemade apple pie.
The Final Slice
Baking this caramel apple pie is about more than just following a recipe. It’s about creating a moment of pure comfort and joy. The smell alone is worth the effort. I hope this pie becomes a cherished tradition in your home, just like it is in mine. It’s the perfect end to a fall meal, a wonderful gift for a friend, or a simple treat to enjoy with a cup of coffee. Now, go preheat that oven and get baking. Your kitchen is about to smell incredible, and someone is going to be very, very happy when you hand them a slice. Happy baking!
Biscoff Caramel Cheesecake
Ingredients
Equipment
Method
- Preheat the oven to 350°F (177°C) and prepare a 9-inch pie pan by greasing and flouring it.
- In a medium bowl, whisk together the all-purpose flour, baking powder, baking soda, and salt.
- In a large bowl, cream together the softened butter, granulated sugar, and brown sugar using an electric mixer until light and fluffy.
- Add the eggs one at a time to the butter mixture, mixing well after each addition, then mix in the vanilla extract.
- Gradually add the flour mixture to the butter mixture, alternating with the buttermilk, and mix until just combined.
- Fold in the chopped apples gently with a spatula, ensuring they are evenly distributed.
- Pour the batter into the prepared pie pan and smooth the top.
- Bake for 45-50 minutes or until the top is golden brown and a toothpick in the center comes out clean.
- Let the pie cool in the pan for 10 minutes before transferring it to a wire rack to cool completely.
- Warm the caramel sauce slightly and drizzle it over the cooled pie before serving.