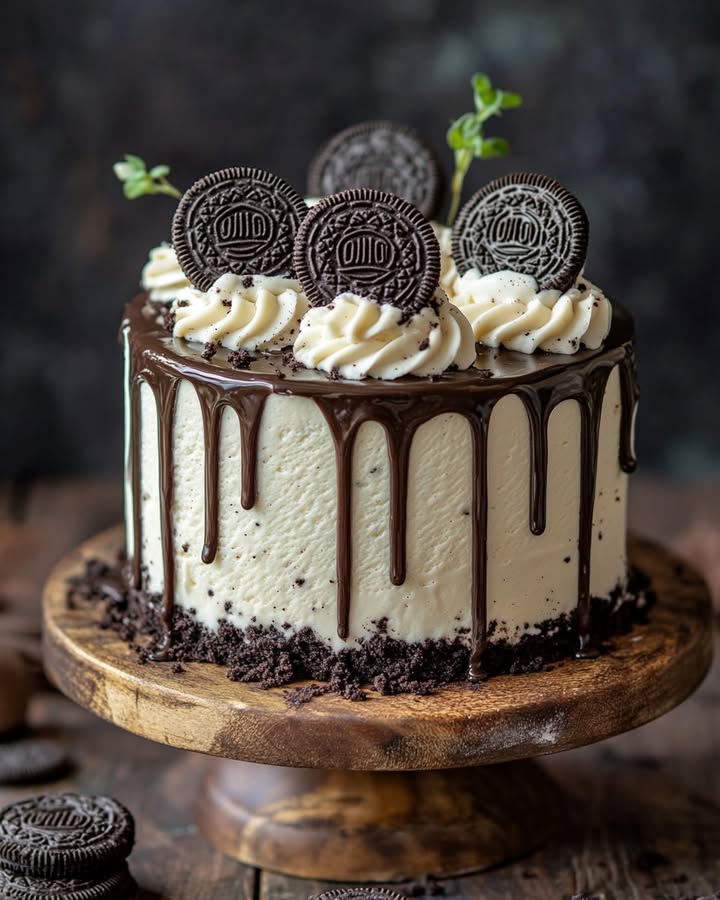
The Ultimate Oreo Ice Cream Overload Drip Cake: A Dream Come True!
Picture this: a perfect summer afternoon, my kids’ eyes wide with wonder as I unveil a dessert that looks like it belongs in a pastry shop window. That’s the magic of the Oreo Ice Cream Overload Drip Cake. It’s not just a cake; it’s an experience, a towering celebration of chocolate, cream, and pure, unadulterated joy. I created this beauty for my daughter’s birthday, and let me tell you, the silence that fell over the table was the best compliment a baking mom could ever get. It’s easier than it looks, and I’m here to guide you every step of the way to baking bliss!
A Sweet Slice of History: From Cookie Jar to Cake Stand
Our story starts with the humble Oreo, that iconic sandwich cookie born in 1912. For over a century, we’ve been twisting, licking, and dunking them. The idea of an Oreo cake is a relatively modern twist, a product of our love for epic desserts and “overload” creations. My version takes it a step further by marrying a moist chocolate cake with cold, creamy ice cream and that signature chocolate drip. It’s a fusion of classic baking and fun, no-fuss assembly. While traditional layer cakes are elegant, this cake is playful, a bit messy in the best way, and 100% designed for maximum fun and flavor.
Why You’ll Absolutely Adore This Drip Cake
You will love this recipe because it’s a showstopper that doesn’t require professional skills. The rich, dark chocolate cake is incredibly moist thanks to a secret ingredient—boiling water! The Oreo frosting adds a fantastic crunch, and the layer of ice cream in the middle is a cool, delicious surprise. It’s a make-ahead dream; you can bake the layers one day and assemble the next. Best of all, it’s customizable. Use your family’s favorite ice cream flavor and watch their faces light up.
Perfect Occasions for Your Masterpiece
This cake is made for celebrations! It’s the star of birthday parties, summer barbecues, and graduation parties. Bring it to a potluck and you’ll instantly be everyone’s favorite person. It’s also a fantastic “just because” treat for a family movie night—because sometimes Tuesday needs a chocolate and ice cream hug.
Gathering Your Ingredients
Most of these are pantry staples, with a few special stars. Here’s what you’ll need:
For the Chocolate Cake:
- 2 cups all-purpose flour
- 2 cups granulated sugar
- 3/4 cup unsweetened cocoa powder
- 1 1/2 teaspoons baking powder
- 1 1/2 teaspoons baking soda
- 1 teaspoon salt
- 2 large eggs, at room temperature
- 1 cup whole milk
- 1/2 cup vegetable oil
- 2 teaspoons pure vanilla extract
- 1 cup boiling water
For the Oreo Frosting & Assembly:
- 1 cup unsalted butter, softened
- 4 cups powdered sugar
- 1/4 cup heavy cream, plus more if needed
- 1 teaspoon vanilla extract
- 1 cup crushed Oreo cookies (about 10-12 cookies)
- 2 cups Oreo ice cream (or your favorite flavor), slightly softened
- 1/2 cup semi-sweet chocolate chips
- 1/4 cup heavy cream (for the drip)
- 1 cup whipped cream (for topping)
- Extra Oreo cookies and chocolate syrup for decoration
Handy Substitution Options
No worries if you’re missing something! Here are easy swaps:
- Flour & Sugar: You can use a 1:1 gluten-free flour blend. For the sugar, coconut sugar works but will darken the cake’s color.
- Milk & Cream: Any milk or non-dairy milk (like almond or oat) works in the cake. For the frosting, use full-fat coconut cream instead of heavy cream for a dairy-free version.
- Butter: Use a good-quality stick margarine for baking if needed.
- Ice Cream: The beauty is in the choice! Mint chocolate chip, cookies and cream, or vanilla bean are all fantastic.
Let’s Bake! Your Step-by-Step Guide
Step 1: Mixing the Magic Cake Batter
Preheat your oven to 350°F (175°C). Grease and flour two 9-inch round cake pans. In a large bowl, whisk together the flour, sugar, cocoa powder, baking powder, baking soda, and salt. It will look like a rich, chocolatey mountain. Make a well in the center and add the eggs, milk, oil, and vanilla. Use a hand mixer on medium to blend until smooth—the batter will be thick and glossy. Now for the secret! Carefully pour in the boiling water. The batter will become thin and liquid. This is perfect! It’s what gives the cake its incredible moisture. Pro tip: Use a whisk to blend in the water; it helps prevent lumps and combines everything smoothly.
Step 2: Baking to Perfection
Divide the thin batter evenly between your prepared pans. I love using a kitchen scale for perfect layers, but eyeballing it works too. Place them in the center of your preheated oven. Bake for 30-35 minutes. You’ll know it’s done when the top springs back lightly to the touch and a toothpick inserted into the center comes out with just a few moist crumbs, not wet batter. The smell will be heavenly! Let the cakes cool in the pans for 10 minutes. Then, gently run a knife around the edges and flip them onto a wire rack to cool completely. Chef’s tip: Patience is key here! A warm cake will melt your frosting and ice cream. You can even wrap and freeze the layers overnight for easier handling.
Step 3: Whipping Up the Crunchy Oreo Frosting
While the cakes cool, let’s make the frosting. In a large bowl, beat the softened butter with an electric mixer for 2-3 minutes until it’s pale and super creamy. Gradually add the powdered sugar, one cup at a time, with the mixer on low speed. Once incorporated, pour in the 1/4 cup of heavy cream and the vanilla. Turn the mixer to medium-high and beat for a full 2-3 minutes. Watch it transform into a light, fluffy cloud. Now, take your crushed Oreos—I put them in a bag and crush them with a rolling pin for therapeutic effect—and fold them into the frosting with a spatula. That satisfying crunch is what makes it special.
Step 4: Assembling the Overload
Place one completely cool cake layer on your serving plate or cake stand. Take your slightly softened ice cream and spread it in an even layer over this first cake. Work quickly so it doesn’t melt! Immediately place the second cake layer on top, pressing down gently. Now, use a generous amount of your Oreo frosting to frost the top and sides of the entire cake. Don’t worry about a “naked cake” look; we want it fully covered for the drip to cling to. Pop the whole cake into the freezer for about 20 minutes to firm up the frosting and ice cream before the next step.
Step 5: Creating that Gorgeous Chocolate Drip
This is the fun, artistic part! Place the chocolate chips and the 1/4 cup of heavy cream for the drip in a microwave-safe bowl. Heat in 30-second bursts, stirring well after each, until the mixture is completely smooth and ganache-like. Let it cool for about 5 minutes—you want it warm but not hot. Take your chilled cake from the freezer. Using a spoon or a squeeze bottle, start at the edges of the cake and gently pour/spoon the chocolate, encouraging it to drip down the sides. Fill in the top center. It will set beautifully on the cold frosting.
Step 6: The Grand Finale of Decorations
Now for the “overload”! Pipe or dollop whipped cream around the top edge of the cake. Tuck whole and halved Oreo cookies into the whipped cream. Take your chocolate syrup and drizzle it artfully over everything. You can add more crushed cookies on top for good measure. Stand back and admire your stunning creation. Chef’s secret: For clean cuts, dip your knife in hot water and wipe it dry between each slice. This glides right through the frozen ice cream layer.
Your Baking Timeline
Here’s a handy breakdown of your time investment:
- Prep Time: 30 minutes (active mixing and assembling)
- Cooking Time: 35 minutes
- Cooling/Chilling Time: At least 1 hour (crucial!)
- Total Time: About 2 hours, 5 minutes from start to decorated finish.
- Servings: 12 happy people
- Calories: Approximately 520 kcal per glorious slice.
Extra Info: The Boiling Water Trick
You might wonder why we add boiling water to the cake batter. This clever trick does two things. First, it “blooms” the cocoa powder, intensifying its deep chocolate flavor. Second, the hot water helps dissolve the sugar and activates the leavening agents more quickly, leading to a cake with a tender, fine crumb. It’s a little piece of baking science that makes a huge difference!
Necessary Equipment
You don’t need fancy gear! Gather these:
- Two 9-inch round cake pans
- Mixing bowls (large and medium)
- Electric hand mixer or stand mixer
- Whisk and spatula
- Measuring cups and spoons
- Wire cooling rack
- Knife or offset spatula for frosting
How to Store Your Masterpiece
Because of the ice cream, this cake must live in the freezer. Once decorated, loosely cover it with plastic wrap or a cake dome. It will keep beautifully for up to 2 weeks. The flavors actually meld and improve!
When you’re ready to serve, let it sit on the counter for about 10-15 minutes before slicing. This softens the cake and ice cream just enough for your knife to glide through without a struggle.
Leftover slices can be individually wrapped in plastic wrap and stored in a freezer bag. This way, you can grab a single slice for a quick treat anytime the craving hits!
Tips and Advice for Success
- Room Temperature Ingredients: Ensure your eggs, milk, and butter are at room temperature for a smoother, better-emulsified batter and frosting.
- Don’t Overbake: Set a timer! Overbaked cake will be dry. Check a few minutes early.
- Crush Cookies Consistently: For the frosting, aim for small chunks, not fine dust. This gives that perfect texture.
- Chill Before Dripping: That 20-minute freezer stop is non-negotiable for a clean, controlled chocolate drip.
Presentation Tips to Wow Your Guests
- Place the cake on a decorative cake stand or a simple plate surrounded by whole Oreos.
- Dust the plate with a little powdered sugar or cocoa powder before setting the cake down for a professional touch.
- Add colorful sprinkles on top of the whipped cream for a festive party look.
- Serve each slice with a small drizzle of extra chocolate syrup and a mini Oreo on the side.
Healthier Alternative Recipe Ideas
Want to lighten things up? Try these fun twists on the classic Oreo overload concept:
- Frozen Yogurt Layer Cake: Swap the ice cream for a thick, strained Greek yogurt mixed with crushed Oreos and a touch of honey. Freeze it in a layer for a tangy, protein-packed middle.
- Black Bean Chocolate Cake: Replace the flour in the cake layers with a puree of black beans and oats. It sounds wild, but it creates a fudgy, gluten-free, and fiber-rich base that’s surprisingly delicious.
- “Nice Cream” Version: Use a layer of banana “nice cream” (frozen bananas blended until creamy) mixed with cacao powder and mini Oreo pieces for a dairy-free, naturally sweetened center.
- Angel Food Base: Use a store-bought or homemade angel food cake for the layers. It’s fat-free and lighter, making the ice cream and toppings the true stars.
- Mini Portion Cups: Make individual servings in clear cups. Layer crumbled chocolate cake, light whipped topping, and a scoop of lower-calorie ice cream. Top with one mini Oreo for portion control.
- Sugar-Free Swap: Use a sugar-free cake mix, sugar-free pudding as a frosting base, and no-sugar-added ice cream. Top with a few regular Oreos for crunch, keeping the overall sugar lower.
Common Mistakes to Avoid
Mistake 1: Using Warm Cake Layers
This is the biggest pitfall! Putting frosting and ice cream on a warm cake is a recipe for disaster. The frosting will melt into a greasy puddle, and the ice cream will turn into soup, making the cake soggy. The cake must be completely cooled to room temperature. For best results, wrap the cooled layers and chill them in the fridge or even freeze them for 30 minutes before assembly. A cold, firm cake is much easier to work with.
Mistake 2: Overmixing the Cake Batter
Once you add the dry ingredients to the wet, mix just until they are combined. Overmixing develops the gluten in the flour, which can make your cake tough and dense instead of soft and tender. When you add the boiling water, mix only until the batter is smooth and uniform. It’s okay if it looks thin—that’s exactly what you want. A few small lumps are better than overmixed batter.
Mistake 3: Frosting a Cake on a Warm Plate
You’ve cooled your cakes perfectly, but did you think about the plate? If you assemble on a warm plate or a stand that was just washed, that residual heat can start to melt the bottom layer of frosting and ice cream. Always assemble your cake on a room-temperature or, even better, a chilled plate or stand. This keeps everything stable from the bottom up.
Mistake 4: The Chocolate Drip is Too Hot or Too Thin
The temperature and consistency of your drip are crucial. If the chocolate is too hot, it will melt the frosting and run too far down the sides. If it’s too thin (from too much cream), it will be a runny mess. Let the ganache cool for 5-10 minutes after melting. Test the consistency by dipping a spoon in it and letting it drip down the side of the bowl. It should flow smoothly but still be thick enough to cling. If it’s too thin, let it cool more. If it’s too thick, add a tiny splash of warm cream.
Frequently Asked Questions
Can I make this cake ahead of time?
Absolutely! This cake is a fantastic make-ahead dessert. You can bake and freeze the cake layers up to a month in advance. Thaw them in the fridge before using. You can also make the frosting a day ahead and keep it covered in the fridge; just let it come to room temperature and re-whip it before using. For the best texture, I recommend fully assembling the cake the day you plan to serve it, but you can do it up to 24 hours ahead and store it in the freezer.
What if I don’t have two 9-inch cake pans?
No problem! You can bake the batter in one 9×13 inch pan. Adjust the baking time; it may need 5-10 minutes longer. Once cooled, you can slice the rectangle in half to create two layers, or simply spread the ice cream and frosting on top for a delicious sheet cake version. Another option is to use a muffin tin to make cupcake versions, filling them halfway and baking for about 18-20 minutes.
My frosting is too thick/crumbly. How can I fix it?
If your Oreo frosting is too thick and difficult to spread, it likely needs more liquid. Add more heavy cream, one tablespoon at a time, and beat well after each addition until you reach a smooth, spreadable consistency. If it’s crumbly, the butter may have been too cold or you added too much powdered sugar at once. Adding more softened butter (a tablespoon or two) and beating thoroughly can help bring it back together.
Can I use a different ice cream flavor?
Please do! That’s the fun of this recipe. Mint chocolate chip creates a fantastic “grasshopper” effect. Vanilla bean makes the chocolate and Oreos shine. Cookies and cream is an obvious (and amazing) choice. Even peanut butter ice cream would be divine for a chocolate-peanut butter combo. Just make sure the ice cream is slightly softened so you can spread it easily without tearing the cake.
How do I get a smooth frosting finish on the cake?
For a smoother look, do a “crumb coat.” First, apply a very thin layer of frosting all over the cake to seal in any crumbs. Chill the cake for 15-20 minutes until that layer is firm. Then, apply your final, thicker, and prettier layer of frosting. The crumb coat prevents dark crumbs from showing through your final white frosting. Using an offset spatula dipped in hot water can also help smooth the final layer.
The ice cream layer melted while I was frosting. What now?
Work quickly and keep things cold. Have your ice cream ready, slightly softened but not runny. Frost the cake immediately after spreading the ice cream, and get the assembled cake into the freezer as soon as possible to set everything. If it does get a little messy, don’t stress! The beauty of this overload cake is that it’s meant to look indulgent and fun. Extra cookies and whipped cream can cover a multitude of sins!
Is there a non-dairy/vegan version of this cake?
Yes, you can make a great vegan version. Use a vegan chocolate cake recipe (substituting eggs with flax eggs and using plant-based milk). For the frosting, use vegan butter and powdered sugar with coconut cream. Choose a delicious dairy-free Oreo-flavored or vanilla ice cream. Oreo cookies are accidentally vegan in many countries, but always check the label to be sure. Use vegan chocolate chips for the drip.
How long can the finished cake sit out at a party?
Because it has a layer of ice cream, you don’t want it sitting out for hours. Serve it directly from the freezer, and let it be on the table for no more than 30-45 minutes on a cool day. If it’s very hot, consider keeping it in the freezer and bringing it out in shifts to slice. The cake itself won’t spoil, but it will become very soft and messy if the ice cream melts completely.
Can I use store-bought frosting to save time?
You can, but I highly recommend making the Oreo frosting from scratch. Store-bought frosting is often much sweeter and has a different texture that doesn’t hold up as well to the crushed cookies or the freezing process. If you’re in a pinch, buy two cans of vanilla frosting, let them come to room temperature, beat them with a mixer to fluff them up, and then fold in your crushed Oreos.
Why did my cake layers sink in the middle?
Sinking cakes are usually due to too much leavening (baking powder/soda), underbaking, or opening the oven door too early. Make sure your baking powder and soda are fresh. Don’t open the oven door during the first 25 minutes of baking. Ensure the cake is fully baked by testing with a toothpick—it should come out clean or with moist crumbs, not wet batter. Also, be careful not to over-beat the batter after adding the boiling water.
Go Forth and Create Your Sweet Masterpiece!
There you have it, friend! Every single secret and step to creating the most epic, talked-about, and joy-bringing Oreo Ice Cream Overload Drip Cake. Remember, baking is about love and fun, not perfection. If your drip isn’t even or your frosting has a few crumbs, it doesn’t matter. What matters is the laughter around the table and the chorus of “mmmms” with every bite. You’ve got this! Now, preheat that oven, grab your favorite spoon for taste-testing, and let’s make some magic happen. Don’t forget to share your gorgeous creations online—tag them with #BakingJoy so I can see them!
Cozy Ham Casserole
Ingredients
Equipment
Method
- Preheat your oven to 350°F (175°C) and grease and flour two 9-inch round cake pans.
- In a large bowl, whisk together flour, sugar, cocoa powder, baking powder, baking soda, and salt.
- Create a well in the center, then add eggs, milk, oil, and vanilla. Mix until smooth.
- Carefully pour in boiling water and mix until combined.
- Divide the batter evenly between prepared pans and bake for 30-35 minutes.
- Allow cakes to cool in pans for 10 minutes before transferring them to a wire rack to cool completely.
- For the frosting, beat softened butter until creamy, then gradually add powdered sugar and beat until fluffy.
- Fold in crushed Oreos into the frosting mixture.
- Place one cake layer on a serving plate, spread softened ice cream over it, then top with the second layer.
- Frost the entire cake with Oreo frosting and freeze for 20 minutes.
- To make the drip, heat chocolate chips and 1/4 cup heavy cream in the microwave until smooth.
- Cool slightly, then pour over the top and edges of the cake, allowing it to drip down.
- Decorate with whipped cream, Oreos, and chocolate syrup.