Introduction: My Go-To One-Pot Cheesy Taco Pasta
Last Tuesday night, I stared at my pantry with exactly 30 minutes before soccer practice. My kids were hungry, cranky, and asking what’s for dinner. Sound familiar? That’s when I threw together this One-Pot Cheesy Taco Pasta, and honestly, it saved the day. The best part? Everyone cleaned their plates without a single complaint.
I’m sharing this recipe today because I know you’re juggling a million things too. Between work, school activities, and trying to feed your family something better than takeout, life gets overwhelming. This dish has become my secret weapon on those crazy weeknights when cooking feels impossible.
This cheesy taco pasta combines two things kids (and adults) absolutely love: tacos and pasta. I stumbled upon this combination by accident one night when I had leftover taco meat and a box of pasta. Now it’s in our regular dinner rotation at least twice a month. My youngest calls it “the best dinner ever,” which is high praise from a picky seven-year-old.
What I love most about this meal is how flexible it is. You can adjust the spice level for sensitive taste buds or kick it up for those who like heat. Add more veggies if you’re trying to sneak in extra nutrition. Swap ingredients based on what’s already in your fridge. It works every single time.
Why One-Pot Cheesy Taco Pasta is a Hit With Busy Families
Let me tell you about the magic of one-pot meals. They changed my life as a parent. Before I discovered them, I was drowning in dirty dishes every night. Pots, pans, colanders, serving bowls – the pile never ended. Now I use one pot, one lid, and maybe a cutting board. That’s it.
The convenience goes beyond just cleanup. Everything cooks together in the same pot, which means the flavors blend beautifully. The pasta absorbs all those delicious taco seasonings while it cooks. The cheese melts into the sauce and coats every noodle. You get this amazing harmony of flavors that you can’t achieve when cooking components separately.
This easy taco pasta takes about 25 minutes from start to finish. I’m not exaggerating. I’ve timed it multiple times. That’s faster than ordering pizza and waiting for delivery. It’s definitely faster than loading everyone in the car for a restaurant trip.
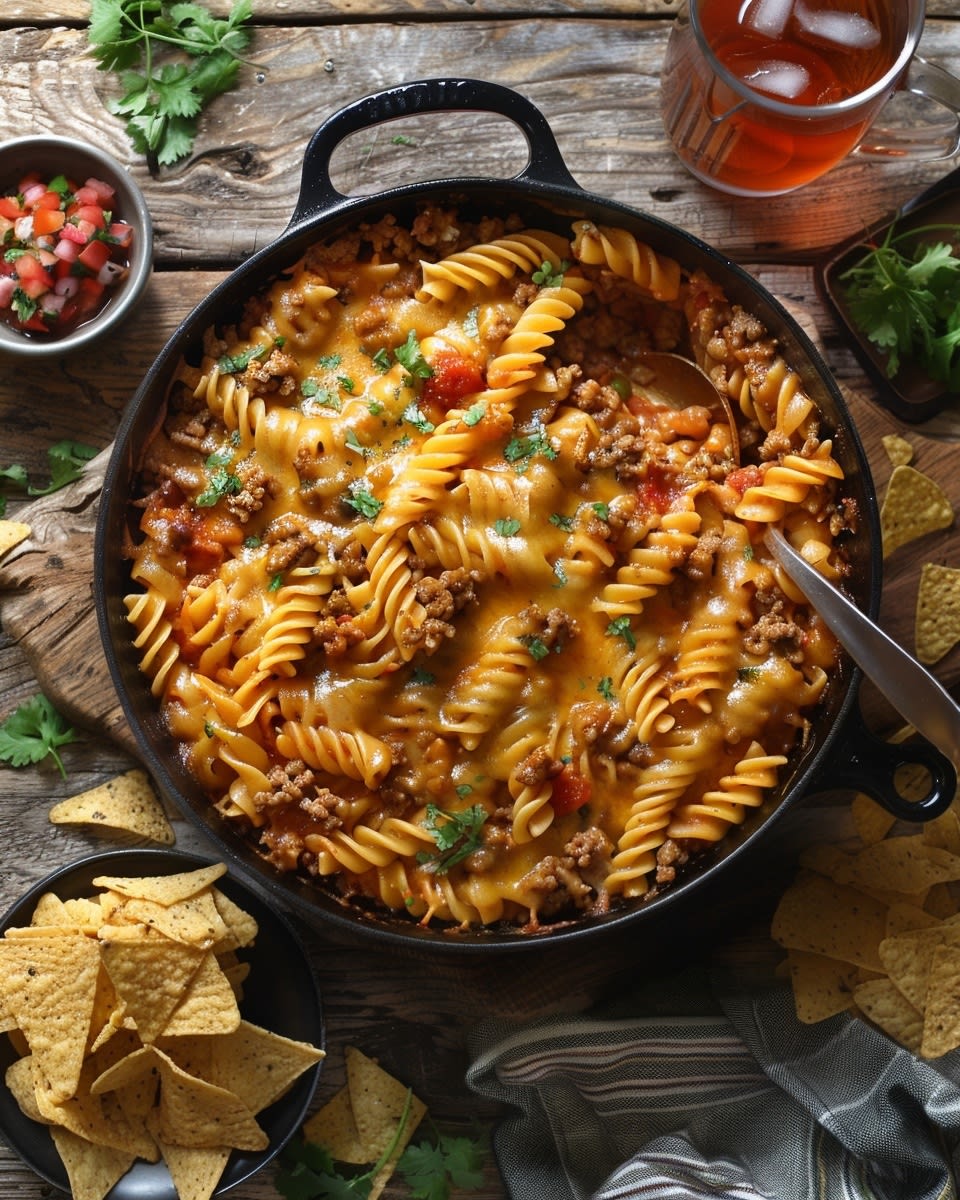
The flavors in this dish hit all the right notes. You get savory ground beef seasoned with classic taco spices like cumin, chili powder, and garlic. The cheese adds creaminess and that irresistible melty goodness. A hint of tomato brings brightness and acidity. The pasta makes it hearty and filling. Together, these elements create comfort food at its finest.
My husband, who usually requests seconds of nothing, asks for more of this dish. My daughter, who typically picks at her food, actually asks when we’re having it again. That tells you everything you need to know about how good it tastes.
The cleanup situation is a dream. You literally wash one pot. Maybe a spoon or spatula. I can have the kitchen completely clean in under five minutes after dinner. This means more time reading bedtime stories or helping with homework instead of scrubbing pans.
Preparation is just as simple. You don’t need any special cooking skills. If you can brown ground beef and boil water, you can make this recipe. There’s no complicated technique or fancy equipment required. Just straightforward, simple cooking that anyone can master.
Ingredients You’ll Need for Perfect Cheesy Taco Pasta
I keep most of these ingredients on hand at all times because this recipe is my emergency backup plan. Here’s what you need to make this one-pot pasta dish:
- Ground beef (1 pound) – I use 85/15 for good flavor without too much grease
- Pasta (12 ounces) – shells, rotini, or penne work best for holding the sauce
- Beef broth (2 cups) – adds so much more flavor than plain water
- Salsa (1 cup) – mild, medium, or hot based on your preference
- Taco seasoning (2 tablespoons) – homemade or store-bought both work great
- Shredded cheddar cheese (2 cups) – the star of the show
- Cream cheese (4 ounces) – this makes the sauce extra creamy and smooth
- Diced tomatoes with green chilies (one 10-ounce can) – adds texture and flavor
- Olive oil (1 tablespoon) – for browning the meat
Those are your basics. But here’s where the fun begins. You can customize this family-friendly pasta recipe in so many ways.
Optional add-ins to make it your own:
- Black beans or pinto beans for extra protein and fiber
- Corn kernels (fresh, frozen, or canned) for sweetness and texture
- Bell peppers diced small and cooked with the beef
- Jalapeños if you want more heat
- Green onions for garnish and fresh flavor
- Sour cream dolloped on top when serving
- Fresh cilantro chopped and sprinkled over each bowl
- Crushed tortilla chips for crunch
- A squeeze of fresh lime juice to brighten everything up
I usually add black beans and corn because they bulk up the meal and add nutrition. My kids don’t even notice the extra veggies when everything is covered in cheese.
Where to find quality ingredients: You don’t need to shop at expensive specialty stores for this meal. I buy everything at my regular grocery store. However, I do have a few tips for getting the best results.
For ground beef, look for meat that’s bright red with minimal brown spots. The fat content matters. Too lean (like 93/7) and your dish will be dry. Too fatty (like 73/27) and you’ll have grease everywhere. The 85/15 ratio is perfect.
Choose pasta shapes with ridges, curves, or hollows. These trap the cheesy sauce better than smooth noodles like spaghetti. My favorites are medium shells and rotini. They’re the perfect size for this cheesy pasta recipe.
Don’t skimp on cheese quality. Buy blocks and shred them yourself instead of using pre-shredded bags. Pre-shredded cheese has anti-caking agents that prevent smooth melting. Freshly shredded cheese melts into a silky sauce that coats every bite.
For taco seasoning, I make my own with spices I already have. But honestly, store-bought packets work just fine. I keep several in my pantry for quick meals. Just avoid the ones with tons of fillers and weird ingredients you can’t pronounce.
Good quality salsa makes a difference. Check the ingredient list. The first items should be tomatoes and peppers, not water or sugar. I prefer chunky salsa for this recipe because it adds nice texture.
Beef broth adds tremendous flavor compared to water. I buy the cartons that can be resealed and stored in the fridge. Much easier than dealing with cans. Low-sodium versions work best because you can control the salt level yourself.


Step-by-Step Guide to Making One-Pot Cheesy Taco Pasta
Now that you’ve got your ingredients lined up, let’s get cooking. I’m walking you through this exactly how I make it on busy weeknights when my brain is half-functioning and I’m simultaneously helping with math homework.
Step 1: Brown the ground beef. Heat your large pot or deep skillet over medium-high heat. Add that tablespoon of olive oil and let it shimmer for about 30 seconds. Toss in your pound of ground beef and break it apart with a wooden spoon or spatula. Here’s my trick: don’t mess with it too much at first. Let it sit for a minute or two to develop a nice brown crust before you start breaking it into smaller pieces. This creates better flavor than constantly stirring it around. Cook until there’s no pink left, which takes about 5-7 minutes. If you’ve got excess grease pooling in the pan, drain most of it off, leaving just a little for flavor.
Step 2: Add your seasonings and aromatics. Sprinkle that taco seasoning directly over your browned beef. If you’re adding diced bell peppers or jalapeños, this is when they go in. Stir everything together and let it cook for another minute. You’ll smell those spices toasting and becoming fragrant. That’s when you know they’re releasing all their flavor compounds. My kitchen smells like a Mexican restaurant at this point, and my kids come running to ask what’s for dinner.
Step 3: Pour in your liquids and pasta. Add the beef broth, salsa, and that can of diced tomatoes with green chilies. Stir it all together. Now dump in your uncooked pasta. This feels weird the first time you make this recipe because you’re used to boiling pasta separately, right? Trust the process. Push the pasta down into the liquid with your spoon so it’s mostly submerged. You want the noodles making contact with the liquid so they cook evenly.
Step 4: The critical simmering phase. Bring everything to a boil, then immediately reduce your heat to medium-low. You want a gentle simmer, not a rolling boil. Cover the pot with a lid, but leave it slightly cracked so steam can escape. Here’s where timing and stirring become super important. Set a timer for 12 minutes. Every 3-4 minutes, lift that lid and give everything a good stir from the bottom up. This prevents the pasta from sticking to the pot and ensures even cooking. I learned this the hard way after scraping burned pasta off the bottom of my favorite pot.
The pasta will absorb most of the liquid as it cooks, creating a naturally thick sauce. If things look too dry before your pasta is tender, add a splash more broth or even water. If it’s too soupy when the pasta is done, just let it simmer uncovered for a couple extra minutes while stirring.
Step 5: Make it gloriously cheesy. Once your pasta is tender, turn off the heat completely. This is crucial. Add your cream cheese in chunks and both cups of shredded cheddar. Let it sit for about 30 seconds so the residual heat starts melting everything. Then stir vigorously until you’ve got a smooth, creamy, cheesy sauce coating every single noodle. The cream cheese creates that restaurant-quality creaminess you can’t get from regular cheese alone. If you’re adding beans or corn, fold them in now so they warm through.
By the way, if your sauce seems too thick at this point, stir in a few tablespoons of milk or cream. If it’s too thin, let it sit for five minutes. The pasta continues absorbing liquid even after cooking stops.
Taste and adjust your seasonings. Sometimes I add an extra pinch of salt, a squeeze of lime juice, or a dash of hot sauce depending on my mood. This is your chance to make it perfect for your family’s taste buds.
Serving Suggestions and Creative Variations
Funny enough, my kids prefer this taco pasta recipe served in bowls rather than on plates. Something about eating it like chili makes them more excited. I ladle generous portions into bowls and set up a little topping bar on the kitchen counter.
My favorite way to serve this involves a dollop of cold sour cream on top that slowly melts into the hot pasta. Then I add crushed tortilla chips for crunch, fresh cilantro if I have it, and sometimes sliced green onions. The temperature contrast between the cold sour cream and hot pasta creates this amazing sensation. My daughter likes hers with extra cheese melted on top, which I achieve by sprinkling more cheddar over her bowl and microwaving it for 20 seconds.
A simple side salad balances the richness of this cheesy dish perfectly. I usually throw together iceberg lettuce, cherry tomatoes, and a basic lime vinaigrette. Takes three minutes and makes me feel like I’m serving a complete meal. Sometimes I make a quick Mexican street corn salad on the side, which complements the taco flavors beautifully.
Here’s the thing about variations: this recipe adapts to almost any dietary need. For a vegetarian taco pasta, skip the ground beef entirely and double up on black beans and corn. Add diced zucchini or mushrooms for meaty texture. I’ve made it this way for my vegetarian sister, and she couldn’t stop raving about it. You can also try it with Creamy Spinach Parmesan Pasta techniques by adding fresh spinach at the end for extra nutrition.
If you need a gluten-free version, simply swap regular pasta for your favorite gluten-free variety. I’ve tested this with chickpea pasta and brown rice pasta, and both worked wonderfully. You might need to adjust cooking time slightly since gluten-free pastas cook differently. Check the package directions and test for doneness a minute or two early.
For a lighter version, use ground turkey or chicken instead of beef. The flavor changes slightly, becoming milder, so you might want to bump up the seasonings. Ground turkey is leaner, so add an extra splash of olive oil when browning to prevent dryness. This variation reminds me of Tuscan Chicken Penne Pasta in how versatile protein swaps can be.
Want to make it spicier? Add diced jalapeños with the beef, use hot salsa instead of mild, throw in some cayenne pepper, or top with hot sauce at serving time. My husband loves heat, so I sometimes make half the batch mild for the kids and stir hot sauce into his portion separately.
During summer when tomatoes are perfect, I add fresh diced tomatoes on top along with avocado slices. The cool, fresh vegetables contrast amazingly with the warm, cheesy pasta. If you enjoy combining different textures like this, you might also like Pesto Chicken Tortellini Skillet which plays with similar contrasts.
Nutritional Benefits of This Satisfying Meal
Let me be honest: this isn’t exactly diet food. But it’s also not nutritionally empty junk food either. This quick taco pasta actually provides a surprisingly balanced meal when you look at what’s in it.
The ground beef delivers high-quality protein, which keeps everyone feeling full and satisfied. Protein is essential for building and repairing tissues, especially important for growing kids. One serving of this dish provides roughly 25-30 grams of protein, which is substantial. The beef also supplies iron, zinc, and B vitamins that support energy production and immune function.
Pasta gets a bad reputation, but it’s actually a decent source of complex carbohydrates that fuel your body and brain. Those carbs give your kids energy for afternoon activities and homework. The key is portion control and what you pair it with. When combined with protein, vegetables, and healthy fats, pasta becomes part of a balanced meal rather than a problem.
The tomatoes and salsa contribute vitamins A and C, along with lycopene, an antioxidant that supports heart health. If you add bell peppers, you’re boosting the vitamin C content even more. These nutrients support immune function, which is always top of mind when you’re trying to keep your family healthy during cold season.
Cheese provides calcium for strong bones and teeth. Yes, it’s also high in saturated fat and calories, but remember that fat helps your body absorb certain vitamins and keeps you feeling satisfied after eating. The key is moderation, not elimination.
Want to boost the nutritional value even more? I’ve got several strategies that work without changing the taste significantly. Add a cup of frozen spinach when you add the pasta. It wilts down and practically disappears into the sauce, but adds iron, vitamins, and fiber. My kids never notice it’s there.
Use whole wheat pasta instead of regular. Modern whole wheat pasta tastes much better than it did years ago. It adds fiber, which aids digestion and helps everyone feel fuller longer. The fiber also helps stabilize blood sugar levels, preventing that post-dinner energy crash.
Bulk up the beans and corn ratio while slightly reducing the pasta amount. This increases protein and fiber while cutting overall calories and carbs. The texture remains hearty and satisfying. For more protein-rich pasta ideas, check out Garlic Butter Steak Pasta which also focuses on satisfying protein combinations.
Reduce the cheese by a third and add Greek yogurt or extra salsa to maintain creaminess. This cuts saturated fat and calories while adding probiotics from the yogurt. I’ve done this when I’m trying to lighten things up, and honestly, nobody at my table noticed the difference.
One serving of this meal provides a reasonable balance of macronutrients: protein, carbohydrates, and fats. When paired with a vegetable side or salad, you’ve created a complete dinner that covers most nutritional bases. It’s comfort food that also happens to fuel your body properly. That’s a win in my book.


Tips for Perfecting Your One-Pot Cheesy Taco Pasta
Here’s where I share the tricks I’ve learned after making this dish probably fifty times. Some of these lessons came from spectacular failures that ended with me ordering pizza at the last minute. Others came from happy accidents that made the recipe even better.
The pasta-to-liquid ratio is everything. This is where most people run into trouble. Too much liquid and you’ll end up with soup. Too little and your pasta sticks to the bottom in a burned, crusty mess. The recipe I gave you works with standard measurements, but here’s the reality: different pasta shapes absorb liquid at different rates. Shells and rotini need slightly more liquid than penne. If you’re substituting pasta shapes, watch it carefully during cooking. When in doubt, add liquid in small amounts rather than dumping everything in at once.
One time I used angel hair pasta thinking it would cook faster. Big mistake. Angel hair turned to mush within minutes and absorbed way too much liquid too quickly. Stick with medium-sized sturdy shapes that can handle a longer cooking time without falling apart.
Don’t skip the stirring. I know it’s tempting to just set a timer and walk away. But that bottom layer of pasta will absolutely stick and burn if you don’t stir regularly. I’ve scraped enough burned cheese off my pot to know this intimately. Set reminders on your phone if you need to. Every three minutes during the simmering phase, give it a good stir from the bottom up.
Temperature control matters more than you’d think. If your heat is too high, the bottom cooks too fast while the top stays crunchy. My stove runs hot, so I actually use medium-low rather than medium. Get to know your equipment. A gentle simmer with small bubbles breaking the surface is what you’re aiming for, not a vigorous rolling boil.
The cheese melting technique is crucial. Adding cheese to boiling liquid causes it to seize up and become grainy. That’s why turning off the heat completely before adding your cheese is non-negotiable. The residual heat melts everything perfectly without breaking the cheese proteins. I learned this the hard way when I ended up with clumpy, separated cheese sauce that looked absolutely terrible. My family still ate it, but it wasn’t pretty.
Always shred your own cheese from blocks. I mentioned this earlier, but it’s worth repeating because it makes such a dramatic difference. Pre-shredded cheese contains cellulose and potato starch to prevent clumping in the bag. These additives prevent smooth melting. Freshly shredded cheese melts into that gorgeous, silky sauce that makes this easy weeknight dinner taste restaurant-quality.
Quality beef produces better results. I’ve made this with everything from premium grass-fed beef to the cheapest ground meat on sale. The flavor difference is noticeable. You don’t need to break the bank, but choosing meat that’s bright red and fresh makes your taco-flavored pasta taste significantly better. Also, if your beef releases tons of grease, definitely drain most of it. Too much fat makes the sauce feel heavy and greasy instead of rich and satisfying.
Season in layers for maximum flavor. Don’t just dump all your seasoning in at once and call it done. Taste as you go. After adding the cheese, taste again. Sometimes the cheese adds enough salt that you don’t need more. Other times, everything tastes a bit flat and needs an extra pinch of salt or splash of hot sauce. Developing this habit of tasting and adjusting transforms good cooks into great ones.
Here’s something I discovered by accident: a tiny splash of vinegar or lime juice at the very end brightens all the flavors. Cheese and beef are both rich and heavy. That little hit of acid cuts through the richness and makes everything taste more vibrant. I’m talking about maybe a teaspoon, not enough to make it taste sour. Just enough to wake up your taste buds.
Common mistakes to watch out for: Rushing the beef browning process creates gray, steamed meat instead of flavorful browned meat. Take those extra two minutes to get good color on your beef. The fond (those brown bits on the bottom of the pan) adds tremendous flavor to your sauce.
Another mistake is using a pot that’s too small. Everything needs room to move around and cook evenly. I use a 5-quart pot minimum for this recipe. Cramming it all into a small pot means uneven cooking and potential overflow as it bubbles. Not fun to clean up.
Overcooking the pasta is easier than you’d think in a one-pot dish. Remember that pasta continues cooking even after you turn off the heat, especially while it’s sitting in hot liquid. I aim for just barely tender, knowing it’ll soften a bit more as it sits. If you’re planning to have leftovers, definitely err on the side of slightly undercooked.
Storing leftovers properly makes a huge difference. This ground beef pasta recipe actually tastes even better the next day after the flavors have had time to meld together. Let it cool completely before storing, which usually takes about 30 minutes at room temperature. Then transfer it to an airtight container. Glass containers work better than plastic because they don’t absorb odors or stain from the tomatoes and spices. Following proper food storage guidelines keeps your leftovers safe and delicious for several days.
Label your container with the date. I know this seems overly cautious, but after finding mystery containers in the back of my fridge, I’ve learned to always date everything. This pasta stays good in the refrigerator for four days, maybe five if you pushed it. The texture and flavor remain excellent during that time.
Freezing works surprisingly well with this dish. Portion it into individual servings in freezer-safe containers or bags. Squeeze out excess air if using bags. It’ll keep frozen for up to three months. I like having single servings in the freezer for those nights when it’s just me eating at home and I don’t want to cook. Pop one in the microwave and dinner is ready in five minutes.
Reheating without ruining the texture requires the right approach. The microwave works fine but tends to dry things out. Add a tablespoon or two of water or milk to your portion before reheating. Cover it with a damp paper towel to trap moisture. Heat in 90-second intervals, stirring between each one, until it’s hot throughout. This prevents the edges from getting nuclear hot while the center stays cold.
Stovetop reheating produces better results if you have time. Put your leftover portion in a small pot over medium-low heat. Add a splash of broth, water, or milk to loosen up the sauce. Stir frequently until it’s heated through. The pasta rehydrates beautifully and tastes almost as good as when you first made it.
If you’re reheating from frozen, thaw it overnight in the refrigerator first for best results. You can reheat from frozen in a pinch, but it takes longer and the texture isn’t quite as good. Add extra liquid since frozen pasta tends to absorb more moisture during reheating.
By the way, leftover cheesy pasta dinner makes an excellent filling for quesadillas or burritos the next day. Spread some between two tortillas with extra cheese, pan-fry until crispy, and you’ve got a completely different meal with zero extra effort. My kids love when I transform leftovers into something that feels new and exciting.
The bottom line is this: perfecting any recipe takes practice and attention to detail. But this particular dish is forgiving enough that even your first attempt will probably turn out great. Each time you make it, you’ll understand the timing and techniques better. Pay attention to what works in your kitchen with your equipment, and adjust accordingly. That’s how you transform a good recipe into your signature dish. If you’re exploring more options for satisfying dinners, browse through these pasta and noodles recipes for additional weeknight inspiration that your family will love.
Frequently Asked Questions About One-Pot Cheesy Taco Pasta
Can I use ground turkey instead of beef?
Absolutely, ground turkey makes an excellent substitute and creates a lighter version of this dish. I recommend using 85/15 or 93/7 ground turkey depending on how lean you prefer. Since turkey is naturally milder than beef, you might want to add a bit more taco seasoning or a dash of smoked paprika to boost the flavor. Brown it the same way you would beef, though it cooks slightly faster. If using very lean turkey, add an extra teaspoon of olive oil to prevent dryness.
How can I make this dish spicier?
There are several ways to add heat without overwhelming the dish. Start by using hot salsa instead of mild and add diced jalapeños when browning the beef. A teaspoon of cayenne pepper or extra chili powder in the seasoning mix kicks things up nicely. My favorite method is adding a few dashes of your favorite hot sauce at the end, which lets everyone customize their spice level. Fresh jalapeño slices or crushed red pepper flakes as toppings work great too.
Is this dish suitable for kids?
Yes, this is one of the most kid-friendly meals in my rotation. The combination of pasta and cheese appeals to even picky eaters. Simply use mild salsa and skip any extra spicy additions if your kids have sensitive palates. The taco seasoning provides flavor without being overwhelming. I’ve served this to kids as young as three years old with zero complaints. You can also set aside a portion before adding spices for extremely sensitive little ones.
What are some good side dishes to pair with this pasta?
A fresh green salad with lime vinaigrette balances the richness perfectly and adds important vegetables to the meal. Mexican street corn, either on the cob or in salad form, complements the taco flavors beautifully. Garlic bread or warm tortillas work if you want something to soak up extra sauce. Sliced avocado, fresh tomato wedges, or a simple cucumber salad all make light, refreshing sides. Keep it simple since the pasta itself is quite hearty and filling.
Can I make this in advance?
Yes, this dish actually benefits from sitting for a few hours or overnight as the flavors develop and deepen. Make it completely according to directions, let it cool, then refrigerate in an airtight container. When ready to serve, reheat gently on the stovetop with a splash of milk or broth to loosen the sauce. The texture stays good for up to four days. I often make a double batch on Sunday and eat it throughout the week for quick lunches.
How long does it stay fresh in the fridge?
Properly stored in an airtight container, this pasta stays fresh for four days in the refrigerator, sometimes up to five if your fridge is very cold. Make sure to let it cool completely before sealing the container to prevent condensation, which can make it watery. Store it toward the back of your fridge where temperature is most consistent. If it starts to smell off or you see any mold, throw it away immediately even if it hasn’t been four days.
Is there a way to make this dish vegan?
Definitely, and it turns out surprisingly delicious. Replace ground beef with plant-based ground meat or crumbled firm tofu seasoned generously with taco spices. Use dairy-free cheese shreds and replace the cream cheese with cashew cream or a vegan cream cheese alternative. Choose vegetable broth instead of beef broth. Add extra black beans for protein and heartiness. The cooking method stays exactly the same, and you end up with a satisfying vegan meal that even meat-eaters enjoy.
Can I add vegetables to this dish?
Adding vegetables is one of my favorite ways to boost nutrition without changing the fundamental appeal of this meal. Bell peppers, zucchini, corn, and mushrooms all work beautifully. Dice them small and sauté with the ground beef so they cook completely. Frozen spinach stirred in at the end adds iron and virtually disappears into the sauce. Canned black beans and corn are the easiest additions since they require no prep. Just make sure whatever you add is cut small enough that it cooks in the same time as the pasta.
What’s the best type of pasta shape for this recipe?
Medium-sized shapes with ridges or hollows work best because they trap the cheesy sauce in their curves. My top choices are rotini, medium shells, penne, and cavatappi. These shapes are sturdy enough to handle the cooking time without getting mushy. Avoid delicate pastas like angel hair or orzo, which overcook easily in one-pot preparations. Smooth shapes like spaghetti don’t hold the sauce as well, so you lose some of that cheesy goodness in every bite.
Can I use a different type of cheese?
Cheddar provides that classic taco flavor, but you can definitely experiment with other varieties. Monterey Jack melts beautifully and has a milder taste. Pepper jack adds a nice kick if you like spice. Mexican cheese blend combines several varieties for complex flavor. Colby works well too. I don’t recommend using only mozzarella as it’s too mild and doesn’t provide enough flavor, but mixing it with cheddar can create an extra-stretchy, melty texture. Whatever you choose, shred it fresh from the block for the smoothest sauce.
I hope these tips help you feel confident about making this recipe your own. The beauty of cooking is that once you understand the basics, you can adapt any dish to fit your family’s preferences and dietary needs. Don’t be afraid to experiment and make mistakes – that’s how you discover your best variations. This One-Pot Cheesy Taco Pasta has become a staple in my home, and I’m confident it’ll earn a regular spot in your dinner rotation too.
Ingredients
Equipment
Method
- Chauffez une grande casserole ou une poêle profonde à feu moyen-vif et ajoutez l'huile d'olive.
- Faites dorer le boeuf haché, en le séparant jusqu'à ce qu'il n'y ait plus de rose, environ 5-7 minutes. Égouttez l'excès de graisse si nécessaire.
- Incorporez l'assaisonnement pour tacos et toutes les légumes hachés, comme les poivrons ou les jalapeños, en cuisant pendant une minute supplémentaire.
- Ajoutez le bouillon de boeuf, la salsa, les tomates en dés et les pâtes crues. Enfoncez les pâtes pour qu'elles soient presque immergées.
- PORTER À ÉBOULITION, puis réduire le feu à moyen-doux et couvrir légèrement pendant 12 minutes, en remuant tous les 3-4 minutes pour éviter que ça colle.
- Une fois les pâtes tendres, éteignez le feu et ajoutez le fromage à la crème et le fromage cheddar râpé. Laissez reposer pendant 30 secondes avant de remuer jusqu'à obtenir une consistance lisse et crémeuse. Ajustez la consistance si nécessaire.
- Goûtez et ajustez les assaisonnements avant de servir.