A Slice of Sunshine: My Honey-Sweetened Cheesecake
Is there anything more comforting than a perfect slice of cheesecake? I’ve always thought of it as a hug on a plate. My version, sweetened with golden honey, is my absolute favorite. It reminds me of Sunday dinners at my grandma’s. I’ve tested this recipe more times than I can count, tweaking it for that ideal creamy yet light texture. It’s now my go-to dessert for every special occasion. Let me show you how to make this sweet dream come true.
The Sweet History of Cheesecake and Honey
Cheesecake is an ancient treat! The first versions were served to athletes in Greece over 4,000 years ago. They were simple blends of cheese, wheat, and honey. Honey was the original sweetener long before sugar was common. My recipe is a nod to that history. It mixes old-world tradition with modern creamy cream cheese. Today’s cheesecakes are richer and baked, unlike those early versions. Adding honey connects us back to the very beginning of this beloved dessert.
Why You’ll Adore This Honey Cheesecake
You will love this recipe for so many reasons! First, the honey gives a warm, floral sweetness that sugar alone can’t match. It’s not overly sweet. Second, the method of folding in whipped egg whites makes it wonderfully light. It feels indulgent but not heavy. Finally, it’s surprisingly simple for such an impressive dessert. You don’t need a water bath or fancy tools. It’s a foolproof path to a stunning centerpiece that will have everyone asking for seconds.
When to Serve Your Honey Cheesecake Creation
This cheesecake is a versatile star. It’s perfect for a cozy family birthday celebration. I love bringing it to potlucks because it travels so well. It’s elegant enough for a holiday table, like Thanksgiving or Easter. Try it for a summer picnic paired with fresh berries. Honestly, a simple Tuesday night is also a great reason to make it. Any day becomes a little sweeter with a slice of this honey-kissed delight.
What You’ll Need: The Ingredients List
Gather these simple ingredients. Having everything at room temperature is the first secret to success!
- 3 large eggs, separated
- 125g (about 1/2 cup) butter, softened
- 125g (about 1 cup) powdered sugar
- 15ml (1 tablespoon) lemon juice
- 3g (1 teaspoon) vanilla powder or extract
- 65g (about 1/2 cup) all-purpose flour
- 7g (1 tablespoon) cornstarch
- 3g (1 teaspoon) baking powder
- 500g (2 cups) cream cheese, full-fat for best results
Handy Substitutions for Your Pantry
Don’t have an ingredient? No problem! Here are some easy swaps.
- Powdered Sugar: You can use an equal amount of granulated sugar, but your batter might be slightly grainier.
- Vanilla Powder: Pure vanilla extract works perfectly. Use the same 1 teaspoon.
- All-Purpose Flour: For a gluten-free version, use a 1:1 gluten-free flour blend.
- Cornstarch: Arrowroot powder or potato starch are good alternatives.
- Lemon Juice: White vinegar or cream of tartar can stabilize the egg whites instead.
Creating Your Honey Cheesecake Masterpiece
Let’s get baking! Follow these steps for a flawless, creamy cheesecake every single time.
Step 1: Preheat and Prepare
Start by heating your oven to 170°C (340°F). This gives it time to reach the perfect, even temperature. Take your 16cm springform pan and grease it lightly with butter. You can also line the bottom with parchment paper for easy removal later. There’s nothing worse than a beautiful cake stuck in the pan! Pro tip: Place a baking sheet on the lower oven rack to catch any potential drips.
Step 2: Cream the Butter and Sugar
In a large mixing bowl, combine the softened butter and powdered sugar. The vanilla goes in now too. Beat them together with an electric mixer for a good 3-4 minutes. Watch as the pale yellow butter transforms into a fluffy, almost white cloud. This step adds crucial air, giving your cheesecake a lighter texture. You should see clear trails from the beaters in the mixture.
Step 3: Add the Yolks and Cream Cheese
Crack your eggs, carefully dropping the yolks into the butter mixture and placing the whites in a separate, squeaky-clean bowl. Mix the yolks in until just combined. Now, add the blocks of cream cheese. The cool, dense cheese will slowly blend into the fluffy butter. Mix on medium speed until you have one perfectly smooth, pale, and thick base. No streaks should remain.
Step 4: Whisk the Dry Ingredients
Grab a medium bowl for your dry team. Whisk together the flour, cornstarch, and baking powder. You’ll see a soft, snowy pile. Whisking is important here. It evenly distributes the baking powder and cornstarch throughout the flour. This prevents little bitter clumps in your finished cake and ensures a uniform rise.
Step 5: Whip the Egg Whites to Stiff Peaks
This is the magic step! Add the lemon juice to your egg whites. Using clean, dry beaters, whip them on high speed. They will go from frothy, to soft white peaks, to glorious stiff peaks. When you lift the beaters, the peaks should stand straight up without folding over. This aerated foam is what will lift your cheesecake beautifully.
Step 6: Gently Combine Everything
First, fold the dry flour mixture into the cream cheese batter. Use a gentle, sweeping motion to avoid deflating it. Next, add about one-third of the whipped egg whites. Fold this in to loosen the thick batter. Now, gently fold in the remaining fluffy whites. Watch as the batter becomes airy and light. Be patient; a few white streaks are better than overmixing.
Step 7: Bake to Golden Perfection
Pour your beautiful batter into the prepared pan. Smooth the top with a spatula. Place it in the center of your preheated oven. Bake for 40 minutes. The top will turn a lovely light golden brown, and the cake will be set with a slight, gentle jiggle in the very center. The smell of baking cheesecake will fill your kitchen with joy.
Step 8: The All-Important Cool Down
This is the test of patience! Once baked, turn the oven off and crack the door open. Let the cheesecake sit inside for about an hour. This slow cooling prevents major cracking. Then, move it to a wire rack to cool completely to room temperature. Finally, refrigerate it for at least 4 hours, preferably overnight. Chef’s tip: Running a thin knife around the edge right after baking helps it pull away from the pan as it cools, preventing cracks.
Your Cheesecake Timeline
Planning is key for a stress-free bake. Here’s a quick breakdown of the time you’ll need.
- Prep Time: 25 minutes
- Cook Time: 40 minutes
- Cooling Time: 1 hour (in oven) + 1 hour (room temp)
- Chilling Time: Minimum 4 hours (overnight is best)
- Total Time: About 6 hours 45 minutes (mostly hands-off)
My Secret for the Creamiest Texture
My absolute number one secret is room temperature ingredients. Take the eggs, butter, and cream cheese out of the fridge at least 2 hours before you start. Soft butter creams better. Room-temperature cream cheese blends smoothly without lumps. Eggs at room temperature whip up to a much greater volume. This simple step ensures a silky, homogenous batter and the perfect rise.
A Sweet Fact About Honey
Honey is the only food that never spoils! Archaeologists have found pots of honey in ancient Egyptian tombs that are over 3,000 years old and still perfectly good to eat. Its natural acidity and low moisture content make it a powerful preservative. So, while our cheesecake won’t last 3,000 years, the honey in it adds a timeless, natural sweetness that has been cherished since the dawn of cooking.
Tools You’ll Need in Your Kitchen
- 16cm (6-inch) springform pan
- Electric hand mixer or stand mixer
- Large and medium mixing bowls
- Rubber spatula for folding
- Whisk
- Wire cooling rack
- Measuring cups and spoons
Storing Your Honey Cheesecake
Once cooled and set, your cheesecake must live in the refrigerator. Cover it tightly with plastic wrap or place it in an airtight container. The cold fridge keeps the cream cheese firm and safe to eat. It also helps the flavors meld together beautifully.
For the best texture and taste, enjoy your cheesecake within 4 to 5 days. The crust may soften slightly after the first day, but the flavor will still be fantastic. Always use a clean, hot knife to cut slices. This gives you neat, clean pieces every time.
You can also freeze this cheesecake for longer storage. Wrap the whole cake or individual slices tightly in plastic wrap, then in foil. It will keep well for up to 2 months. Thaw it overnight in the refrigerator before serving.
Helpful Tips for Baking Success
- Don’t open the oven door during the first 30 minutes of baking. The sudden temperature drop can cause the cake to fall.
- If you see cracks forming, don’t panic! A lovely drizzle of extra honey or a topping of fresh fruit covers them perfectly.
- For an extra flavor boost, add a teaspoon of lemon zest to the batter with the cream cheese.
- Make sure your bowl for whipping egg whites is completely free of any grease, or they won’t whip up properly.
Making It Look Simply Stunning
Presentation is the final touch! Here are a few of my favorite ways to serve it.
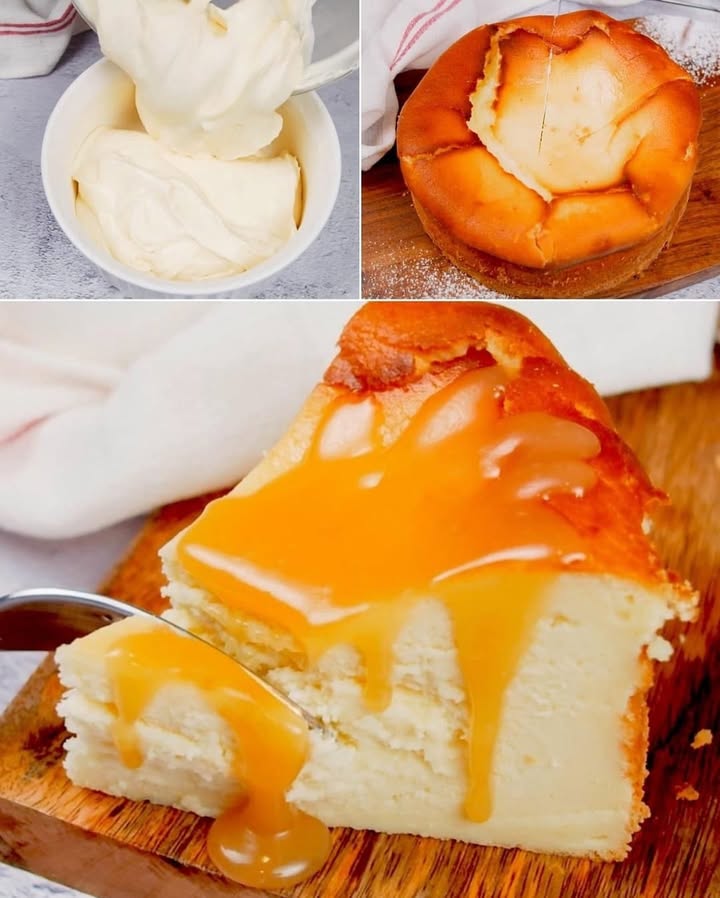
- Drizzle each slice with a little extra warm honey and a sprinkle of crushed nuts.
- Arrange a crown of fresh mixed berries like raspberries and blueberries on top.
- For a fancy touch, add a dollop of lightly sweetened whipped cream and a mint leaf.
- Serve on a simple white plate for the golden color of the cheesecake to really shine.
Six Delicious Variations to Try
Love this base recipe? Mix it up with one of these tasty twists!
1. Citrus Blast: Add the zest of one orange and one lemon to the batter. The citrus oils make it incredibly fragrant and bright.
2. Berry Swirl: Before baking, swirl 1/4 cup of seedless raspberry jam through the batter with a knife for a marbled effect.
3. Chocolate Chip: Fold 1/2 cup of mini chocolate chips into the batter at the very end for a sweet, melty surprise.
4. Ginger Snap Crust: Swap the classic base for a crust made from crushed ginger snap cookies and butter for a spicy kick.
5. Pumpkin Spice: Replace 1/2 cup of the cream cheese with pure pumpkin puree and add a teaspoon of pumpkin pie spice.
6. Lemon Pudding Delight: For a tangier, richer layer, spread a cup of prepared lemon pudding over the cooled cheesecake before chilling. The creamy pudding adds a wonderful contrast.
Common Mistakes to Avoid
Mistake 1: Using Cold Ingredients Straight From The Fridge
This is the most common error. Cold cream cheese and butter will never blend smoothly into your batter. You will end up with a lumpy mixture. This can also cause overmixing as you try to beat the lumps out. Overmixing leads to a dense, tough cheesecake. Always plan ahead. Let your dairy ingredients sit on the counter until they are softly yielding to the touch.
Mistake 2: Overmixing the Batter After Adding Flour
Once you add the dry ingredients, a gentle hand is key. Vigorous mixing develops the gluten in the flour. This makes your cheesecake bouncy and rubbery, not tender and creamy. Use a folding motion with a spatula. It’s okay if you see a few small streaks of flour when you add the egg whites. They will incorporate in the next folding step.
Mistake 3: Not Letting the Cheesecake Cool Gradually
Pulling the hot cheesecake out and putting it directly into the cold fridge is a shock. The sudden temperature change makes the center contract rapidly. This almost always causes a big crack down the middle. Avoid the heartbreak. Let it cool slowly in the turned-off oven first, then on the counter. Only refrigerate it once it’s no longer warm.
Mistake 4: Cutting Into a Warm Cheesecake
I know it’s hard to wait! But slicing into a cheesecake before it’s fully set is a mess. The center will be runny and won’t hold its shape. You’ll get a soupy slice instead of a neat one. The chilling time in the fridge is when the structure really firms up. For the perfect clean slice, patience is your best ingredient.
Your Cheesecake Questions, Answered
Can I use a different size pan?
Yes, but the baking time will change. A larger pan, like a 9-inch, will make a thinner cheesecake. You will need to reduce the baking time by 10-15 minutes. Watch for the golden top and the slightly jiggly center. A smaller pan will make a taller cake, and you may need to add 5-10 minutes to the bake time. Always do the visual and jiggle test to know when it’s done.
Why did my cheesecake crack on top?
Cracking usually happens from a sudden temperature change or overbaking. Cooling it too quickly is a common cause, which is why we cool it slowly in the oven. Overbeating the batter can incorporate too much air, which then collapses and cracks. Also, if you bake it too long, the proteins tighten too much and split. Don’t worry, a crack doesn’t affect the taste. Cover it with a delicious topping!
Can I make this recipe without eggs?
This specific recipe relies on eggs for structure and lift. For an egg-free version, you would need to use a completely different recipe designed to be eggless. It would likely use a chemical leavener like extra baking powder and a binder like cornstarch or a commercial egg replacer. The texture would be more dense and likely not rise as much.
My cream cheese batter is lumpy. What can I do?
This means your cream cheese was too cold. First, try mixing it on a slightly higher speed for a bit longer. If small lumps remain, you can press the batter through a fine-mesh sieve. This is a bit of work but will save your texture. For next time, remember to let the cream cheese soften fully. You can also cut it into small cubes to help it warm up faster.
What’s the best way to cut a cheesecake cleanly?
Use a long, thin, sharp knife. Run it under very hot water and wipe it dry before each cut. The heat helps the knife slide through the creamy filling without dragging or sticking. Make clean, confident cuts. For the neatest slices, clean the knife after each cut. A piece of dental floss pulled tightly also works wonderfully for cutting through cheesecake.
Can I use granulated sugar instead of powdered sugar?
You can, but the texture will be different. Powdered sugar contains cornstarch, which helps stabilize the cake. Granulated sugar is coarser. Your final cheesecake might have a slightly grainier mouthfeel. If you must substitute, blend the granulated sugar in a blender for a minute to make it superfine. This will help it dissolve better into the butter and cream cheese.
How do I know when the cheesecake is done baking?
The cheesecake is done when the edges look set and the top is light golden brown. The very center, about the size of a lemon, should still have a slight jiggle when you gently shake the pan. It will firm up as it cools. If the center is completely liquid, it needs more time. If the whole top is firm and doesn’t move, it is likely overbaked.
Can I add a crust to this cheesecake?
Absolutely! A graham cracker crust is a classic pairing. Mix 1 cup of graham cracker crumbs with 3 tablespoons of melted butter and a tablespoon of sugar. Press it firmly into the bottom of your pan. Pre-bake the crust for 8 minutes at 170°C, then let it cool before adding the cheesecake batter. This adds a wonderful crunchy texture contrast.
Is there a way to make this lower in sugar?
You can reduce the powdered sugar slightly, but it will affect texture and sweetness. For a more natural, lower-glycemic option, you could try using a honey powder or a monk fruit powdered sweetener blend made for baking. I don’t recommend using liquid sweeteners other than honey as a direct swap, as they change the liquid balance of the recipe.
What can I do with leftover egg yolks?
Don’t throw them away! Egg yolks are gold in the kitchen. Use them to make a rich custard, homemade mayonnaise, or lemon curd. You can also add an extra yolk to scrambled eggs or an omelet for extra creaminess. To store them for a day or two, place them in a small container, cover with a little water, and keep them in the fridge.
The Final Slice
And there you have it, my dear friend. My tried-and-true recipe for a gorgeous honey cheesecake. It’s more than just a dessert. It’s a way to create a sweet memory with every bake. The process is part of the joy. I love seeing the creamy batter come together and smelling it fill the house. I hope this recipe becomes a special tradition in your home too. Grab your mixer, and let’s make something wonderful. Happy baking!
Lemon Pudding Delight
Ingredients
Equipment
Method
- Preheat your oven to 170°C (340°F) and prepare a 16cm springform pan by greasing it lightly with butter and lining the bottom with parchment paper.
- In a large mixing bowl, cream together the softened butter and powdered sugar, then mix in the vanilla; beat for 3-4 minutes.
- Add the egg yolks into the butter mixture and mix until just combined; then add in the cream cheese and mix until smooth.
- In a medium bowl, whisk together the flour, cornstarch, and baking powder.
- In a clean bowl, whip the egg whites with lemon juice until stiff peaks form.
- Gently fold the dry ingredients into the cream cheese mixture, followed by one-third of the whipped egg whites; then fold in the remaining egg whites.
- Pour the batter into the prepared pan, smooth the top, and bake for 40 minutes until golden brown with a slight jiggle in the center.
- Cool the cheesecake in the oven with the door cracked for about an hour, then transfer it to a wire rack to cool completely before refrigerating for at least 4 hours.