Aloha in Every Bite: The Joy of Hawaiian Pineapple Cake
You know that feeling when you take a bite of something so good it instantly transports you? That’s Hawaiian Pineapple Cake. The first time I made it for a rainy Tuesday dinner, my family’s faces lit up like sunshine. It’s not just a dessert. It’s a little edible vacation. Each moist, tropical forkful topped with fluffy frosting is pure happiness. It’s the cake I’m always asked to bring to potlucks, and trust me, it never fails to be the star of the show.
More Than Just a Tropical Treat
While you might picture it on a luau table, this cake has deeper roots. It’s often called a “poke cake” in the South, where bakers pour syrup over warm cake to make it ultra-moist. Using crushed pineapple with its juice is the genius tropical twist. It keeps the cake incredibly tender and infuses it with bright, sweet-tart flavor. My version blends the best of both worlds. It has the easy preparation of a sheet cake with the lush, island-inspired taste we all love. It’s a modern classic born from kitchen creativity and a love for pineapple.
Why You’ll Fall in Love With This Pineapple Cake
This recipe is a winner for so many reasons. First, it’s incredibly easy. You mix everything in one bowl! No fancy techniques are needed. Second, the result is unbelievably moist. The pineapple juice bakes right in, creating a texture that stays soft for days. Third, the flavor combination is magic. Sweet cake, tangy pineapple, creamy frosting, and crunchy toasted coconut. It’s a party in your mouth. Plus, it’s sturdy enough to travel, making it the perfect treat to share.
When to Bake Your Tropical Masterpiece
This cake is a crowd-pleaser for any event! It’s a must for summer barbecues and pool parties. I love serving it at baby showers or bridal luncheons for a taste of sunshine. It’s perfect for a casual family Sunday dinner when you want a special dessert without the fuss. Honestly, it’s also my secret weapon for cheering someone up. A slice of this cake wrapped in a pretty box says “I’m thinking of you” better than any store-bought card.
What You’ll Need: Your Tropical Ingredients List
- 1 can (20 oz) crushed pineapple, undrained
- 2 cups all-purpose flour
- 1 1/2 cups granulated sugar
- 1/2 cup unsweetened shredded coconut
- 2 large eggs
- 1 teaspoon baking soda
- 1 teaspoon vanilla extract
- 1/2 teaspoon salt
- 1/2 cup butter, melted
- 1/2 cup chopped walnuts or pecans (optional)
- 1/2 teaspoon ground cinnamon
- 1/4 cup brown sugar
For the Frosting & Topping:
- 1 package (8 oz) cream cheese, softened
- 1/4 cup butter, softened
- 2 cups powdered sugar
- 1 teaspoon vanilla extract
- 1/2 cup shredded coconut, toasted for topping
- 1/4 cup crushed pineapple, drained for topping
No Problem! Handy Ingredient Swaps
Out of something? Don’t worry. Cooking is about improvisation. For a gluten-free cake, use a 1-to-1 gluten-free baking flour blend. If you don’t have shredded coconut in the batter, just leave it out. The cake will still be delicious. The nuts are optional, but pecans add a lovely buttery crunch. If you’re dairy-free, use plant-based butter and cream cheese. For a lighter frosting, you can use Neufchâtel cheese instead of regular cream cheese.
Creating Your Slice of Paradise
Step 1: Get Your Oven and Pan Ready
Start by preheating your oven to 350°F (175°C). This ensures it’s perfectly hot when your batter is ready. Take your 9×13 inch baking dish and give it a good coat of butter or non-stick spray. Then, dust it lightly with flour. Tap out the excess. This little ritual is the secret to your cake sliding out beautifully later. Pro tip: For extra easy cleanup, line the pan with parchment paper after greasing it.
Step 2: Mix Your Dry Ingredients
Grab a large mixing bowl. Whisk together the flour, granulated sugar, coconut, baking soda, salt, and cinnamon. Watch as the white flour gets flecked with brown spices and snowy coconut. This mixing step evenly distributes the leavening agent. That means your cake will rise perfectly in the oven. You’ll start to smell the warm, sweet aroma already. It’s the smell of good things to come.
Step 3: Bring in the Wet Team
Now, pour in the whole can of crushed pineapple with its glorious juice. Add the eggs, melted butter, and vanilla extract. The melted butter will swirl into the flour, creating little crumbly pockets. As you stir, the batter will transform. It will become a thick, luscious, pale yellow mix with speckles of pineapple. If you’re using nuts, fold them in gently now. The batter should be well combined but not over-mixed. A few small lumps are okay.
Step 4: Bake to Golden Perfection
Pour the batter into your prepared pan. Use a spatula to spread it evenly into the corners. Now, for a magic trick: sprinkle the brown sugar evenly over the entire top. This will create a slightly caramelized, crunchy topping as it bakes. Place the pan in the center of your preheated oven. Bake for 30-35 minutes. Your kitchen will fill with an incredible tropical scent. The cake is done when the top is golden and a toothpick poked in the center comes out clean.
Step 5: Whip Up the Dreamy Frosting
While the cake cools, make the frosting. It’s so simple. In a medium bowl, beat the softened cream cheese and butter together until completely smooth. Gradually add the powdered sugar and vanilla. Keep beating until the frosting is light, creamy, and fluffy. Resist the urge to taste it more than once… or twice! This frosting is the cool, tangy cloud that will crown your warm, spicy cake.
Step 6: Frost and Finish with Flair
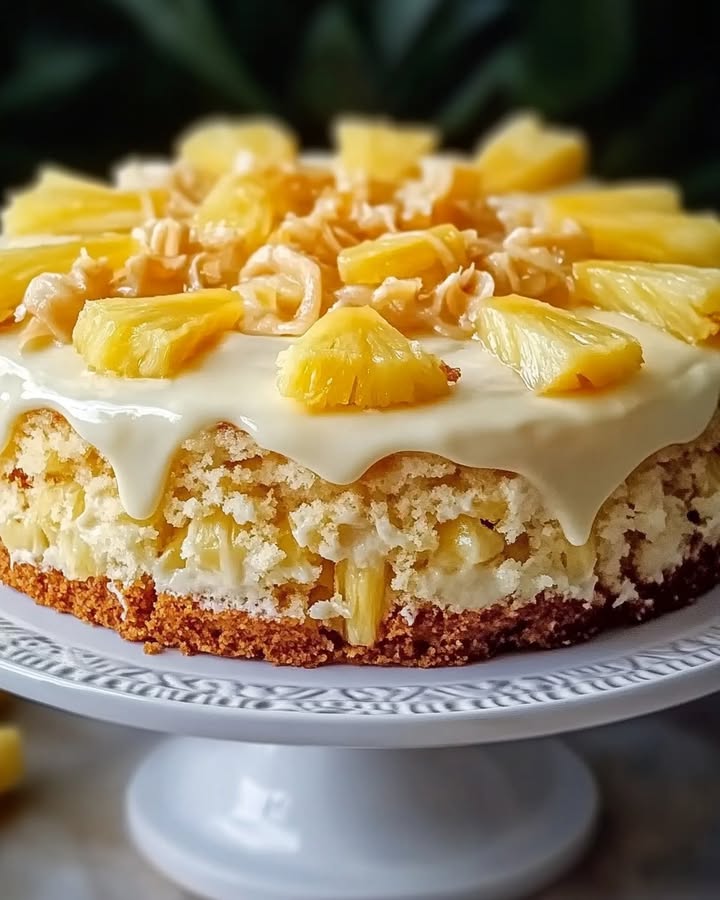
This is the most important step: let the cake cool completely. If you frost a warm cake, the frosting will melt into a sad puddle. Patience is key. Once it’s room temperature, spread the frosting over the top in big, swoopy swirls. Finally, sprinkle on the toasted coconut and a little extra crushed pineapple. Toasting the coconut in a dry pan until golden brings out a nutty flavor that is simply irresistible.
Your Baking Timeline
Planning is part of the fun! Here’s how your time will break down:
- Prep Time: 20 minutes (Includes gathering, mixing, and pan prep)
- Cooking Time: 35 minutes (For that perfect bake)
- Cooling Time: At least 1 hour (Crucial for perfect frosting!)
- Total Time: About 1 hour 55 minutes from start to finish
- Kcal: Approximately 320 per serving
- Servings: 12 generous pieces of paradise
My Chef’s Secret
For an extra layer of flavor, I sometimes soak the warm cake. After taking it out of the oven, I poke holes all over the top with a fork or skewer. Then, I slowly drizzle about 1/4 cup of the pineapple juice (from the can for the topping) right over the hot cake. It soaks in, making every single bite even more intensely pineapple-y and moist. It’s our family’s favorite version.
A Sweet Pineapple Fact
Did you know the pineapple is a symbol of hospitality? In the 1700s, sea captains would place a pineapple outside their home to announce their safe return from voyage and invite friends to visit. By baking this cake, you’re carrying on that centuries-old tradition of welcoming and sharing. How cool is that?
Tools of the Trade
You don’t need fancy gadgets! Here’s all you’ll use:
- 9×13 inch baking dish
- Large mixing bowl
- Medium mixing bowl (for frosting)
- Whisk and spatula
- Electric hand mixer or stand mixer (for frosting, but a strong arm works too!)
- Measuring cups and spoons
- Toothpick or cake tester
Keeping Your Cake Fresh and Delicious
Because this cake is so moist, storage is easy. First, cover it tightly with plastic wrap or store it in an airtight container. You can leave it right in the baking pan if it has a lid.
It’s happy at room temperature for one day. This is perfect if you’re serving it later the same day. The frosting stays soft and the texture is perfect.
For longer storage, keep it in the refrigerator. It will stay fresh for up to 4-5 days. The cold actually makes the cake even more dense and delicious. Let a slice sit out for 10 minutes before eating to take the chill off the frosting.
Tips for a Foolproof Cake Every Time
- Room temperature ingredients are key. Take the eggs, cream cheese, and butter out about an hour before you start. They blend so much smoother.
- Don’t over-mix the batter. Stir just until you no longer see dry flour. Over-mixing makes cakes tough.
- Toast your coconut for the topping. It adds a depth of flavor and crunch that raw coconut just can’t match.
- For clean slices, dip your knife in hot water and wipe it dry between each cut.
Make It Look as Good as It Tastes
- Serve on a bright-colored platter with a few fresh pineapple leaves or edible flowers for a true tropical vibe.
- Cut into small squares and serve on a tiered stand for a party.
- Drizzle a little caramel sauce over each slice right before serving for a decadent twist.
- Top each piece with a fresh strawberry or a maraschino cherry for a pop of contrasting color.
Mix It Up! Healthier and Fun Variations
Love the base recipe? Try one of these twists for a brand new experience.
- Whole Wheat & Honey Delight: Swap half the all-purpose flour for whole wheat pastry flour. Replace the granulated sugar with 1 cup of honey. The result is a denser, earthier cake with rich flavor.
- Tropical Vegan Cake: Use flax eggs (1 tbsp ground flax + 2.5 tbsp water per egg). Use coconut oil instead of butter and vegan cream cheese. It’s just as moist and totally plant-based.
- Pineapple Upside-Down Style: Before pouring batter, arrange pineapple rings and maraschino cherries in the pan. Sprinkle with the brown sugar. Pour batter over and bake. Flip it after cooling for a stunning presentation.
- Individual Mini Cakes: Bake the batter in a greased muffin tin for about 20-25 minutes. Frost individually for perfect portion-controlled treats.
- Coconut Cream Dream: Add 1/2 cup of coconut cream (the thick part from a can) to the frosting. Garnish with toasted macadamia nuts instead of walnuts for a super-rich, island-inspired flavor.
- Lower-Sugar Option: Reduce the granulated sugar in the cake to 1 cup. Use a sugar substitute blend made for baking that measures 1:1 like sugar. For the frosting, use a powdered erythritol blend.
Common Mistakes to Avoid
Mistake 1: Forgetting to Drain Topping Pineapple
It’s easy to grab the crushed pineapple for the topping and just sprinkle it on. But if you don’t drain it first, the extra juice will make your beautiful frosting slide right off the cake. It can also make the topping soggy. To avoid this, always drain the pineapple meant for the garnish. Just spoon it into a fine mesh strainer and press lightly with a spoon. Let the juice drip out completely before sprinkling it over the frosting.
Mistake 2: Frosting a Warm Cake
We’ve all been there. You’re excited and the cake smells amazing. But spreading that creamy frosting on a warm cake is a recipe for disaster. The heat melts the butter and cream cheese. You’ll end up with a gloppy, runny mess instead of pretty swirls. The fix is simple but requires patience. Let your cake cool in the pan on a wire rack for at least an hour. Touch the center gently. It should feel completely cool to the touch. Then, and only then, get your frosting ready.
Mistake 3: Not Toasting the Coconut Garnish
Sprinking raw shredded coconut on top is fine. But toasting it is a game-changer. Raw coconut can be a bit chewy and bland. Toasting unlocks a deep, nutty aroma and creates a delightful golden crunch. It adds a whole new layer of texture and flavor. Toasting is easy. Just spread the coconut in a dry skillet over medium-low heat. Stir constantly for 3-5 minutes until it’s lightly golden. Your nose will tell you when it’s done!
Mistake 4: Over-measuring the Flour
Too much flour is the top reason cakes turn out dry and dense. The most common way this happens is by scooping the flour directly from the bag with your measuring cup. This packs the flour in tightly. You end up with more flour than the recipe intended. Always spoon the flour lightly into your measuring cup. Then, level it off with the flat edge of a knife. This “spoon and level” method gives you the perfect, light amount every time.
Your Hawaiian Pineapple Cake Questions, Answered
Can I use fresh pineapple instead of canned?
You can, but it needs a little prep. Fresh pineapple contains an enzyme called bromelain. This enzyme can break down proteins and make your cake gummy. To use it, you need to cook it first to deactivate the enzyme. Chop or crush about 2 cups of fresh pineapple. Cook it in a small saucepan with 1/4 cup of water and 2 tablespoons of sugar until soft and juicy. Let it cool completely before using. Canned pineapple is already cooked, making it a more reliable and convenient choice for this recipe.
How do I know for sure when the cake is done baking?
The toothpick test is your best friend. Around the 30-minute mark, open the oven and gently poke a toothpick or a thin wooden skewer into the center of the cake. Pull it out. If it comes out clean or with just a few dry crumbs clinging to it, your cake is done. If you see wet batter, it needs more time. Bake in 3-minute increments and check again. The top should also be a lovely golden brown and spring back lightly when you touch it. Don’t rely on the clock alone!
My frosting is too runny. What can I do?
A runny frosting usually means your cream cheese or butter was too warm. Don’t panic. First, pop the whole bowl of frosting into the refrigerator for 20-30 minutes. Let it chill and firm up. Then, beat it again. If it’s still too soft, you can add a little more powdered sugar, about 1/4 cup at a time, until it reaches the right consistency. Remember, the cake must be completely cool before you frost it, or even the thickest frosting will melt.
Can I make this cake ahead of time?
Absolutely. In fact, making it ahead can improve the flavor! You can bake the cake the day before. Let it cool completely, then wrap the whole pan tightly in plastic wrap. Store it at room temperature overnight. Make the frosting and toast the coconut the day of serving. This way, the cake has time for the flavors to meld, and your frosting will be fresh and beautiful. You can also frost the whole cake, cover it well, and refrigerate it a day ahead.
How do I store leftovers, and how long do they last?
Cover the cake pan tightly with plastic wrap, foil, or a fitted lid. You can store it in the refrigerator for 4-5 days. The cold makes the cake wonderfully dense and moist. Some people even prefer it cold! If you want to freeze it, cut it into portions. Wrap each piece individually in plastic wrap and then in foil. Freeze for up to 2 months. Thaw in the refrigerator overnight or on the counter for a few hours.
I don’t like coconut. Can I leave it out?
Of course you can. The coconut in the batter adds texture and flavor, but the cake will still be delicious without it. Simply omit the 1/2 cup of shredded coconut from the batter. For the topping, skip the toasted coconut. You could replace it with something else you love. Try a sprinkle of chopped toasted pecans, a drizzle of caramel, or just leave it with the classic cream cheese frosting and pineapple. Make it your own.
Is there a way to make this recipe without nuts?
Yes, the nuts are completely optional. The recipe works perfectly fine without them. If you’re making it for people with allergies or just don’t like nuts, simply leave them out. You won’t need to replace them with anything else. The cake will be just as moist and flavorful. The walnuts or pecans add a nice crunchy texture, but you won’t miss them.
Can I bake this in a different pan size?
You can, but the baking time will change. For two 9-inch round cake layers, divide the batter evenly between the pans. Bake for 25-30 minutes. For a 9×9 square pan, the cake will be thicker. Bake for 35-40 minutes. Always do the toothpick test to be sure. Remember, if you change the pan, the serving size and presentation will be different too. A 9×13 pan is ideal for easy serving at parties.
Why did my cake sink in the middle?
A sinking cake can have a few causes. The most likely culprit is that the cake wasn’t fully baked in the center. The structure wasn’t set, so it collapsed as it cooled. Another reason could be opening the oven door too early or too often. The rush of cold air can make it fall. Finally, check your baking soda. If it’s old and lost its power, your cake won’t rise properly. Make sure your ingredients are fresh and bake until truly done.
What can I use instead of cream cheese for the frosting?
If you need a non-dairy option, use a good-quality vegan cream cheese. The flavor and texture will be very similar. For a different flavor, you could make a simple buttercream with butter, powdered sugar, and a splash of pineapple juice. Or, try a whipped coconut cream frosting. Chill a can of full-fat coconut milk overnight. Scoop out the solid cream and whip it with a little powdered sugar. It’s light and pairs beautifully with the tropical theme.
The Final Slice
So there you have it. Your guide to baking the most delicious, foolproof Hawaiian Pineapple Cake. This isn’t just a dessert. It’s a memory maker. It’s the cake that disappears first at every gathering. It’s the happy sigh after the first bite. With its sunny flavor and easy prep, it’s sure to become a favorite in your home too. Grab your bowl, preheat your oven, and get ready to bring a little aloha spirit to your kitchen. Happy baking.
Strawberry Cheesecake Delight
Ingredients
Equipment
Method
- Preheat your oven to 350°F (175°C) and prepare a 9x13 inch baking dish with butter or non-stick spray and flour.
- In a large mixing bowl, whisk together the flour, granulated sugar, coconut, baking soda, salt, and cinnamon.
- Add the crushed pineapple with its juice, eggs, melted butter, and vanilla extract to the dry ingredients and mix until well combined but not over-mixed.
- Pour the batter into the prepared pan and sprinkle brown sugar over the top.
- Bake for 30-35 minutes, or until a toothpick inserted into the center comes out clean.
- While the cake cools, prepare the frosting by beating together cream cheese and butter until smooth, then gradually add powdered sugar and vanilla until fluffy.
- Once the cake is cool, spread the frosting on top and garnish with toasted coconut and drained crushed pineapple.