My Love Affair with Baked Ziti with Ricotta Cheese
I still remember the first time I made baked ziti for my family on a chilly Sunday evening. The kitchen smelled amazing, and when I pulled that bubbling dish from the oven, everyone gathered around the table faster than usual. That moment taught me something important: comfort food brings people together like nothing else.
Welcome to my kitchen! Today, I’m excited to share a classic and comforting recipe that has saved me countless times: Baked Ziti with Ricotta Cheese. This dish is not just delicious but also versatile, making it perfect for any occasion. I’ve made it for busy weeknight dinners, potlucks, holiday gatherings, and even those lazy Sunday afternoons when I want something hearty without too much fuss.
Whether you’re a seasoned chef or a beginner in the kitchen, this easy baked ziti with ricotta cheese will become a favorite in no time. I promise you don’t need fancy skills or expensive equipment. Just a good baking dish, some basic ingredients, and about an hour of your time. The best part? Most of that time is hands-off while the oven does the work.
Why Baked Ziti with Ricotta Cheese Works Every Time
Let’s talk about why this dish is so special. The combination of creamy ricotta, gooey mozzarella, and perfectly cooked ziti pasta creates a mouthwatering experience that feels like a warm hug. Each bite gives you that perfect balance of cheesy richness and tangy tomato sauce.
It’s a crowd-pleaser and can be adapted to include your favorite ingredients. You can make baked ziti with ricotta and meat using ground beef or Italian sausage. Or keep it simple with a meatless baked ziti with ricotta and mozzarella that vegetarians will love. I’ve even added vegetables like spinach, mushrooms, and bell peppers when I need to sneak more nutrients into my family’s diet.
This dish also makes fantastic leftovers. I actually think it tastes better the next day after all the flavors have had time to blend together. You can make it ahead for meal prep or double the recipe and freeze half for another time. Trust me, future you will be grateful.
What Makes This Recipe Different
You might wonder what sets this authentic baked ziti apart from other pasta bakes. The secret lies in how we layer the ingredients and prepare the ricotta mixture. Some people just dump everything together and hope for the best. That works, but taking a few extra minutes to do it right makes a huge difference.
I learned from my Italian neighbor that the ricotta should be seasoned well before mixing it with the pasta. She taught me to add herbs, a touch of garlic, and yes, sometimes an egg to help bind everything together. This creates pockets of creamy cheese throughout the dish instead of having it all sink to the bottom.
The layered baked ziti with ricotta approach gives you more control over the final texture. You get crispy edges, tender pasta in the middle, and that golden, bubbly cheese on top that everyone fights over. It looks impressive when you serve it, too.
Ingredients You’ll Need for Perfect Baked Ziti
To make this delectable baked ziti with ricotta and mozzarella, gather these essential ingredients:
- Ziti pasta – This tube-shaped pasta is traditional, but penne or rigatoni work great too
- Ricotta cheese – Get the full-fat version for the best flavor and texture
- Mozzarella cheese – I use a mix of shredded and fresh when I can
- Parmesan cheese – Freshly grated makes such a difference
- Marinara sauce – Use your favorite store-bought or homemade version
- Ground beef or Italian sausage (optional) – For baked ziti with ricotta and sausage or meat
- Fresh herbs like basil and oregano – Dried herbs work in a pinch
- Salt and pepper to taste
Some recipes call for baked ziti with ricotta cheese and sour cream, which adds extra tanginess. I’ve tried it both ways, and while traditional ricotta-only is my preference, the sour cream version has its fans. It makes the cheese mixture lighter and gives it a slight tang that cuts through the richness.
Common Questions About Making Baked Ziti
Before we get cooking, let me address some questions I hear all the time. These tips will help you avoid the pitfalls that can turn a great dish into a mediocre one.
Do you add egg to ricotta for ziti? Yes, I usually do. Adding one or two eggs to the ricotta helps bind the mixture and gives it a slightly firmer texture. The eggs also add richness and help the cheese layer hold together when you slice and serve the ziti. If you skip the egg, your dish will still taste good, but it might be a bit runnier.
What’s the secret to a flavorful ziti? The secret is proper seasoning at every step. Don’t just season the sauce. Season your pasta water with salt. Season the ricotta mixture with salt, pepper, and herbs. Season your meat if you’re using it. Building flavor in layers creates a much more satisfying dish than trying to fix bland food at the end.
Should I cover my baked ziti when I put it in the oven? I cover mine with foil for the first 30 minutes, then uncover it for the last 15 to 20 minutes. This method keeps the pasta from drying out while allowing the top to get golden and bubbly. If you skip the foil, the top might brown too quickly while the inside stays cold.
What are common baked ziti mistakes? The biggest mistake is overcooking the pasta before baking. Your ziti will continue cooking in the oven, so you want it slightly underdone when you drain it. Another mistake is using too little sauce, which leads to dry pasta. And finally, many people forget to let the dish rest for 10 minutes after baking. This resting time lets everything set up properly.
I’ve made all these mistakes myself over the years. My first attempt at baked ziti with ricotta no meat was so watery it was more like soup. My second try was so dry we needed extra sauce on the side. But that’s how we learn, right?
Now that you understand what makes this dish special and what to avoid, you’re ready to create an amazing meal. This recipe works for quiet family dinners or when you’re feeding a crowd. It’s forgiving enough for beginners but delicious enough to impress experienced cooks. Get your ingredients ready, and let’s make some magic happen in your kitchen.


Step-by-Step Guide to Preparing Baked Ziti with Ricotta Cheese
Now that we’ve covered the basics and you understand what makes this dish work, let’s get our hands dirty and actually make this thing. I’m walking you through each step just like I would if you were standing in my kitchen with me.
First things first: crank that oven up to 375°F (190°C). I know it seems obvious, but I can’t tell you how many times I’ve gotten halfway through prep only to realize my oven wasn’t even on. Give it at least 15 minutes to fully preheat while you work on everything else. A properly heated oven makes such a difference in how evenly everything cooks.
While the oven’s warming up, get a large pot of water boiling for your pasta. And I mean large. You want at least 4 quarts of water for a pound of ziti. Here’s something my cooking teacher taught me years ago: salt that water generously. It should taste like the ocean. This is your only chance to season the pasta itself, and undersalted pasta water leads to bland ziti no matter how flavorful your sauce is.
Cook your ziti according to the package directions, but here’s the trick: pull it off the heat about 2 minutes before the package says it should be done. You’re looking for that al dente texture where there’s still a tiny bit of firmness in the center. Remember, this pasta is going in the oven for another 45 minutes or so. If you cook it fully now, you’ll end up with mushy pasta later. Trust me on this one. I learned this lesson the hard way at a dinner party where my ziti turned into paste because I cooked the pasta too long.
Drain your pasta in a colander, but don’t rinse it. That starchy coating helps the sauce cling to the noodles. Set it aside while you prepare the cheese mixture. This is where the magic happens, folks.
Creating the Creamy Ricotta Mixture
Grab a large mixing bowl and dump in your ricotta cheese. For a standard 9×13 baking dish, I use about 15 ounces of ricotta, though I’ve been known to add a bit more because I love that creamy texture. If you’re following my lead and wondering do you add egg to ricotta for ziti, the answer is yes, and here’s when you do it.
Crack one or two eggs right into that ricotta. The eggs serve as a binder and give the mixture a slightly firmer, almost custard-like quality once it bakes. Some people skip this step, and that’s fine, but I really notice the difference. The egg helps everything hold together when you’re serving it instead of having cheese oozing everywhere.
Now season this mixture like your life depends on it. Add about half a cup of grated Parmesan cheese, a teaspoon of salt, half a teaspoon of black pepper, and whatever herbs you’re feeling. I usually go with a tablespoon of dried Italian seasoning or a handful of chopped fresh basil if I have it. Sometimes I add a pinch of red pepper flakes for a little kick. Mix everything together until it’s well combined and tastes amazing. Yes, taste it. Raw egg won’t hurt you in such a small amount, and you need to know if it needs more salt or herbs.
By the way, if you’re making baked ziti with ricotta cheese and sour cream, this is when you’d add about half a cup of sour cream to the mixture. It lightens the whole thing up and adds a pleasant tang. I don’t always do this, but when I’m feeling fancy or want something a bit different, it’s a nice variation.
Preparing the Meat and Sauce
If you’re making baked ziti with ricotta and meat, now’s the time to brown your protein. Heat a large skillet over medium-high heat and add about a pound of ground beef or Italian sausage. I personally love using half beef and half sausage because the sausage adds so much flavor with its built-in seasonings.
Break up the meat with a wooden spoon as it cooks, getting it nice and crumbly. You want it fully browned with no pink remaining, which usually takes about 8 to 10 minutes. Here’s a tip I picked up from watching too many cooking shows: don’t move the meat around constantly. Let it sit and develop some brown crusty bits on the bottom of the pan. Those crispy pieces add tons of flavor.
Once your meat is cooked through, drain off the excess fat. I usually pour it into an old can or jar rather than down the sink because, plumbing issues. Then add your marinara sauce right to the pan with the meat. I typically use about 24 to 28 ounces of sauce for a standard batch. You can use jarred sauce, and honestly, there’s no shame in that. I keep several jars in my pantry for nights when I don’t have time to make sauce from scratch. If you want to get fancy, you could use a homemade sauce similar to what you’d find in one-pot tomato basil pasta, which has that fresh, bright flavor.
Stir the sauce and meat together and let it simmer for a few minutes while you get ready to assemble. If you’re making a meatless baked ziti with ricotta and mozzarella, simply warm your marinara sauce in a pot. Sometimes I sauté some garlic and onions first to boost the flavor, kind of like the aromatic base you’d build for creamy Cajun chicken Alfredo.
The Art of Layering Your Baked Ziti
Here’s where this layered baked ziti with ricotta really comes together. Get your 9×13 baking dish ready. I like to spray mine with cooking spray first to make cleanup easier later, though some people skip this step.
Start by spreading about a cup of your meat sauce across the bottom of the dish. This prevents the pasta from sticking and adds moisture to the bottom layer. Then add about half of your cooked ziti, spreading it out evenly. It doesn’t have to be perfect. We’re making dinner, not building the Sistine Chapel.
Next comes half of your seasoned ricotta mixture. I use a spoon to dollop it around over the pasta, then gently spread it with the back of the spoon. It won’t cover every single noodle, and that’s okay. You want pockets of that creamy cheese throughout the dish. Sprinkle about a third of your mozzarella over this layer. I use about 3 cups of shredded mozzarella total for the whole dish.
Pour about half of your remaining sauce over the cheese layer. Then repeat the whole process: pasta, ricotta mixture, mozzarella, sauce. For the final top layer, I go heavy on both the mozzarella and Parmesan cheese because everyone loves that golden, bubbly top. This is what makes the dish look as good as it tastes.
Funny enough, my kids always fight over the corner pieces because they get extra crispy cheese on two sides. I’ve actually considered making individual portions in smaller dishes just to give everyone their own corners, similar to how you might portion out something like lemon butter shrimp pasta for an elegant presentation.
Baking Your Ziti to Perfection
Now for the question everyone asks: Should I cover my baked ziti when I put it in the oven? Yes, absolutely, at least for the first part of baking. Cover your dish tightly with aluminum foil. This traps steam inside, which keeps everything moist and helps the pasta finish cooking through without drying out.
Slide your covered dish into that preheated 375°F oven and set a timer for 25 minutes. During this time, the cheese melts, the flavors meld together, and everything heats through evenly. The foil prevents the top cheese from browning too quickly before the inside is hot.
After 25 minutes, carefully remove the foil. Watch out for the steam that escapes because it’s hot enough to burn you. I learned this the hard way and now use oven mitts on both hands when removing foil. Put the dish back in the oven, uncovered, for another 20 to 25 minutes. This final uncovered time allows the top to turn golden brown and bubbly. You’re looking for that gorgeous caramelized cheese on top with sauce bubbling up around the edges.
The total baking time is usually 45 to 50 minutes, though every oven is different. You’ll know it’s done when the cheese is golden, the edges are bubbling, and a knife inserted in the center comes out hot. If you want to take it up a notch like you might with spicy garlic chili oil noodles, you could broil it for the last 2 minutes to get an extra crispy top, but watch it carefully so it doesn’t burn.
Once it comes out of the oven, resist the urge to dig in immediately. I know it smells incredible and you’re hungry, but let it rest for at least 10 minutes. This resting time allows everything to set up properly so you get nice clean slices instead of a soupy mess. Pour yourself a glass of wine, set the table, call everyone to dinner, and by then it’ll be perfect.


Serving Your Perfect Baked Ziti with Ricotta Cheese
The hard part is over, and now comes the fun stuff. While your baked ziti with ricotta cheese is resting on the counter, take a moment to appreciate what you just made. That golden, bubbling cheese. Those crispy edges. The aroma filling your kitchen. This is what cooking is all about.
After that crucial 10-minute rest, grab your serving spatula or a large spoon. I find a metal spatula works best for cutting through the layers cleanly. Slide it down through all those beautiful layers we built, right to the bottom of the pan. The first piece is always the hardest to get out. Don’t worry if it’s not picture-perfect. By the third or fourth serving, you’ll have the hang of it, and honestly, it all tastes the same once it’s on your plate.
Here’s something I do that makes a huge difference in presentation: I always garnish with fresh herbs right before serving. A handful of torn basil leaves or some chopped fresh oregano scattered over the top adds a pop of color and a burst of fresh flavor that contrasts beautifully with the rich, baked cheese. Sometimes I add a sprinkle of extra Parmesan too because more cheese is never a bad thing in my book.
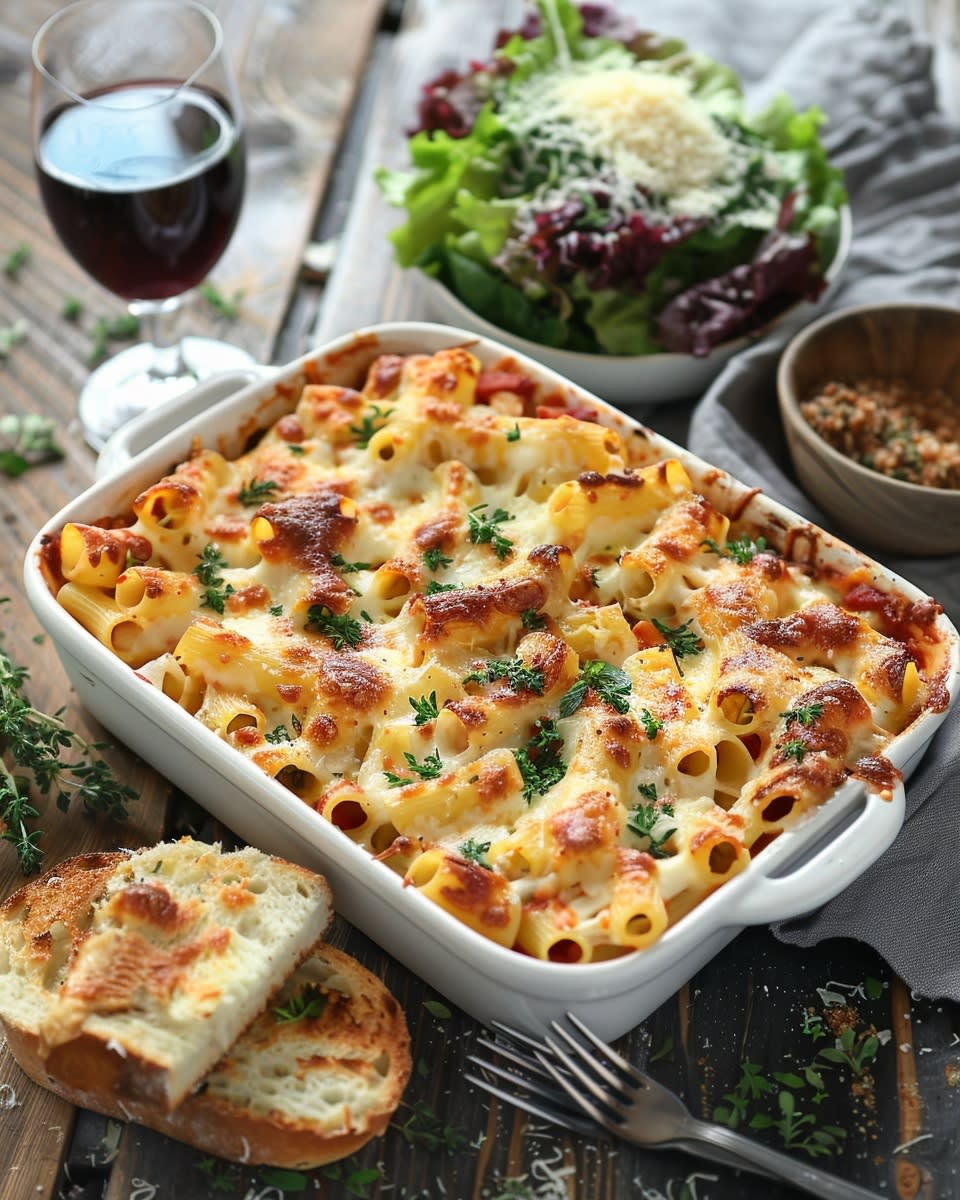
I typically serve this baked ziti with ricotta and sausage as a main course with a simple side salad and some crusty garlic bread. The bread is perfect for sopping up any extra sauce on your plate. My family also loves when I make a quick Caesar salad on the side. The crisp, tangy lettuce cuts through the richness of the pasta beautifully. Sometimes I’ll throw together some roasted vegetables if I’m feeling ambitious, though honestly, the ziti is substantial enough to stand on its own.
Making Your Baked Ziti Even Better
Once you’ve mastered the basic easy baked ziti with ricotta cheese, you can start playing around with variations. That’s when cooking gets really exciting. I’ve experimented with all sorts of additions over the years, and some have become permanent fixtures in my rotation.
Try adding some fresh spinach to your ricotta mixture. Just thaw frozen spinach, squeeze out all the water until your hands hurt, and mix it right in. This sneaks in some vegetables and adds a lovely green color throughout the dish. Plus, leafy greens like spinach offer nutritional benefits that can even contribute to immune system support, making your comfort food just a bit healthier.
Another variation I love is mixing different cheeses into the ricotta blend. A little fontina adds nuttiness. Some provolone brings sharpness. I once used some leftover goat cheese, and while my husband thought I was crazy, it turned out amazing. The tanginess paired so well with the tomato sauce.
For the meat version, don’t limit yourself to just ground beef. I’ve used ground turkey for a lighter option, spicy Italian sausage for heat, or even leftover shredded pot roast. One time I had leftover meatballs from another dinner, so I chopped those up and stirred them into the sauce. My son said it was the best ziti I’d ever made.
If you’re going the meatless baked ziti with ricotta and mozzarella route, consider adding mushrooms, diced zucchini, or roasted red peppers to your sauce. These vegetables add texture and flavor while keeping the dish vegetarian. I’ve also stirred in some sun-dried tomatoes for a more intense tomato flavor that my vegetarian friends absolutely loved.
Storage and Reheating Tips That Actually Work
Let’s talk about leftovers because this dish makes plenty. If you’re lucky enough to have some remaining after dinner, you’re in for a treat the next day. I actually think baked ziti with ricotta and mozzarella improves after sitting overnight. All those flavors have time to become friends.
Let any leftover ziti cool completely before covering it. I usually wait about an hour at room temperature. Then cover the whole pan tightly with plastic wrap or transfer individual portions to airtight containers. It’ll keep in the fridge for about 4 days, though it’s never lasted that long in my house.
Reheating is simple. For a single portion, the microwave works fine. Just add a splash of water or a spoonful of extra marinara sauce before heating to keep it from drying out. Cover it with a damp paper towel and heat in 1-minute intervals until it’s hot all the way through.
For larger portions, the oven is your best bet. Put the ziti in an oven-safe dish, cover with foil, and heat at 350°F for about 20 minutes. This method keeps everything moist and brings back that fresh-baked quality. Sometimes I actually prefer oven-reheated ziti because the edges get even crispier the second time around.
Freezing Your Baked Ziti for Future Meals
Here’s where this layered baked ziti with ricotta becomes a real lifesaver. You can absolutely freeze this dish, and I do it all the time. When life gets crazy, having a homemade meal in the freezer feels like winning the lottery.
You have two freezing options. First, you can assemble the entire dish, cover it really well without baking it, and freeze it unbaked. When you’re ready to cook it, let it thaw in the fridge overnight, then bake as directed. You might need to add 10 or 15 minutes to the baking time since it’s coming from the fridge.
Second, you can bake it fully, let it cool completely, then freeze it. This is my preferred method because it’s truly ready to eat. Just thaw it overnight and reheat. I portion mine into smaller containers so I can pull out exactly what I need for lunches or quick dinners.
Funny enough, I started batch-cooking this recipe when my neighbor had surgery last year. I made three pans: one for us, one for her family, and one for my freezer. That frozen pan saved me on a night when I got home late from work and had nothing planned for dinner. My kids thought I was a magician producing a hot meal so quickly.
Frozen ziti keeps well for about 3 months. After that, it’s still safe to eat, but the quality starts to decline. I always label mine with the date because I can never remember when I made things. Use a permanent marker on freezer tape or directly on aluminum foil.
Scaling This Recipe Up or Down
Sometimes you need to feed a crowd, and other times you’re cooking for just one or two people. This authentic baked ziti scales beautifully in either direction.
For a smaller batch, cut everything in half and use an 8×8 square pan instead of the 9×13 rectangle. Same cooking time, same delicious results, just less food. This is perfect for couples or small families. I’ve also made individual portions in those disposable aluminum containers. They’re great for giving as gifts to new parents or friends who could use a home-cooked meal.
Going bigger? Double or even triple the recipe. I’ve made this in those huge disposable roasting pans for church potlucks and family reunions. Just keep in mind that larger, deeper pans need more time in the oven. Check the center with a knife to make sure it’s heated all the way through. I once underbaked a giant pan because I didn’t account for the extra depth, and the middle was still cold when I served it. Not my finest moment.
For really large gatherings, I actually prefer making multiple standard-sized pans rather than one enormous one. They cook more evenly, and you can pull them out of the oven at different times if people are eating in shifts.
Wine and Beverage Pairings
If you’re serving this baked ziti with ricotta and meat for a special occasion, the right beverage makes everything even better. I’m no sommelier, but I’ve learned a few things about what works.
A medium-bodied red wine like Chianti or Sangiovese pairs beautifully with the tomato sauce and cheese. The acidity in these wines cuts through the richness without overwhelming the dish. If you prefer white wine, try a crisp Pinot Grigio. It’s refreshing and light enough not to compete with all those flavors.
For non-alcoholic options, I love sparkling water with lemon or a good Italian soda. The carbonation cleanses your palate between bites. My kids prefer lemonade or iced tea, which work surprisingly well too. By the way, if you’re looking for more comforting pasta dishes to pair with different beverages, you might enjoy browsing through other pasta and noodle recipes that offer similar versatility.
Sharing the Love
One of the best things about this baked ziti with ricotta no meat or with meat is how well it travels. The dish holds together beautifully, making it perfect for taking to someone’s house. I’ve brought it to countless potlucks, and it always disappears first.
If you’re transporting it, keep it in the pan you baked it in and wrap it well with foil. Put it in an insulated carrier or wrap towels around it to keep it warm. I have a specific tote bag I use just for carrying hot dishes, and it’s been worth every penny.
This recipe has become my go-to gift for new neighbors, friends with new babies, or anyone going through a tough time. There’s something about receiving a homemade meal that feels like a warm hug. I always include reheating instructions on an index card tucked under the foil. People really appreciate that thoughtfulness.
Making this dish for others has connected me with my community in ways I never expected. The Italian grandmother down the street gave me her secret for perfect ricotta mixture after I brought her a pan when she was ill. The young couple next door learned to cook by trying to recreate my ziti. Food really does bring people together, and this simple pasta dish has been the start of many beautiful friendships in my life.
So there you have it. Everything I know about making, serving, storing, and sharing the perfect baked ziti. This dish has fed my family on busy weeknights and impressed guests at dinner parties. It’s comforted us through hard times and celebrated good ones. I hope it becomes as special in your kitchen as it is in mine. Now go ahead and make a pan. Your future self will thank you.
Frequently Asked Questions About Baked Ziti with Ricotta Cheese
Can I substitute cottage cheese for ricotta in baked ziti? Yes, you absolutely can, and many people do this to save money since cottage cheese is usually cheaper. Blend the cottage cheese in a food processor first to get a smoother texture similar to ricotta. The flavor will be slightly different, a bit tangier, but it still works wonderfully in the dish. I’ve done this substitution many times when my store was out of ricotta, and my family honestly couldn’t tell the difference.
How do I prevent my baked ziti from being watery? The most common cause of watery ziti is using too much sauce or not draining your pasta well enough. Make sure you shake that colander vigorously after draining the pasta. Also, if you’re adding vegetables like zucchini or spinach, squeeze out all their excess moisture first. Another trick is to let the assembled dish sit for about 10 minutes before baking, which gives the pasta time to absorb some sauce. Finally, don’t skip the resting time after baking, as this allows everything to set up properly.
Can I use fresh mozzarella instead of shredded? Fresh mozzarella works beautifully, though it releases more liquid than the pre-shredded kind. I actually like using a combination of both: shredded mozzarella mixed in the layers for that stretchy quality, and torn pieces of fresh mozzarella on top for those gorgeous melted pools of cheese. If you’re only using fresh mozzarella, slice it and let it drain on paper towels for about 15 minutes before adding it to your ziti. This removes some of the excess moisture that could make your dish watery.
What’s the best way to reheat frozen baked ziti? The safest and best method is to thaw it completely in the refrigerator overnight, then reheat it covered in a 350°F oven for about 30 minutes. However, if you’re in a hurry, you can go straight from freezer to oven, but you’ll need to increase the baking time to about 90 minutes and keep it covered with foil for most of that time. Check the center with a knife to make sure it’s hot all the way through. I’ve learned that patience pays off here because rushing it leads to hot edges and a frozen center.
Can I make baked ziti in a slow cooker? Yes, though the texture will be different than oven-baked. Cook your pasta until barely al dente, then layer everything in your slow cooker just as you would in a baking dish. Cook on low for 3 to 4 hours. The advantage is you can set it and forget it. The disadvantage is you won’t get those crispy, golden edges that make oven-baked ziti so special. I’ve done this for potlucks where I needed to keep the dish warm for hours, and it worked great for that purpose.
How can I make my baked ziti healthier without sacrificing flavor? There are several swaps you can make that keep the dish delicious. Use whole wheat or chickpea pasta for more fiber and protein. Switch to part-skim ricotta and mozzarella to reduce fat content. Add vegetables like spinach, mushrooms, or bell peppers to increase nutrients. Use lean ground turkey instead of beef, or skip the meat entirely. You can even reduce the amount of cheese slightly and bulk up the dish with extra vegetables. I’ve made all these swaps at various times, and while it’s a bit different, it’s still really satisfying.
Why does my cheese get oily on top when baking? This happens when the cheese gets too hot and the fat separates out. Using pre-shredded cheese that contains cellulose can make this worse. Try using freshly shredded cheese instead, and don’t set your oven temperature higher than 375°F. If you’re broiling at the end to get that golden top, watch it very carefully and only do it for 1 to 2 minutes. The oil pools look unappealing, but you can blot them with a paper towel before serving, and the dish still tastes fine.
Can I assemble baked ziti the night before and bake it the next day? Absolutely, and this is actually one of my favorite time-saving strategies. Assemble the entire dish, cover it tightly with plastic wrap and foil, and refrigerate overnight. The next day, let it sit at room temperature for about 30 minutes while your oven preheats, then bake as directed. You might need to add 5 to 10 minutes to the cooking time since it’s starting cold. This make-ahead approach is perfect for busy weeknights or when you’re hosting and want to prep in advance.
What pasta shapes work if I can’t find ziti? Penne is the closest substitute and works perfectly. Rigatoni is another excellent choice because the ridged tubes hold sauce beautifully. I’ve also used mostaccioli, which is basically smooth penne. In a pinch, even rotini or shells work, though the texture is a bit different. The key is choosing a pasta shape that can hold sauce and is sturdy enough not to turn to mush during baking. I once used farfalle (bow ties) when I couldn’t find anything else, and while it looked unusual, it tasted great.
How do I know when my baked ziti is done? The cheese on top should be melted, bubbly, and golden brown in spots. The edges should be bubbling and slightly crispy. If you insert a knife or fork into the center, it should come out very hot when you touch it to your wrist. The internal temperature should reach about 165°F if you want to use a thermometer. Trust your eyes and nose too – it should look gorgeous and smell amazing. If you pull it out and it doesn’t look quite right, you can always put it back in for another 10 minutes. Better to overbake slightly than serve it undercooked.
Ingredients
Equipment
Method
- Préchauffez le four à 375°F (190°C).
- Faites bouillir une grande casserole d'eau et salez généreusement.
- Cuisinez les zitis selon les indications de l'emballage, mais retirez du feu 2 minutes plus tôt pour une texture al dente.
- Égouttez les pâtes dans une passoire sans les rincer.
- Dans un grand bol de mélange, combinez le fromage ricotta et les œufs battus (si vous en utilisez).
- Saisonner le mélange de ricotta avec le fromage parmesans, le sel, le poivre et les herbes.
- Dans une poêle, faites dorer le boeuf haché ou la saucisse jusqu'à ce qu'ils soient bien cuits, si vous utilisez.
- Égouttez l'excès de graisse de la viande et ajoutez la sauce marinara dans la poêle ; laissez mijoter pendant quelques minutes.
- Dans un plat de cuisson 9x13 graissé, étalez environ 1 tasse de sauce à la viande au fond.
- Disposez la moitié des pâtes ziti sur la sauce uniformément.
- Cueillez la moitié du mélange de ricotta sur les pâtes, en saupoudrant également la moitié du fromage mozzarella.
- Versez la moitié de la sauce restante sur cette couche.
- Répétez le processus de superposition avec les ingrédients restants.
- Ajoutez la couche finale avec encore plus de mozzarella et de parmesan.
- Couvrez le plat de cuisson avec du papier d'aluminium et faites cuire pendant 25 minutes.
- Retirez le papier d'aluminium et faites cuire à découvert pendant 20 à 25 minutes supplémentaires jusqu'à ce que le dessus soit doré et bouillonnant.
- Laissez le ziti au four reposer pendant au moins 10 minutes avant de servir.