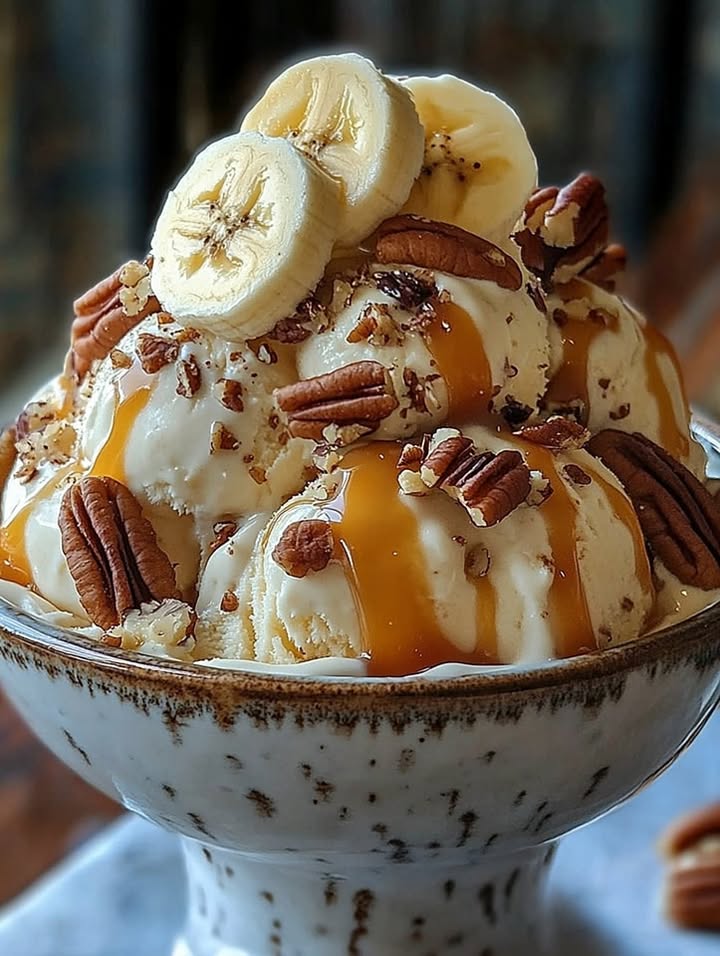
The Ultimate Homemade Banana Nut Ice Cream
You know that one almost-too-ripe banana sitting on your counter? The one begging to be used? I used to make banana bread every single time. But then one hot summer day, my ice cream maker was calling my name. I thought, “Why not?” The result was magic. This Luscious Banana Nut Ice Cream is that happy accident turned family favorite. It’s so creamy, so nutty, and it tastes like a hug in a bowl.
A Sweet Story: From Peel to Pint
Bananas and ice cream have been best friends for ages. Think banana splits at old-fashioned diners! This recipe is my take on a classic. It blends the comfort of banana bread with the cool joy of homemade ice cream. I wanted something rich but not too fancy. Something my kids could help make. The toasted walnuts were my dad’s idea. He said every great dessert needs a little crunch. He was right! That nutty texture makes all the difference.
Why You’ll Fall in Love With This Banana Nut Ice Cream
First, it’s incredibly easy. No cooking the custard! You just mix and churn. Second, it solves the “sad banana” problem beautifully. Third, the flavor is unreal. It’s intensely banana-y, creamy, and studded with toasty walnuts. It beats store-bought any day. You control the sweetness and the quality. It’s a dessert you can feel good about sharing.
When to Whip Up This Frozen Treat
This ice cream is perfect for so many moments! Serve it at a summer barbecue instead of cake. It’s a hit at birthday parties. I love making it for family movie nights. It also makes a thoughtful gift. Scoop it into a nice container for a new neighbor. Any occasion is better with homemade ice cream.
Gathering Your Ingredients
Let’s gather everything. Using simple, good-quality stuff makes the best ice cream.
- For the Ice Cream Base:
- 2 cups heavy cream
- 1 cup whole milk
- 3/4 cup granulated sugar
- 1 teaspoon pure vanilla extract
- 2 very ripe bananas (the spottier, the better!), mashed
- For the Mix-ins:
- 3/4 cup chopped walnuts
Easy Ingredient Swaps
Don’t have something? No worries! Here are some swaps.
- Heavy Cream: You can use half-and-half for a lighter version. The ice cream will be less rich but still tasty.
- Walnuts: Pecans or roasted almonds are fantastic substitutes. Use what you love!
- Granulated Sugar: Coconut sugar works well for a deeper flavor. It will change the color slightly.
- Whole Milk: 2% milk is okay in a pinch. Avoid skim milk, as it makes the ice cream icy.
Let’s Make Some Ice Cream!
Follow these simple steps for perfect ice cream every time. Trust me, the smell alone is worth it.
Step 1: Prepare Your Magic Base
Grab a large mixing bowl. Pour in the heavy cream and whole milk. The mixture will look beautifully white and silky. Add the sugar and vanilla extract. Now, take those ripe bananas. Peel them and mash them right into the bowl. Use a fork or a potato masher. You want them mostly smooth with just a few tiny lumps. Whisk it all together until the sugar dissolves and everything is happily combined. Pro tip: Let this mixture chill in the fridge for 30 minutes before churning. A cold start helps the ice cream freeze faster and creamier.
Step 2: Churn it to Perfection
Now for the fun part! Give your ice cream machine bowl a quick check. Make sure it’s fully frozen according to the manual. Pour your creamy banana mixture into the machine. Turn it on and let it work its magic. It will slowly thicken over about 20-25 minutes. Watch it transform from liquid to a soft, luxurious frozen custard. The sound will change from a slosh to a quiet whirr. That’s your cue that it’s almost done.
Step 3: The Nutty Finale
In the last 5 minutes of churning, it’s time for the walnuts! Open the lid or use the chute if your machine has one. Sprinkle in the chopped walnuts. Let the dasher fold them evenly throughout the creamy banana ice cream. You’ll see lovely brown specks swirl in. This ensures every single scoop gets a perfect amount of crunch.
Step 4: Freeze to Firm Up
Your ice cream is now “soft-serve” consistency—delicious, but not yet scoopable. Carefully spoon it into a freezer-safe container with a tight lid. A loaf pan covered in plastic wrap works great too! Smooth the top. Press a piece of parchment paper directly onto the surface. This prevents ice crystals from forming. Pop the lid on and freeze for at least 4 hours, or overnight. Chef’s tip: Patiently waiting for it to harden is the hardest part, but it makes all the difference!
Your Banana Nut Ice Cream Timeline
| Prep Time | 10 minutes |
| Churning Time | 25 minutes |
| Freezing Time | 4 hours (minimum) |
| Total Time | 4 hours 35 minutes |
My Secret for Super Creamy Ice Cream
Here’s my little secret: a tiny pinch of salt. Add it to the base mixture before churning. You won’t taste it as salty. Instead, it makes the banana flavor pop and the sweetness taste richer. It balances everything perfectly. Try it once, and you’ll never skip it again!
A Fun Banana Fact
Did you know bananas are berries, but strawberries aren’t? It’s true! Bananas grow on giant herb plants, not trees. The riper they get, the more natural sugars develop. That’s why your recipe works best with those spotty, super-ripe bananas. They bring all the sweetness and flavor.
What You’ll Need to Make It
You don’t need any fancy equipment. Just a few basics.
- A large mixing bowl
- A whisk or electric hand mixer
- A fork or potato masher
- An ice cream maker (the frozen bowl type works great)
- A rubber spatula
- A freezer-safe container with a lid
Storing Your Homemade Masterpiece
Proper storage keeps your ice cream dreamy and smooth. Always use an airtight container. Press that parchment paper on the surface before sealing the lid. This creates a barrier against cold air. It stops those pesky ice crystals from forming.
Your banana nut ice cream is best enjoyed within 2 weeks. The flavors are brightest in the first week. After that, the banana flavor may fade a bit. But honestly, it never lasts that long in my house!
When you’re ready to scoop, let the container sit on the counter for 5-10 minutes. This softens it just enough. It makes scooping easy and prevents bent spoons!
My Top Tips and Advice
- Toast those nuts! Just toss them in a dry pan over medium heat for 3-4 minutes. Watch them closely. You’ll smell a wonderful, toasty aroma. This step makes the walnuts ten times more flavorful.
- Use the ripest bananas you can find. Brown spots mean more sugar and more intense banana taste.
- Make sure your ice cream maker bowl is completely frozen. I keep mine in the back of the freezer for a full 24 hours before churning.
- For an extra-decadent treat, drizzle each serving with warm caramel sauce or hot fudge.
Pretty Ways to Serve It
- Scoop into waffle cones and add a dollop of whipped cream.
- Make an epic banana split with fresh strawberry slices and pineapple.
- Serve a scoop alongside a warm slice of homemade banana bread.
- For a party, use a small cookie scoop to make cute, uniform mini-scoops on a platter.
Healthier & Fun Flavor Twists
Love the idea but want to mix it up? Here are six fantastic variations.
- Vegan Banana Nice Cream: Skip the dairy! Blend 4 frozen bananas with 1/2 cup of coconut milk until super creamy. Fold in raw walnuts. Freeze for an hour. It’s naturally sweet and delicious.
- Chocolate Chip Banana: Replace the walnuts with 2/3 cup of mini chocolate chips. It’s like a frozen chocolate chip banana bread.
- Peanut Butter Banana: Swirl in 1/2 cup of smooth peanut butter during the last 2 minutes of churning. It’s a classic flavor combo everyone loves.
- Caramel Swirl: Churn the ice cream without nuts. Layer it in the container with thick salted caramel sauce. Use a knife to swirl it gently.
- Tropical Twist: Add 1/2 cup of toasted coconut flakes and 1/3 cup of chopped dried pineapple with the walnuts.
- Espresso Banana: Add 1 tablespoon of instant espresso powder to the milk mixture. It gives a lovely mocha-coffee depth that pairs so well with banana.
Common Mistakes to Avoid
Avoiding these simple errors guarantees perfect ice cream every single time.
Mistake 1: Using Underripe Bananas
This is the biggest flavor killer. Pale yellow, firm bananas lack sweetness and that deep banana taste. They can even taste a little starchy. Your ice cream will be bland. Always wait for those bananas to get spotty and soft. The riper, the better. If you’re in a hurry, you can roast unripe bananas in their peels at 300°F for 15-20 minutes. This caramelizes their sugars.
Mistake 2: Skipping the Toasting Step for Nuts
Adding raw walnuts is fine, but you’re missing out. Raw nuts can taste a bit bitter and dull. Toasting them wakes up their natural oils. It brings out a rich, nutty, almost buttery flavor. It takes just a few minutes in a pan. This one small step adds a huge layer of flavor. Never skip it!
Mistake 3: Churning a Warm Base
Pouring a room-temperature mixture into your ice cream maker is a problem. The machine has to work too hard. It can lead to uneven freezing and a grainy texture. Your ice cream may not thicken properly. Always chill your base mixture in the fridge first. Aim for at least 30 minutes, or until it’s very cold. This ensures a smooth, fast, and creamy churn.
Mistake 4: Not Freezing Long Enough After Churning
It’s so tempting to eat it right out of the machine! But soft-serve consistency is not the final product. If you try to scoop it then, it will melt into a puddle immediately. You need that firm freezing time. It allows the ice cream to set fully. This gives you those perfect, round, beautiful scoops. Be patient. Four hours is the minimum, but overnight is ideal.
Your Banana Nut Ice Cream Questions, Answered
Can I make this without an ice cream maker?
Yes, you can! It requires a little more effort but works. Pour your mixed base into a shallow, freezer-safe dish. A metal baking pan is perfect. Freeze for 45 minutes. Take it out and use a hand mixer or a fork to break up all the frozen edges. Stir it vigorously. Repeat this process every 30 minutes for about 3-4 hours. Add the walnuts during the last mixing session. This method prevents large ice crystals. It keeps the texture as smooth as possible without churning.
Why is my homemade ice cream too hard?
This is usually caused by too much sugar or not enough fat. Your recipe has a good balance. If it’s still rock hard, you may have over-churned it. Churning past the soft-serve stage can make it icy. Another reason is your freezer temperature. Home freezers are often set very cold. Just let the container sit out for 10-15 minutes before scooping. This softens it perfectly. Adding a tablespoon of vodka or bourbon to the base also helps. Alcohol doesn’t freeze, so it keeps ice cream softer.
How can I prevent ice crystals from forming?
The parchment paper trick is your best friend! Pressing it directly on the surface blocks air contact. Using an airtight container is non-negotiable. Also, try to fill the container as full as possible. Less air space inside means fewer crystals. Finally, eat it within a week or two. The longer it sits, the more chance crystals have to form, even with perfect storage.
Can I use frozen bananas?
Absolutely! This is a great trick. Peel and slice ripe bananas before freezing them. When you’re ready to make ice cream, let them thaw just enough to mash. Or, add them frozen to your blender with a bit of the milk from the recipe. Blend until smooth, then mix with the other ingredients. Frozen bananas can make the base extra cold and thick, which is actually helpful.
What’s the best way to mash bananas for this?
I like to use a plain old fork in my mixing bowl. It gives me control. You want them mostly smooth, but a few tiny lumps are okay. They will add little bursts of banana flavor. You can also use a potato masher. If you prefer completely smooth ice cream, you can use a blender. Blend the bananas with the milk first. This ensures no lumps at all.
How long will this ice cream last in the freezer?
For the best flavor and texture, enjoy it within 2 weeks. The banana flavor is strongest in the first week. After a month, it’s still safe to eat. But it might develop freezer burn or lose its fresh taste. It’s a homemade product without preservatives. So it’s meant to be enjoyed relatively quickly. This is rarely a problem in my experience!
Can I double this recipe?
Check your ice cream maker’s capacity first! Most home machines hold between 1.5 and 2 quarts. This recipe makes about 1.5 quarts. Doubling it might overflow your machine. If your machine is large enough, go for it! Just make sure you have a big enough container to freeze it all. If your machine is standard size, it’s safer to make two separate batches.
My ice cream tastes too sweet. What happened?
This likely means your bananas were extremely ripe and very sweet on their own. The sugar in the recipe is for average ripe bananas. Next time, taste your base before churning. If it seems very sweet, you can reduce the added sugar by 2-3 tablespoons. Remember, flavors taste less sweet once frozen. So a base that tastes just right when cold will be perfect frozen.
What other nuts work well besides walnuts?
So many options! Pecans are my second favorite. They have a buttery, rich flavor. Toasted almonds add a lovely crunch. Hazelnuts would be divine, especially with a chocolate drizzle. Even roasted, salted peanuts would be delicious for a banana-peanut butter vibe. The rule is: toast any nut you use. It makes all the difference.
Is it necessary to use whole milk and heavy cream?
For the creamiest, richest texture, yes. The fat in the heavy cream and the proteins in the whole milk create that luxurious mouthfeel. If you use lower-fat milk, your ice cream can become icy and hard. You need that fat content for smoothness. If you must substitute, using half-and-half for both the milk and cream is your best bet. The result will be lighter but still decent.
Ready for Your First Scoop?
There you have it! Your guide to making the most luscious banana nut ice cream at home. It’s simple, satisfying, and sure to bring smiles. I love seeing my family’s faces when I bring out the tub. It’s a little piece of homemade happiness. So grab those spotty bananas and your ice cream maker. It’s time to create your own delicious memories. Happy churning, and enjoy every creamy, nutty, banana-filled bite!
Marshmallow Cocoa Cookies
Ingredients
Equipment
Method
- In a large mixing bowl, combine heavy cream, whole milk, granulated sugar, and vanilla extract.
- Mash the ripe bananas and add to the mixture. Whisk until well combined.
- Chill the mixture in the fridge for 30 minutes.
- Pour the chilled mixture into an ice cream maker and churn for 20-25 minutes until it reaches a soft-serve consistency.
- In the last 5 minutes of churning, add the chopped walnuts.
- Transfer the mixture to a freezer-safe container and press parchment paper directly on the surface.
- Freeze for at least 4 hours, or overnight, before serving.